
Welcome to the 5th and final day of my Fall Decor Blog Series! Today’s decor project doubles as party favors. I also created a tutorial to show you how to make them.
Supplies:
-
Sizzix Thinlits Die Set 44PK – Treat Bag (Item #663096)
-
Sizzix Thinlits Die Set 12PK – Frightening Faces (Item #663090)
-
Sizzix Sidekick Side-Order Set – Halloween (Item #663072)
-
Sizzix Big Shot Machine Only (White and Gray)
-
Sizzix Accessory – Cutting Pads, Standard, 1 Pair (Purple w/Silver Glitter)
-
Sizzix Accessory – Standard Magnetic Platform for Wafer-Thin Dies
-
Faber-Castell Design Memory Craft Gelatos Set – Steampunk
-
Kraft Cardstock
-
Ink pad
-
Glue pen
-
Scissors
-
Trimmer
-
Faber-Castell – Mix and Match Collection – Color Gelatos –
Now, let me walk you through the steps.
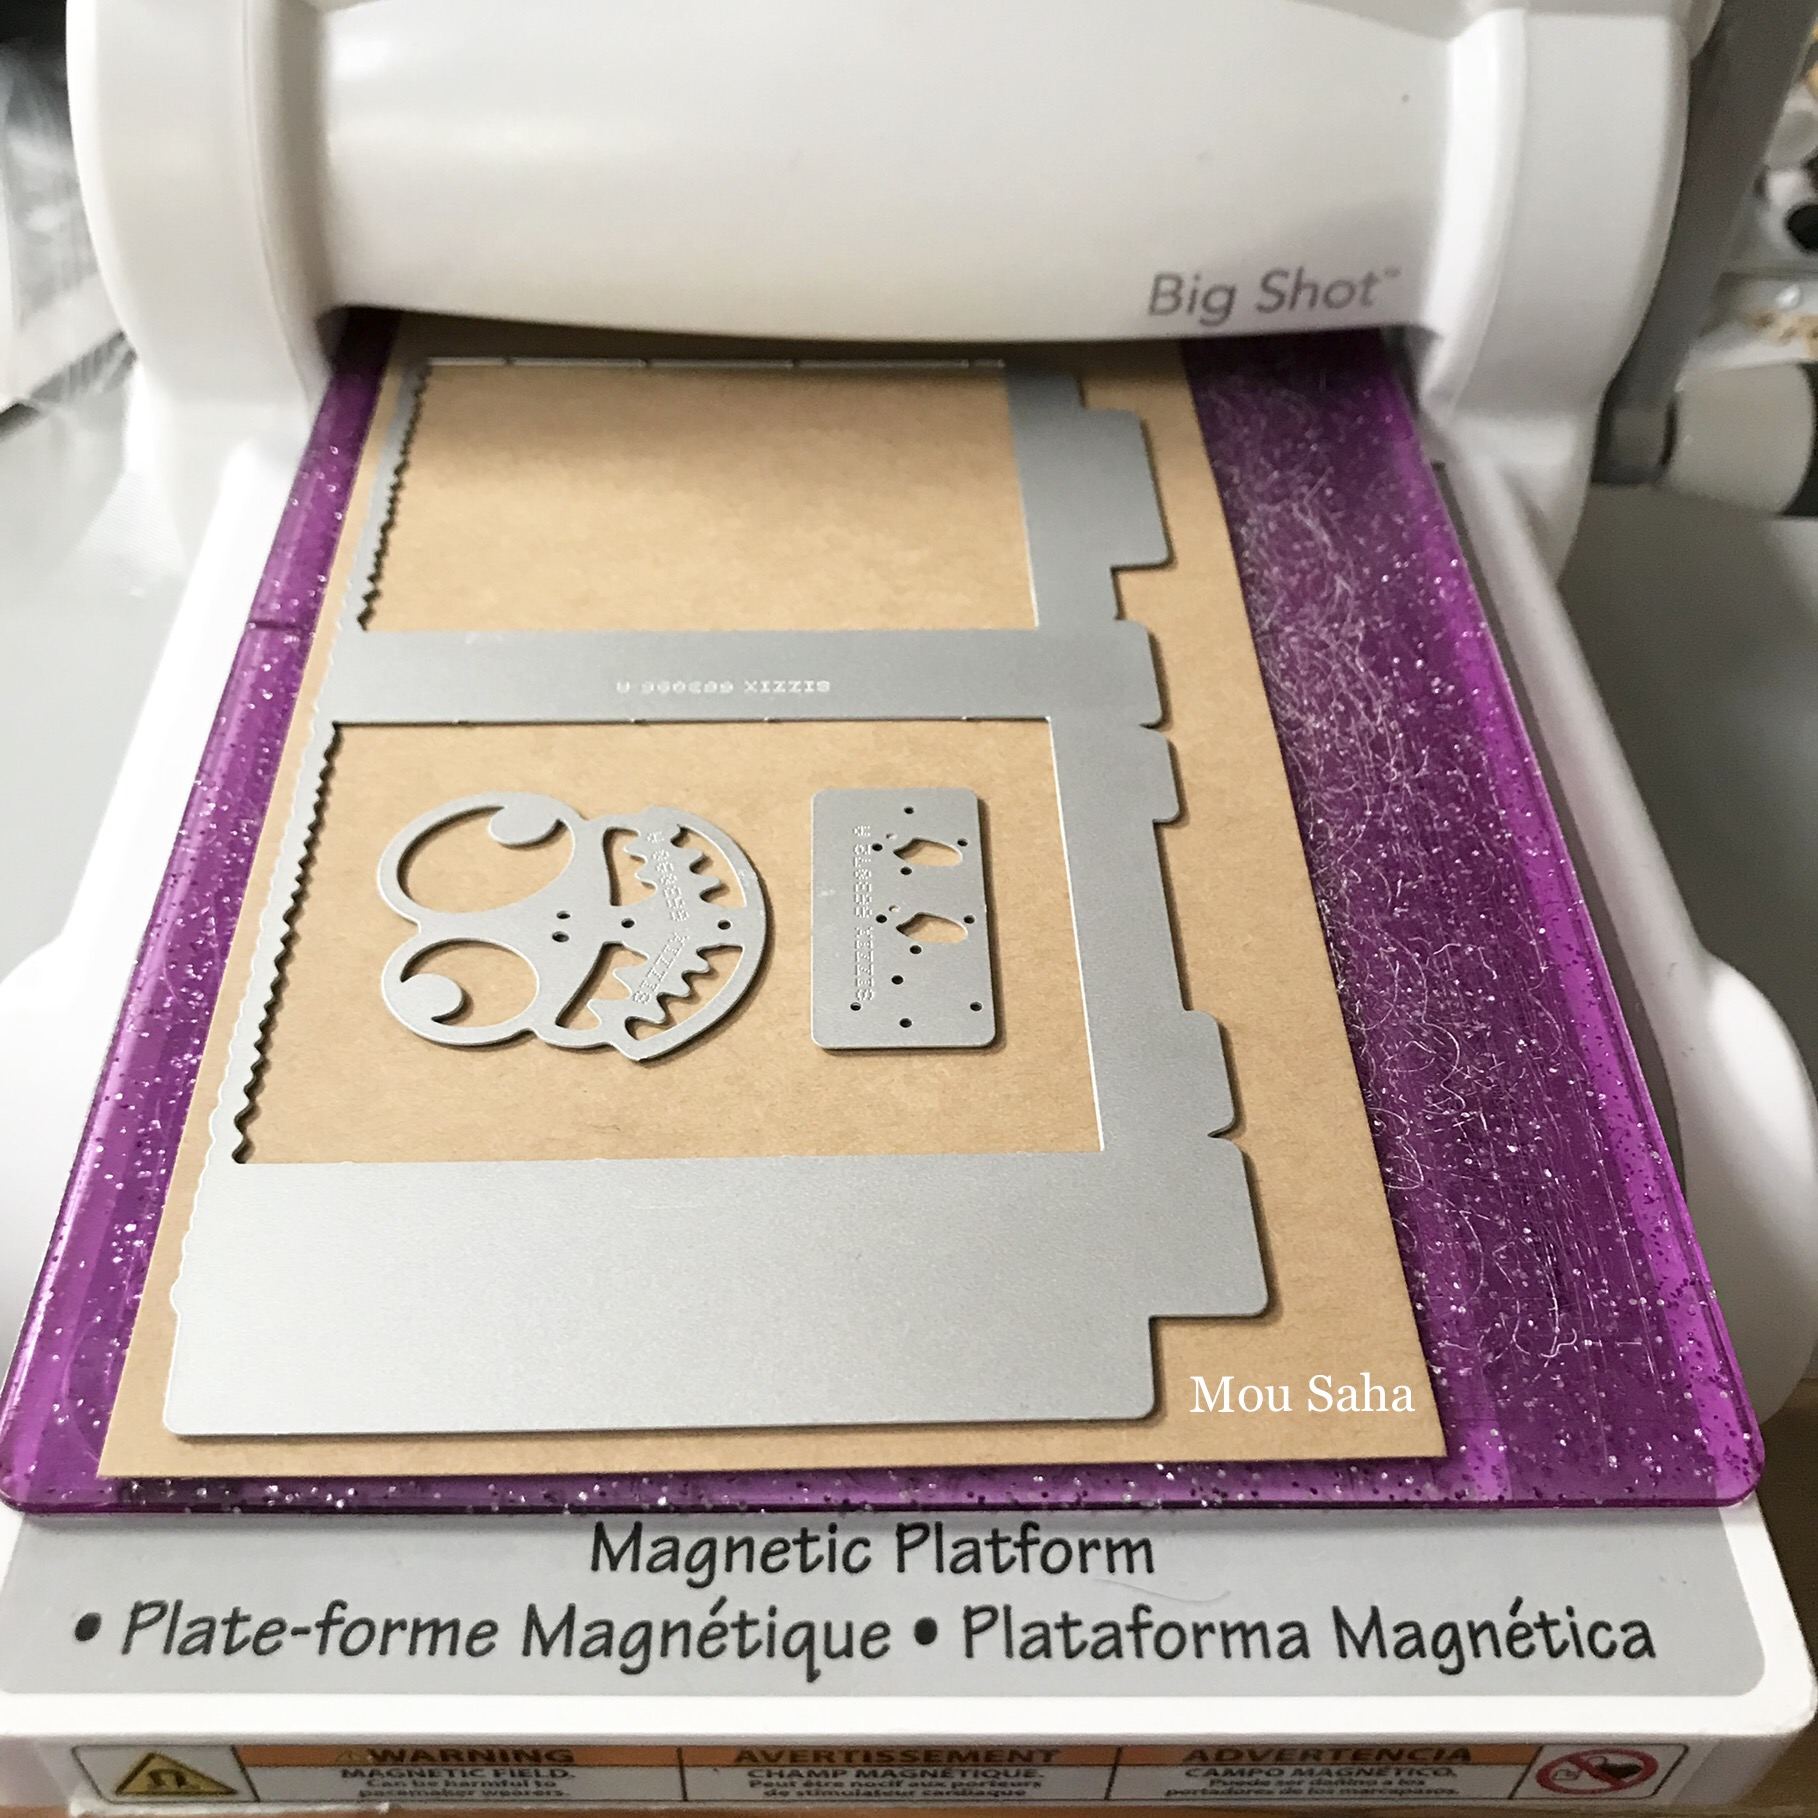
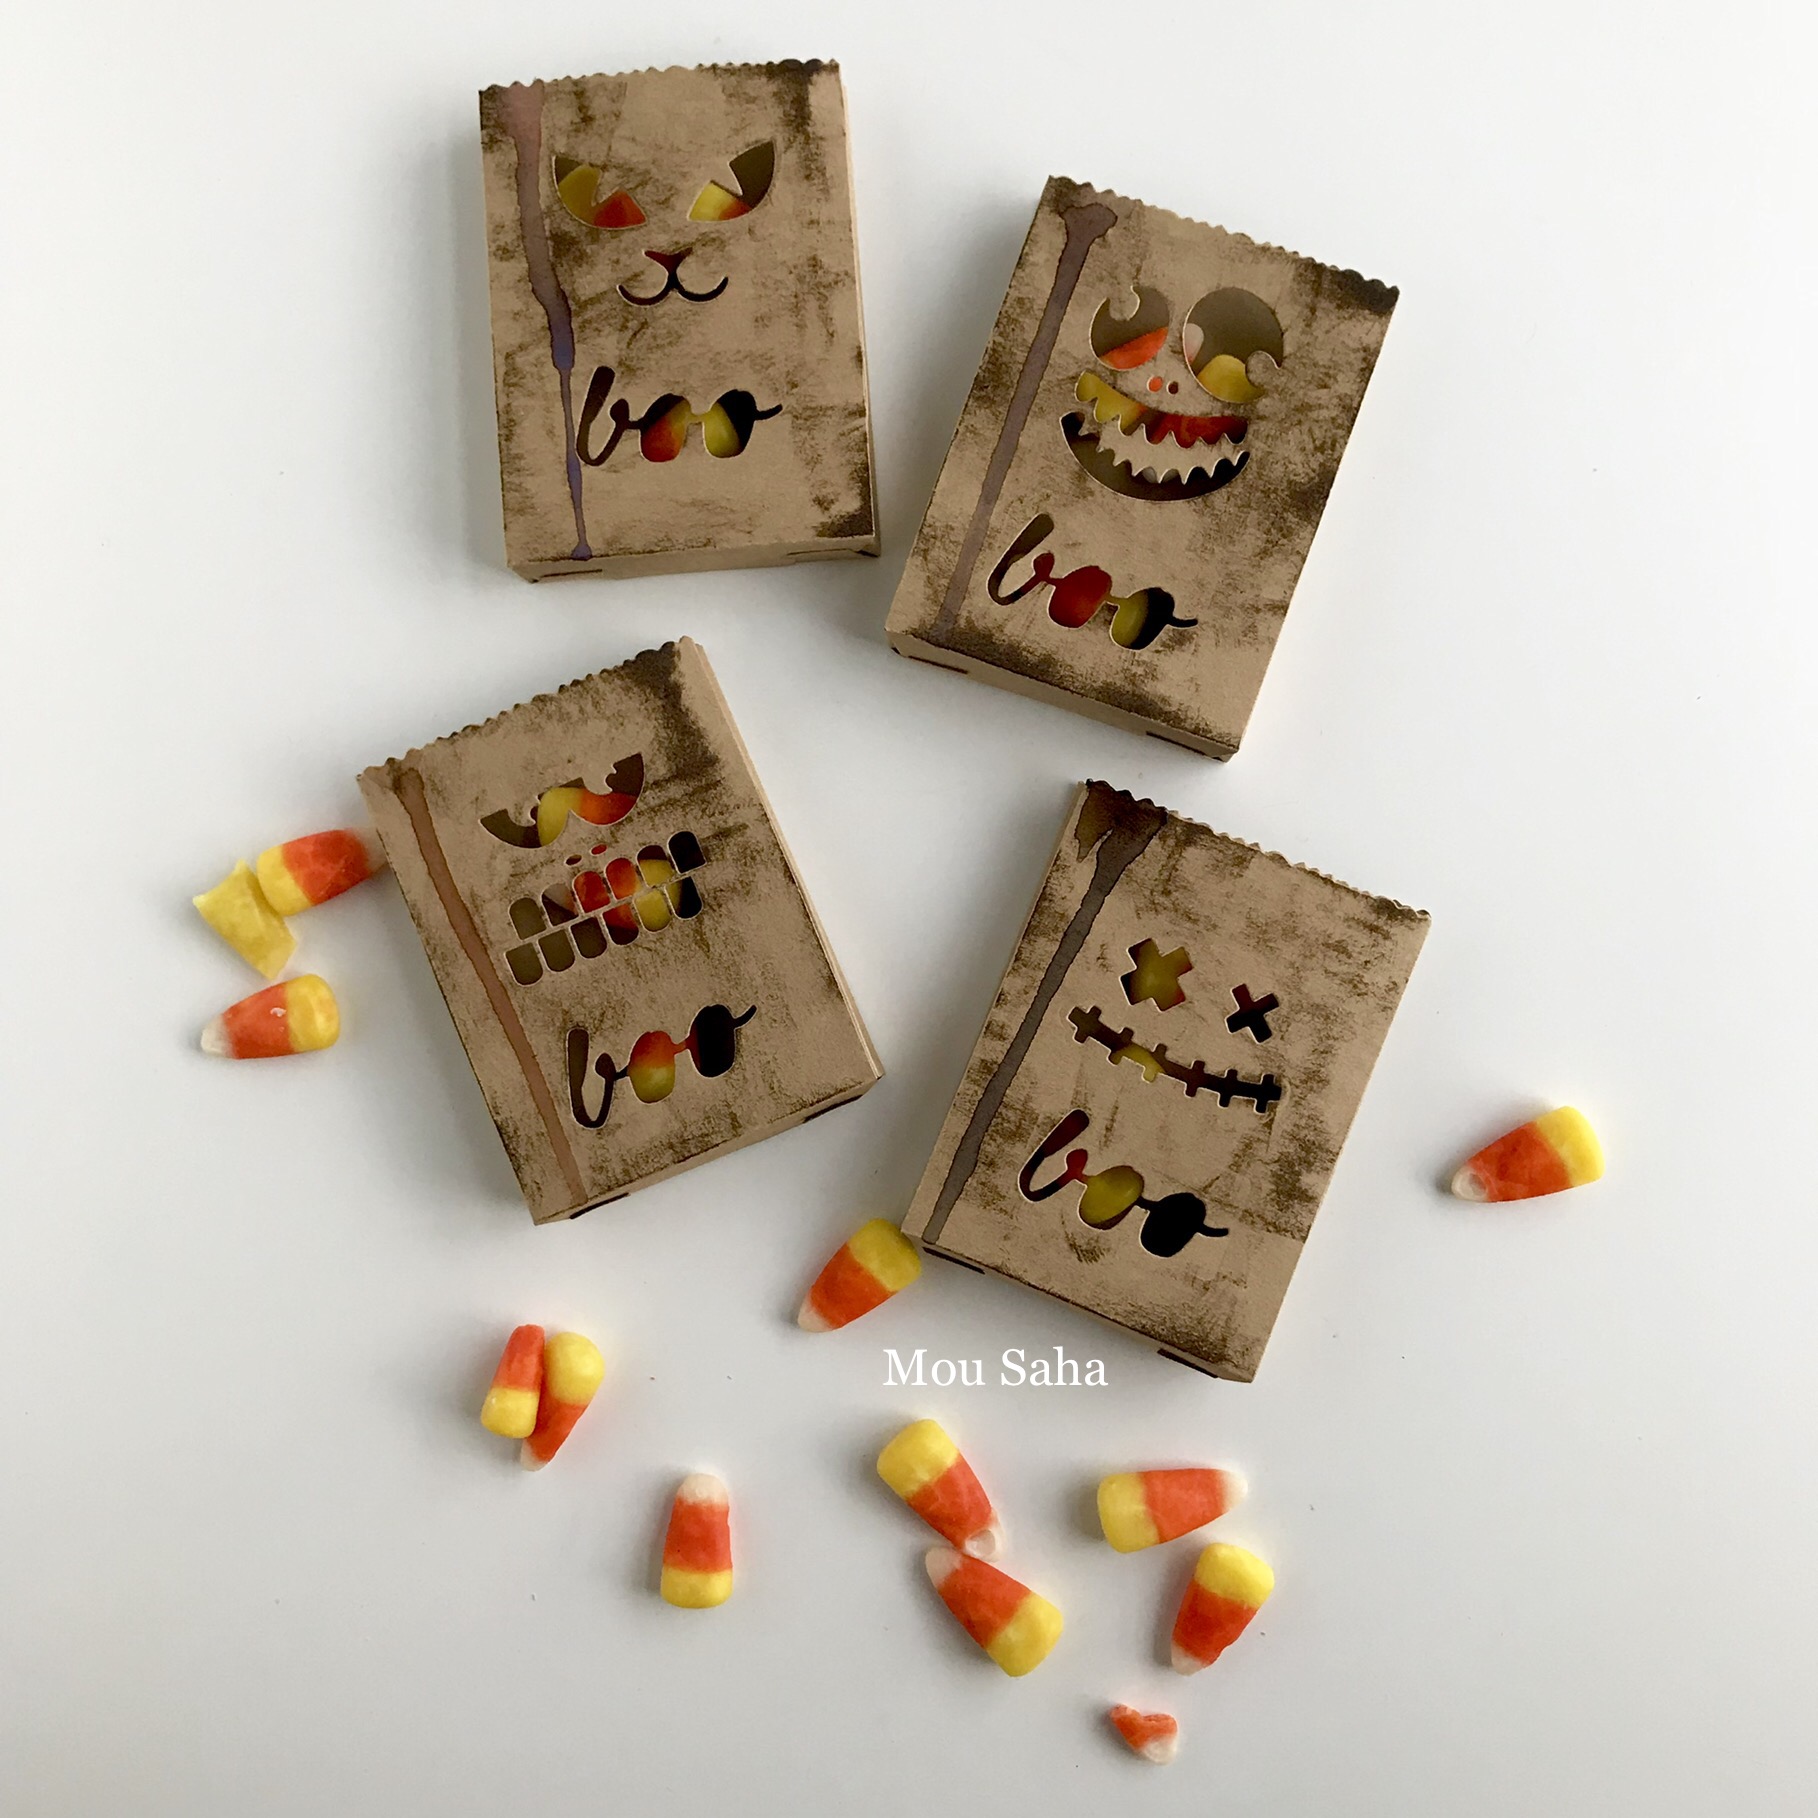
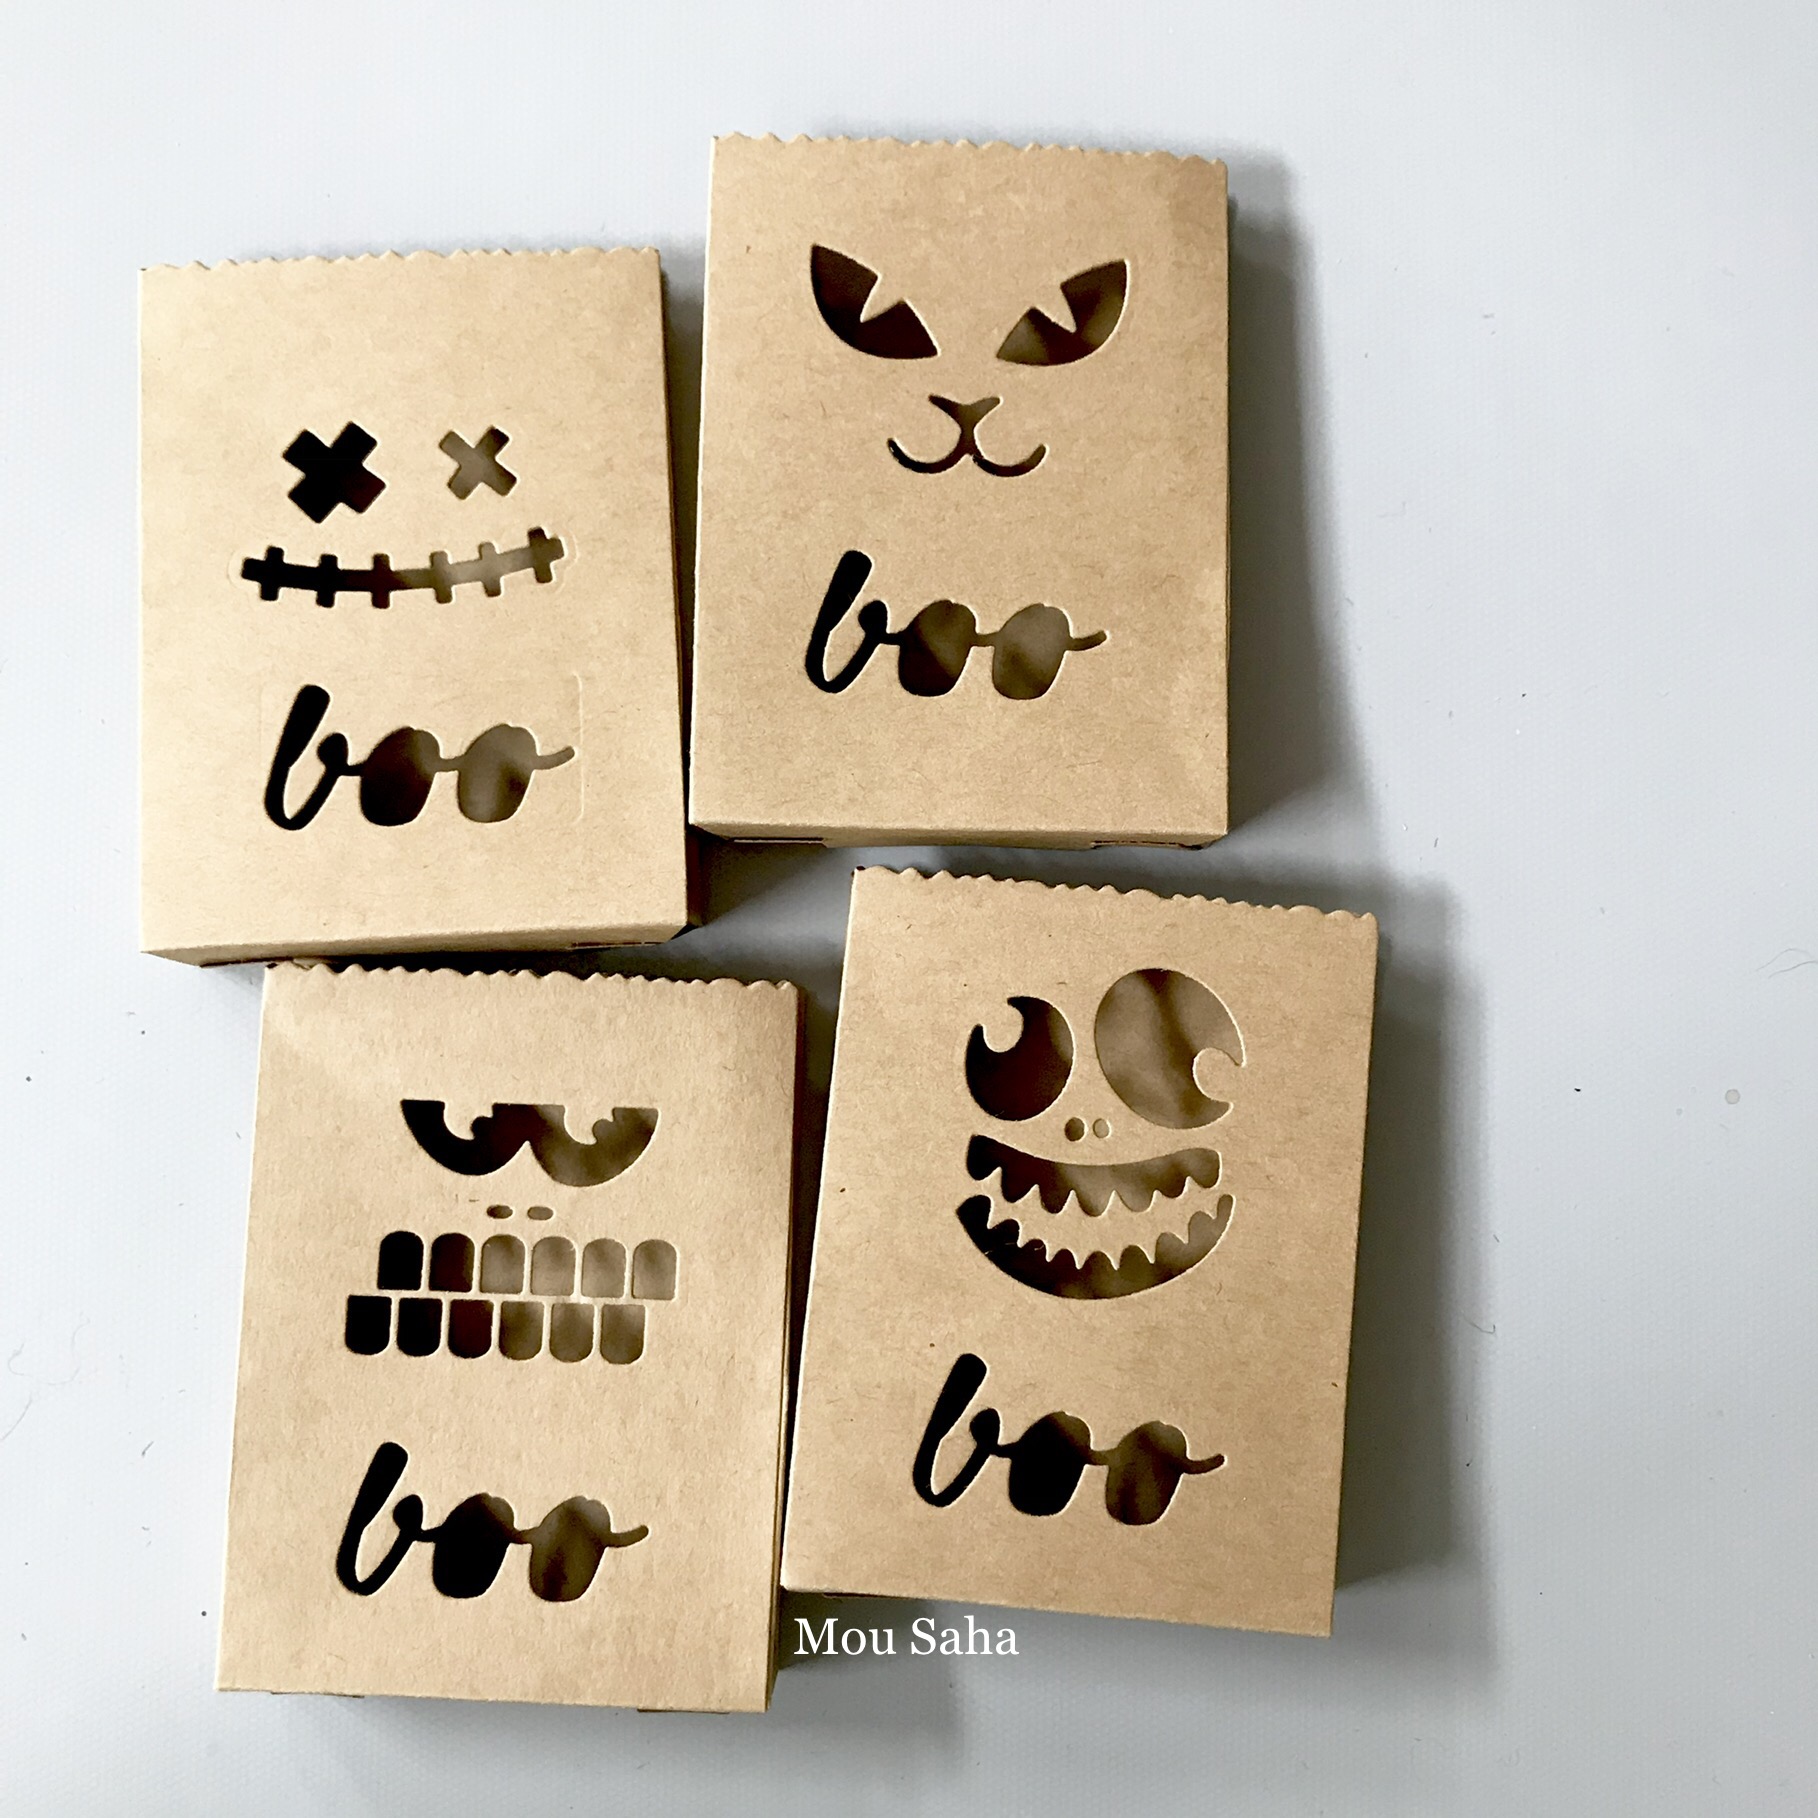
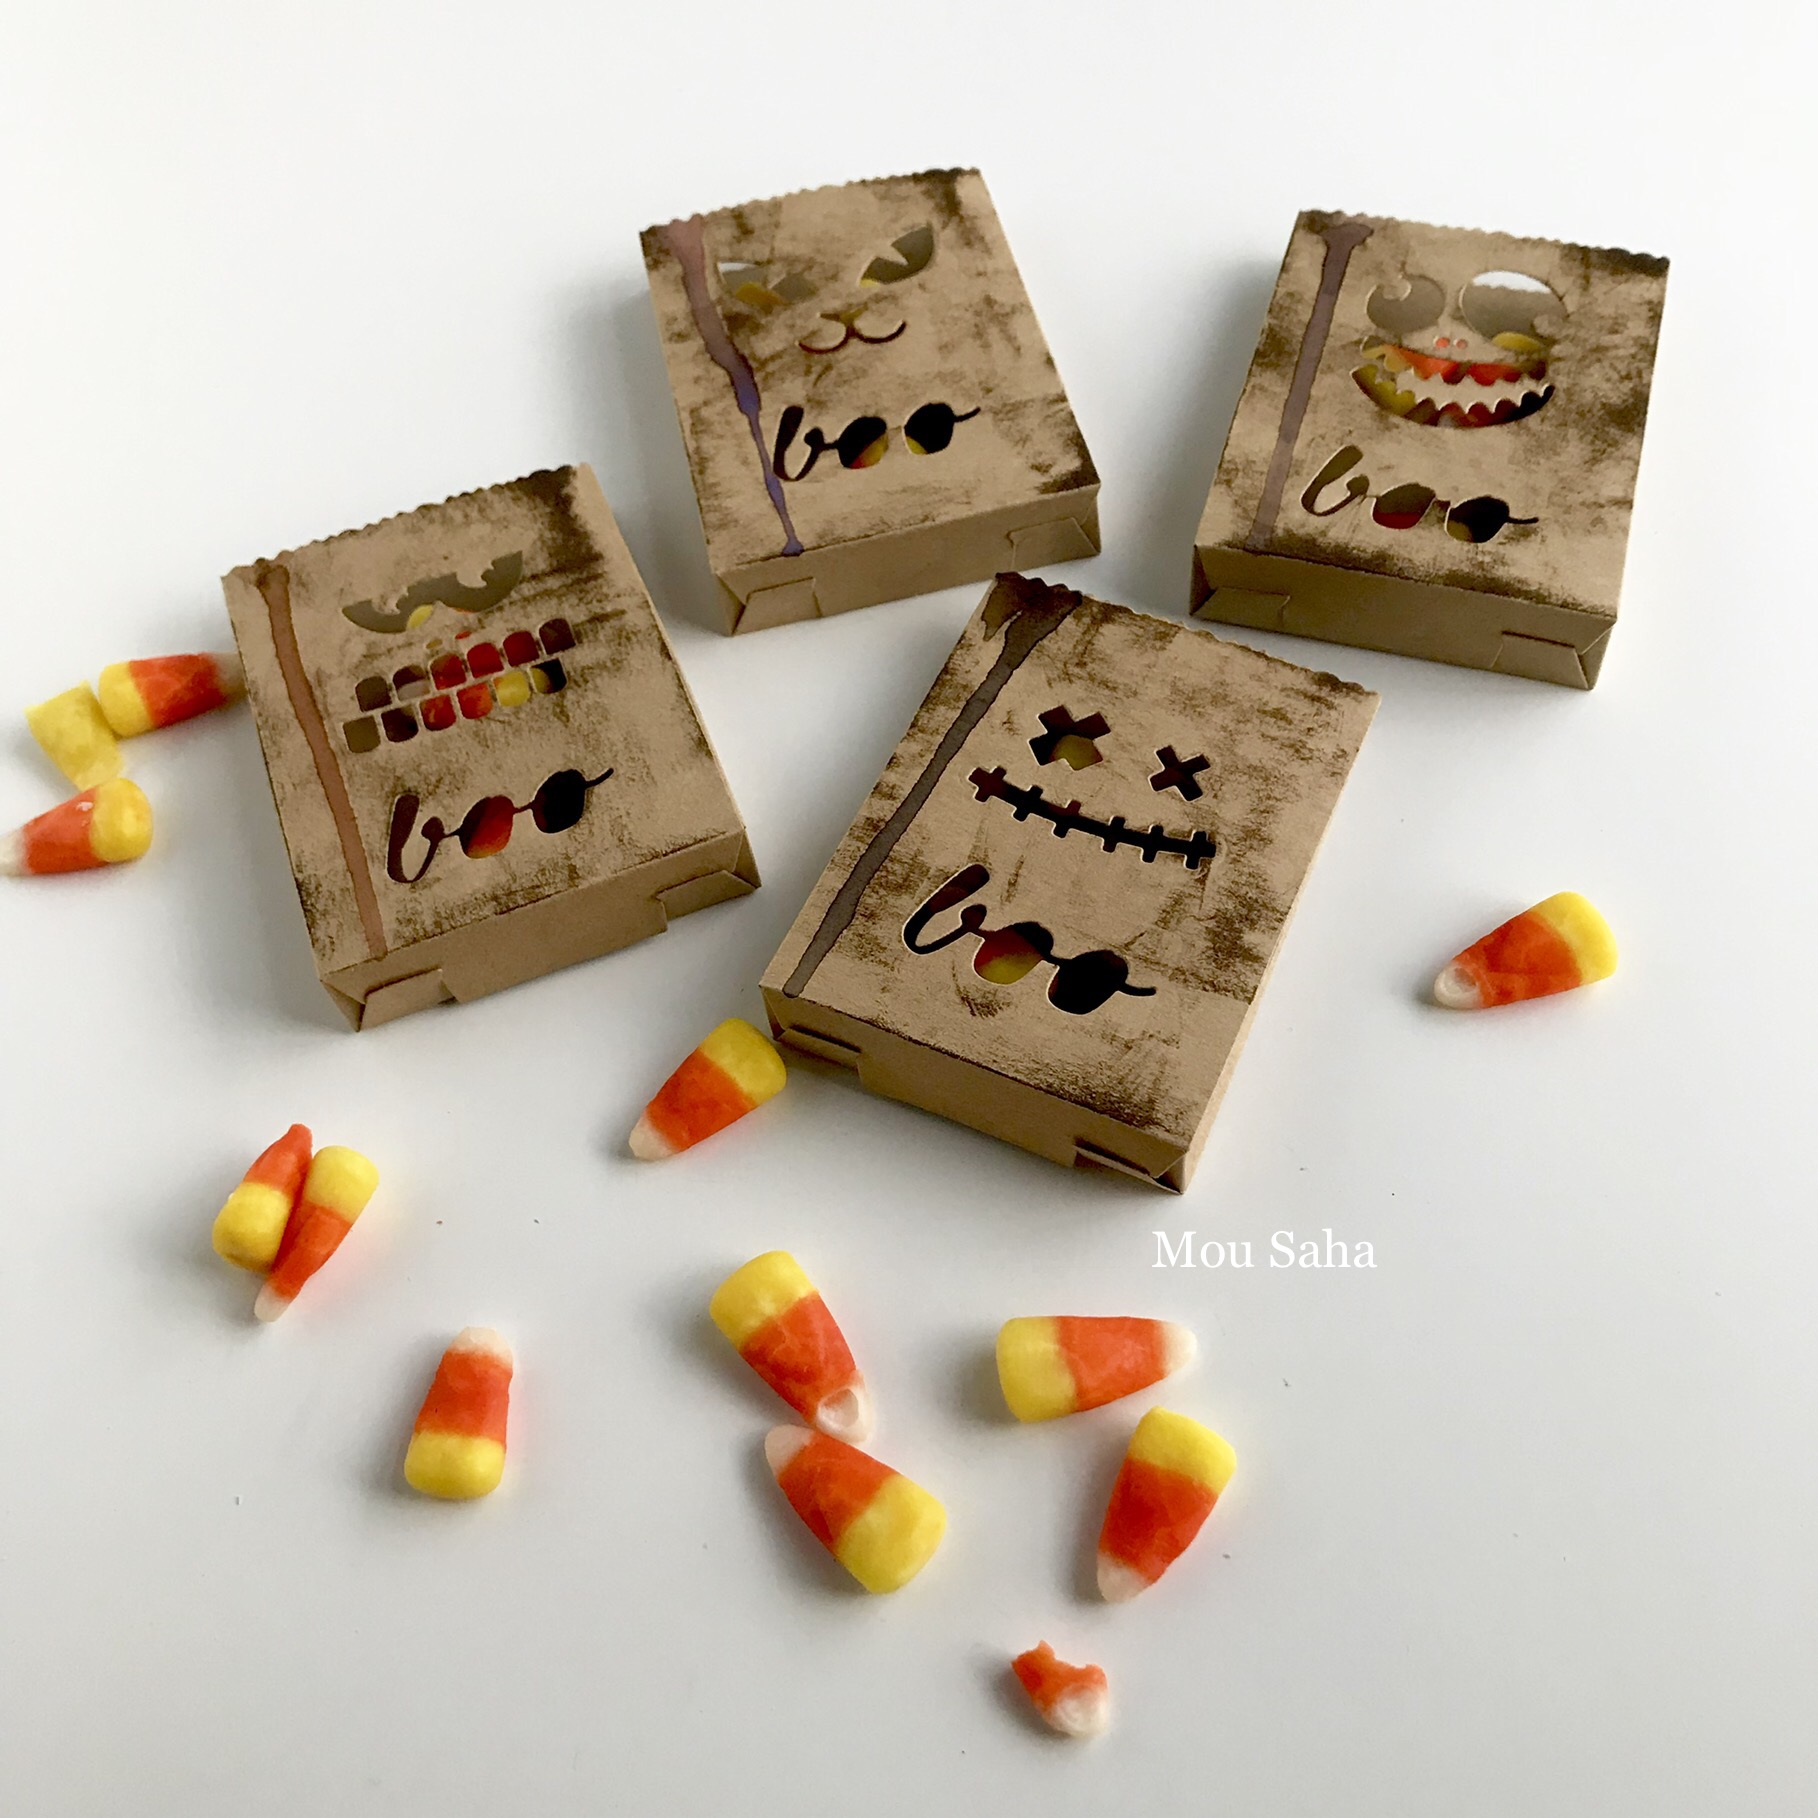
To die-cut the treat bags, create the following Sizzix Sandwich – on Sizzix Accessory Standard Magnetic Platform for Wafer-Thin Dies, lay a Standard Cutting Pad. Place kraft cardstock on the cutting pad and lay Treat Bag die blade side down on it. Arrange one of the Frightening Faces dies and the ‘boo’ sentiment from the Sizzix Sidekick Side-Order Set – Halloween inside the Treat Bag die, making sure that your design will be upright after the bag is cut out. Cover with the other Standard Cutting Pad and pass the whole Sizzix Sandwich through the Sizzix Big Shot Machine. Repeat with other face designs for an interesting variety.
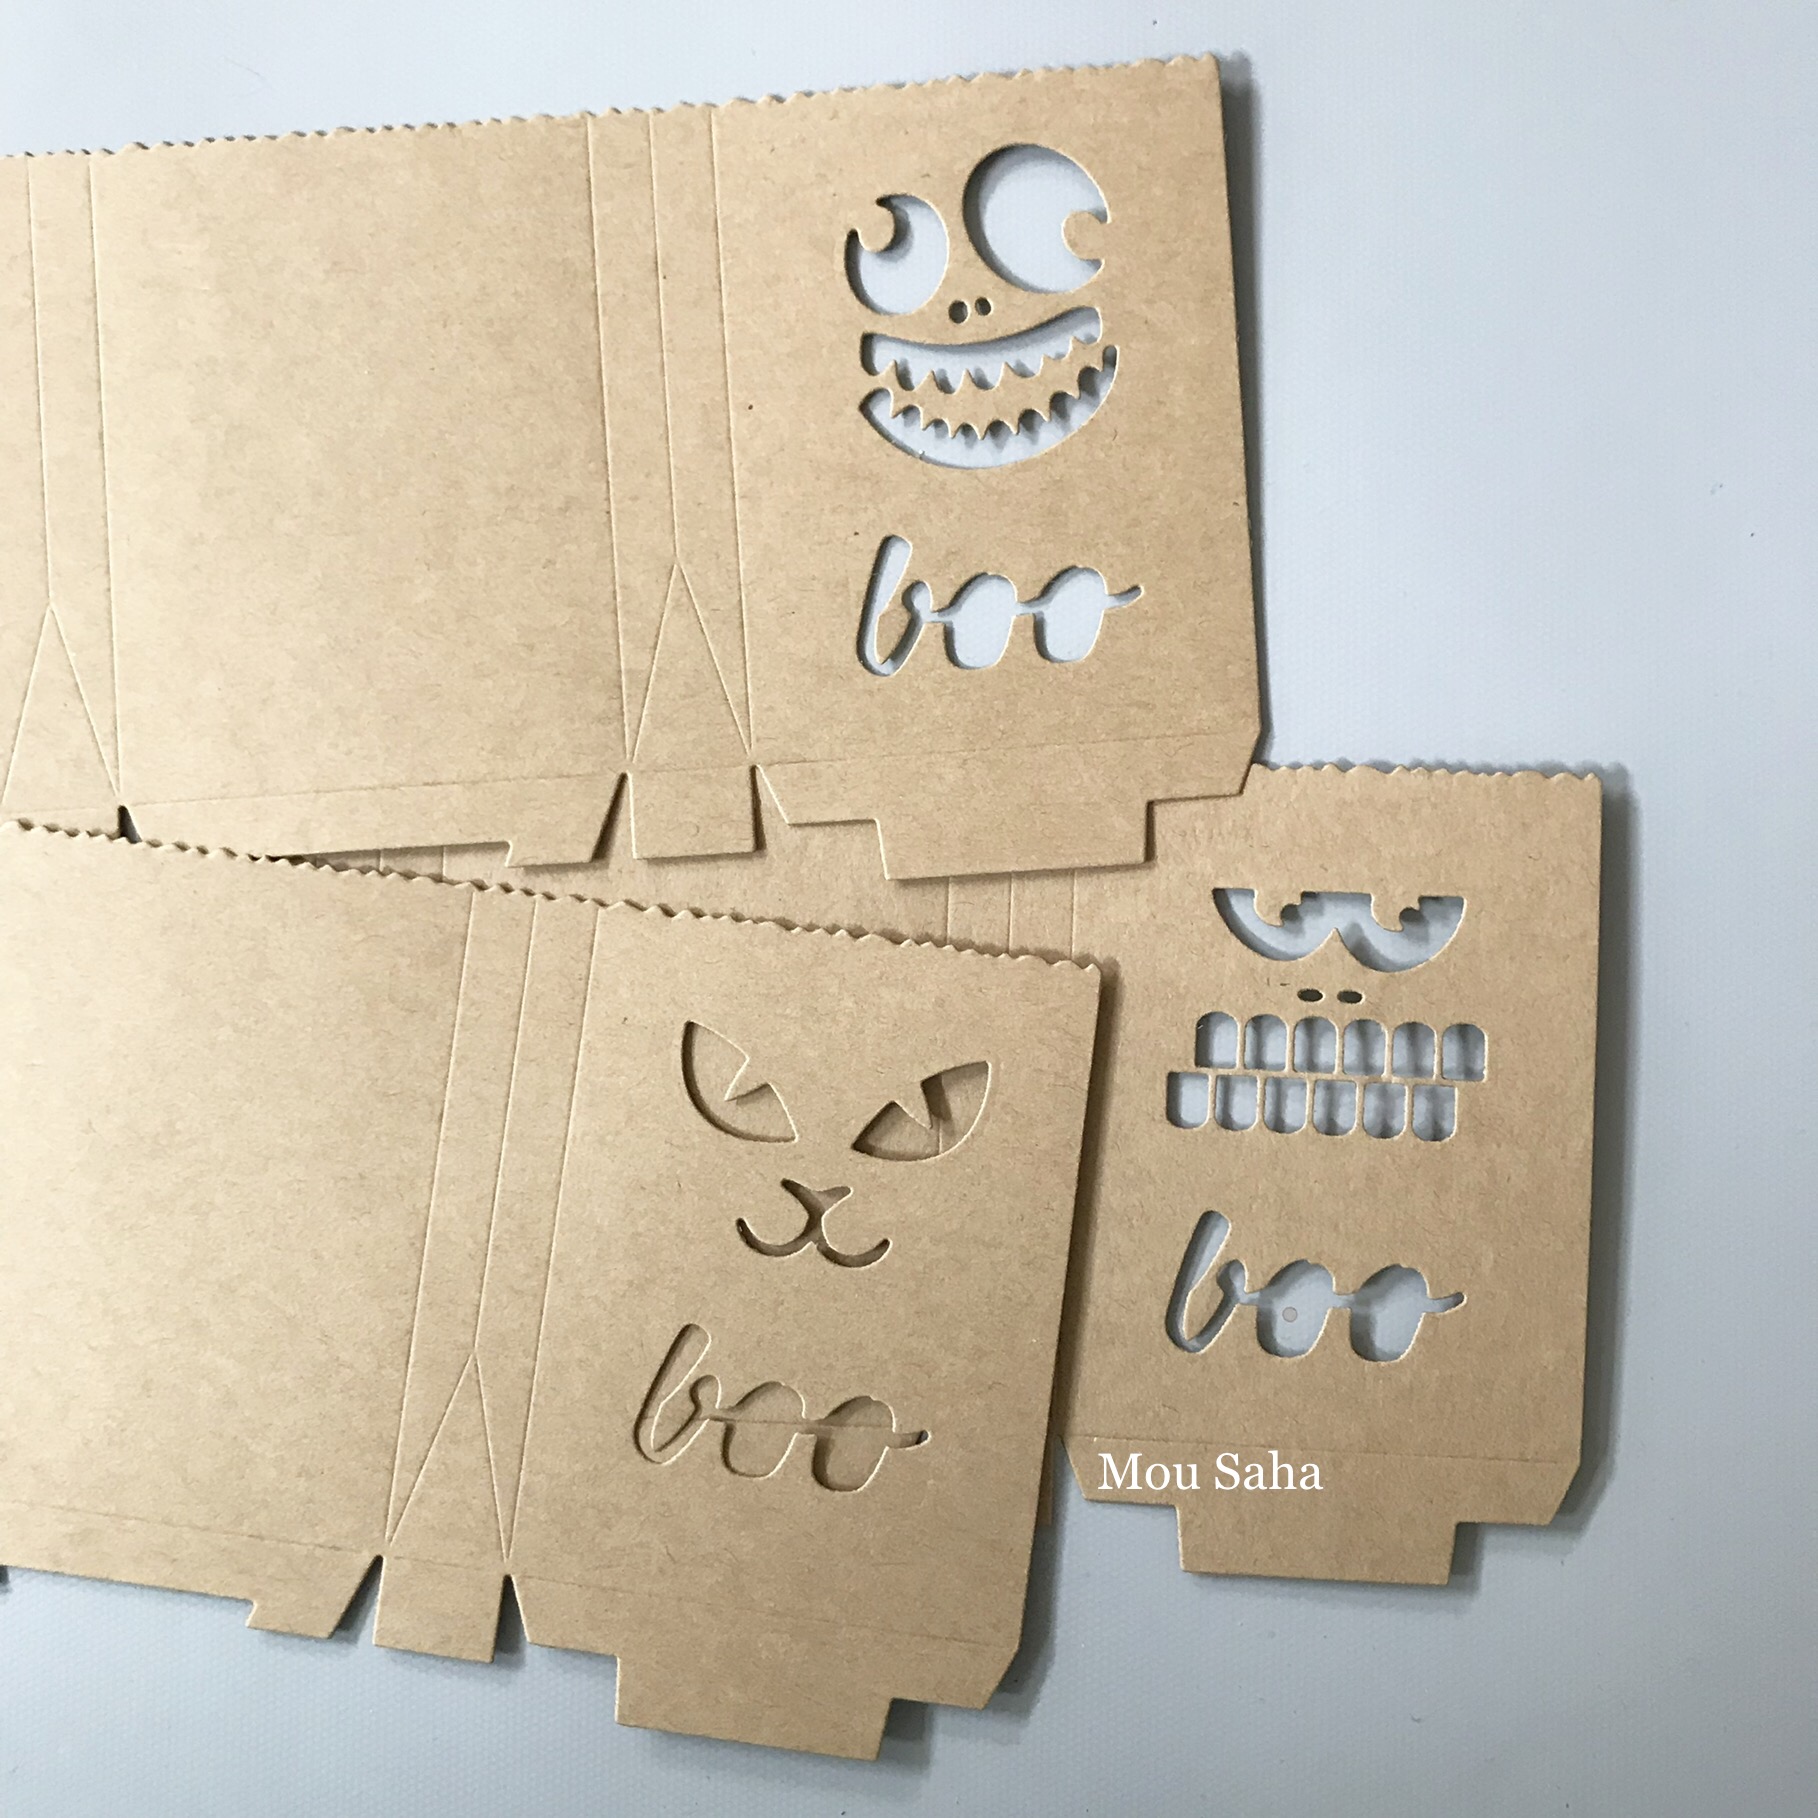
Here are some of my Treat Bag die-cuts.
Fold along the score lines of the die-cut Treat Bags and apply adhesive to the flaps to assemble each bag. It hardly takes 2-3 minutes to make each bag from start to finish.
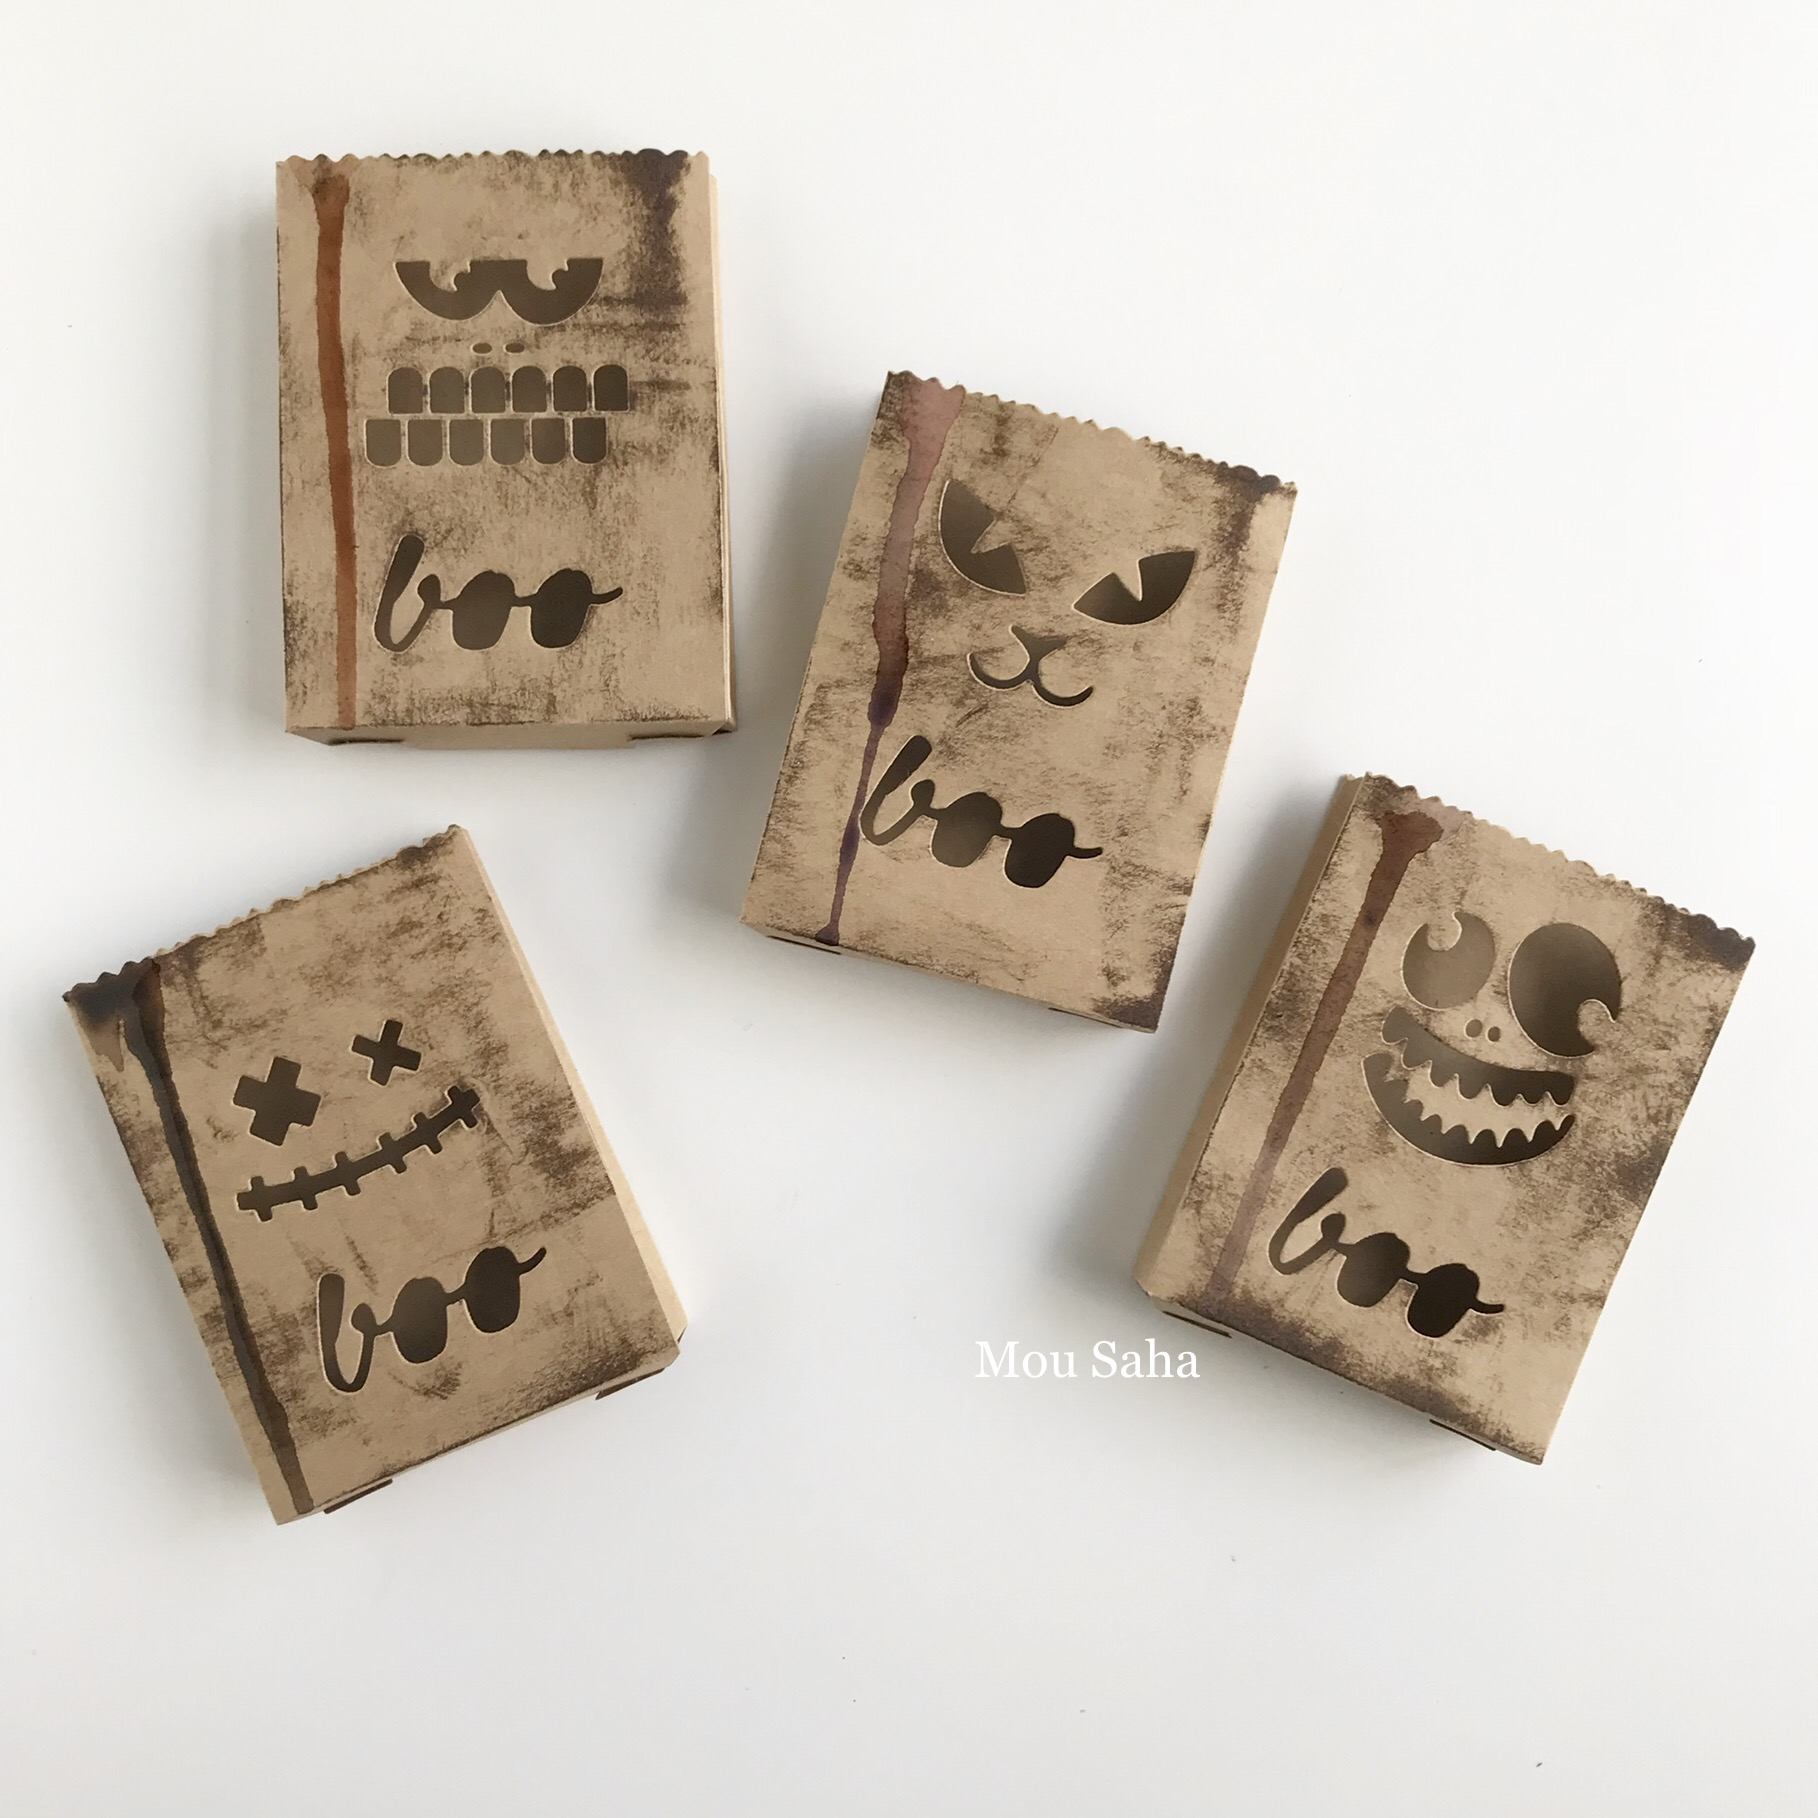
Rub some ink to the bags to add a touch of grunge. Dilute some Gelatos colors from the Steampunk set and drip them down the edge of each the bag. Let dry.
1 Comment
these are darling! What a clever idea!