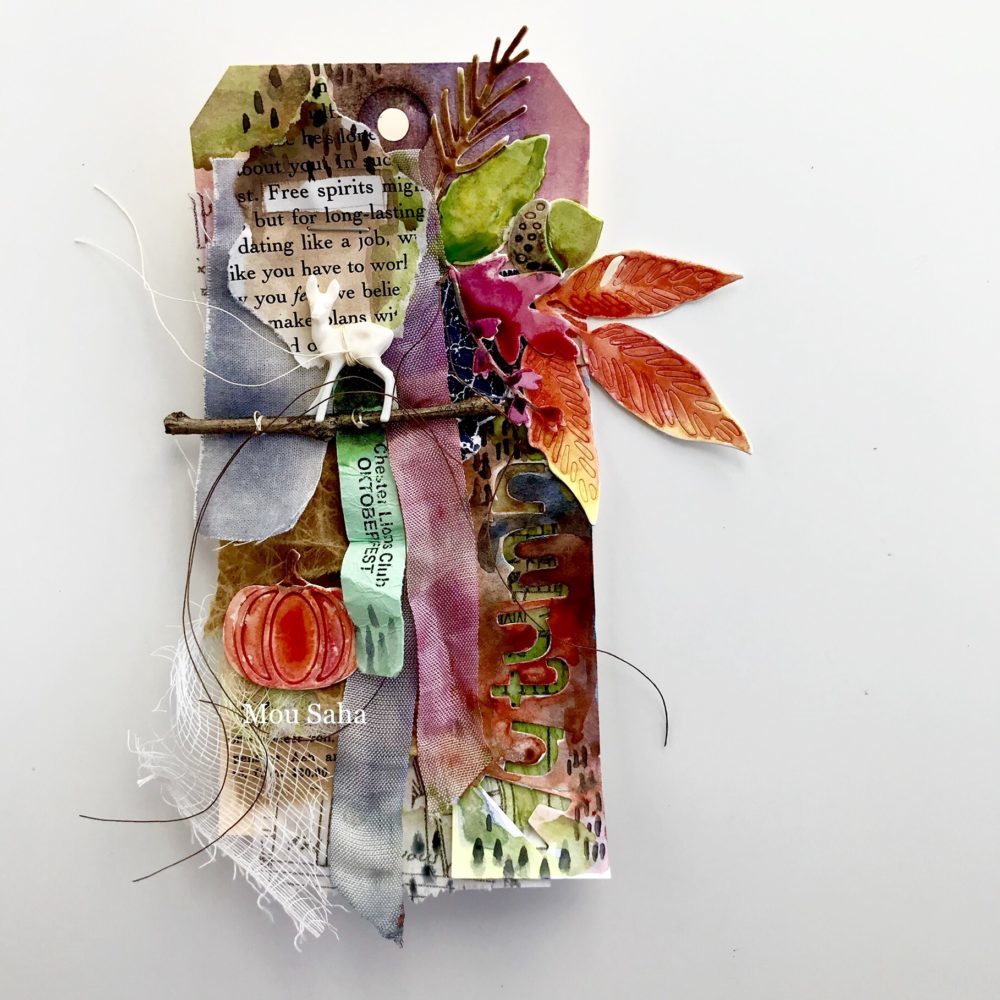
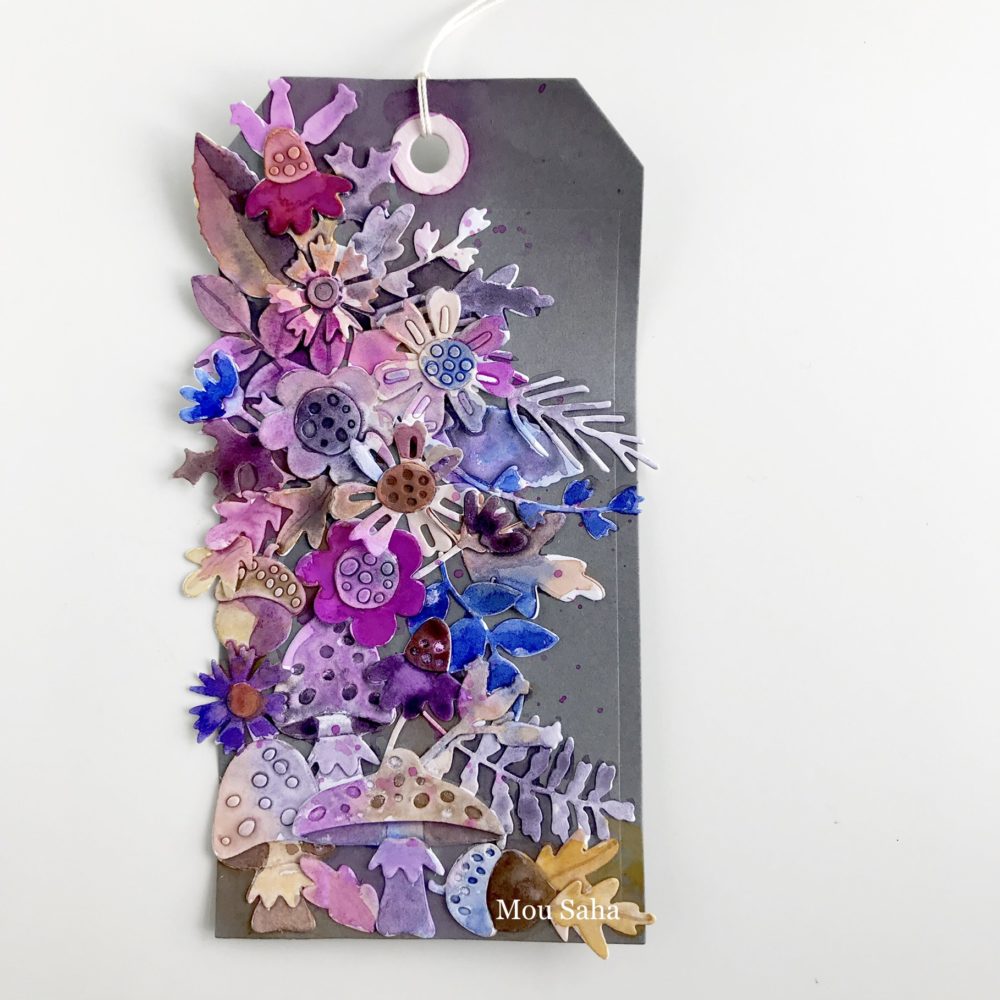
Welcome to day 5 of my Blog Series Inspired by Autumn. All of this week, I have shared projects inspired by the season. Be sure to scroll down and check out all the posts from this Blog Series. You can also find the list of supplies that I used for each project. And if you want to learn more about tag making, check out Life Book 2019 where my class will be all about tags.
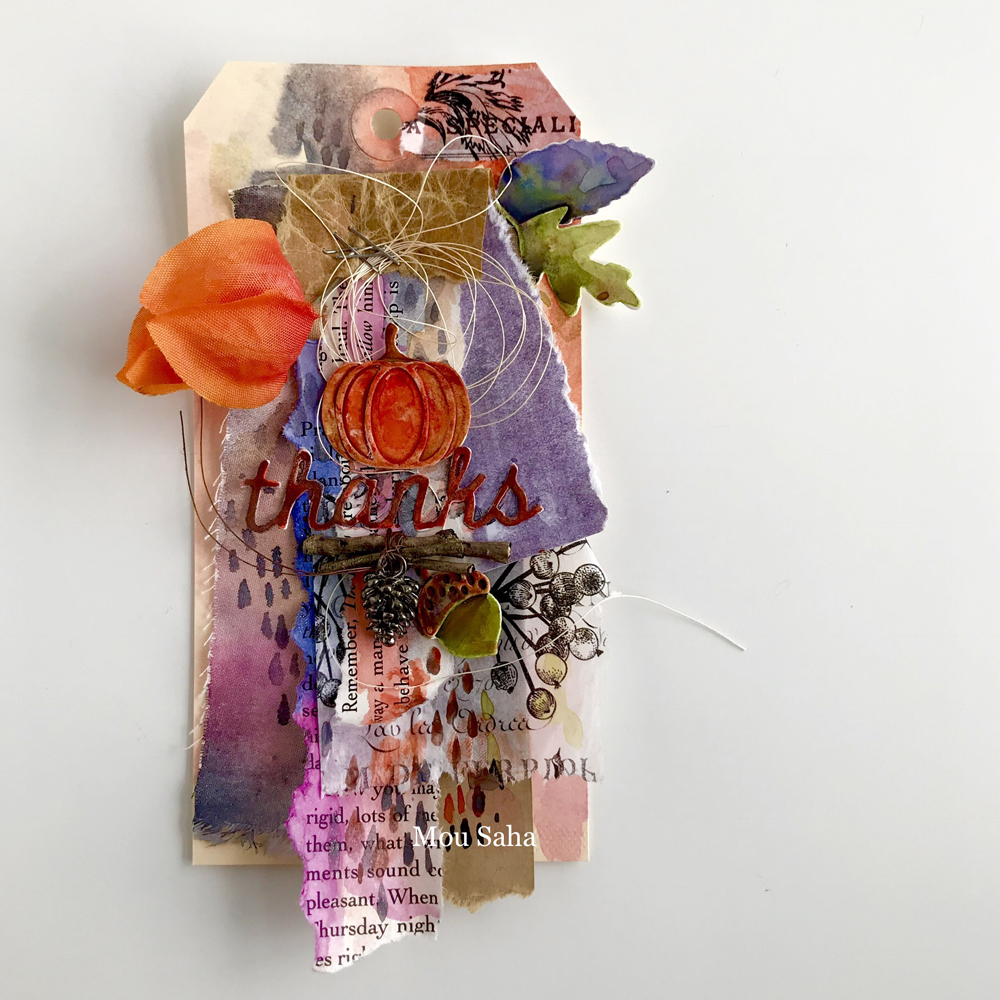
Welcome to day 4 of my Blog Series Inspired by Autumn. All of this week, I’ll post projects inspired by the season. Be sure to check back each day for a new project and a list of supplies that I used. And if you want to learn more about tag making, check out Life Book 2019 where my class will be all about tags.
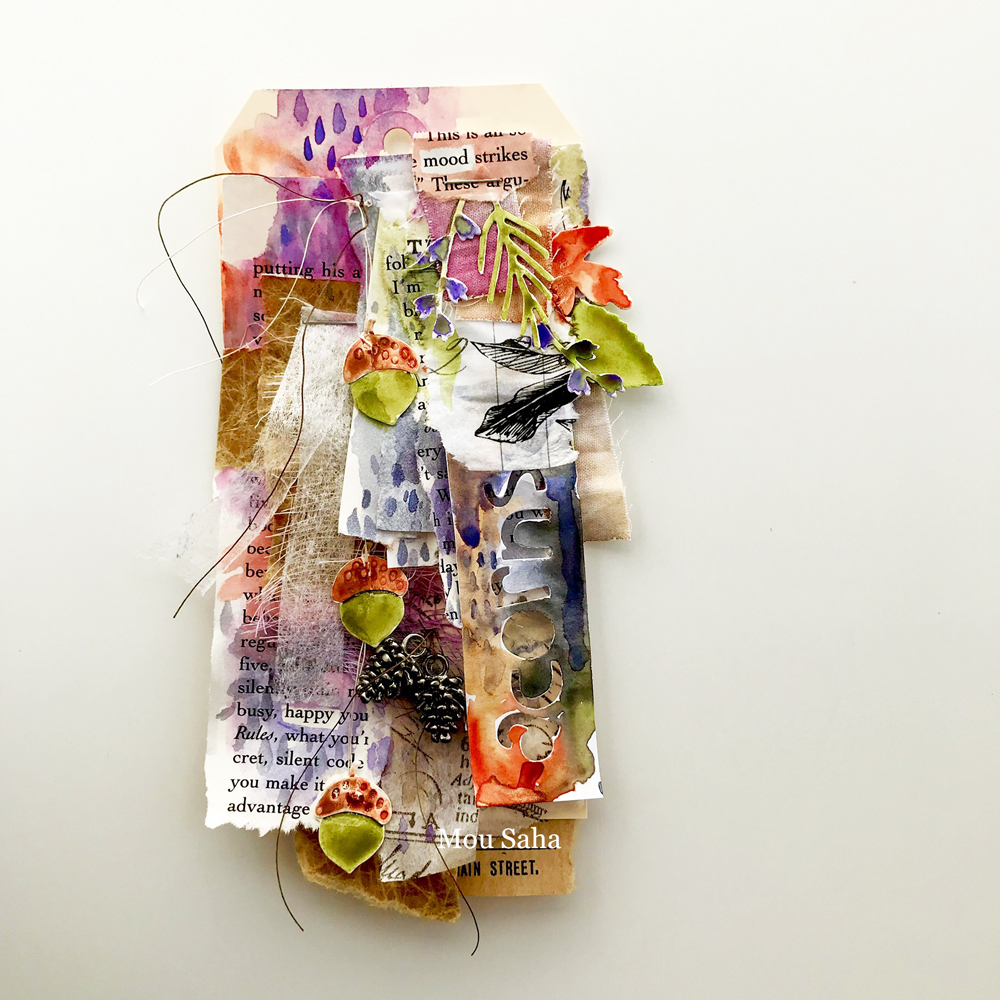
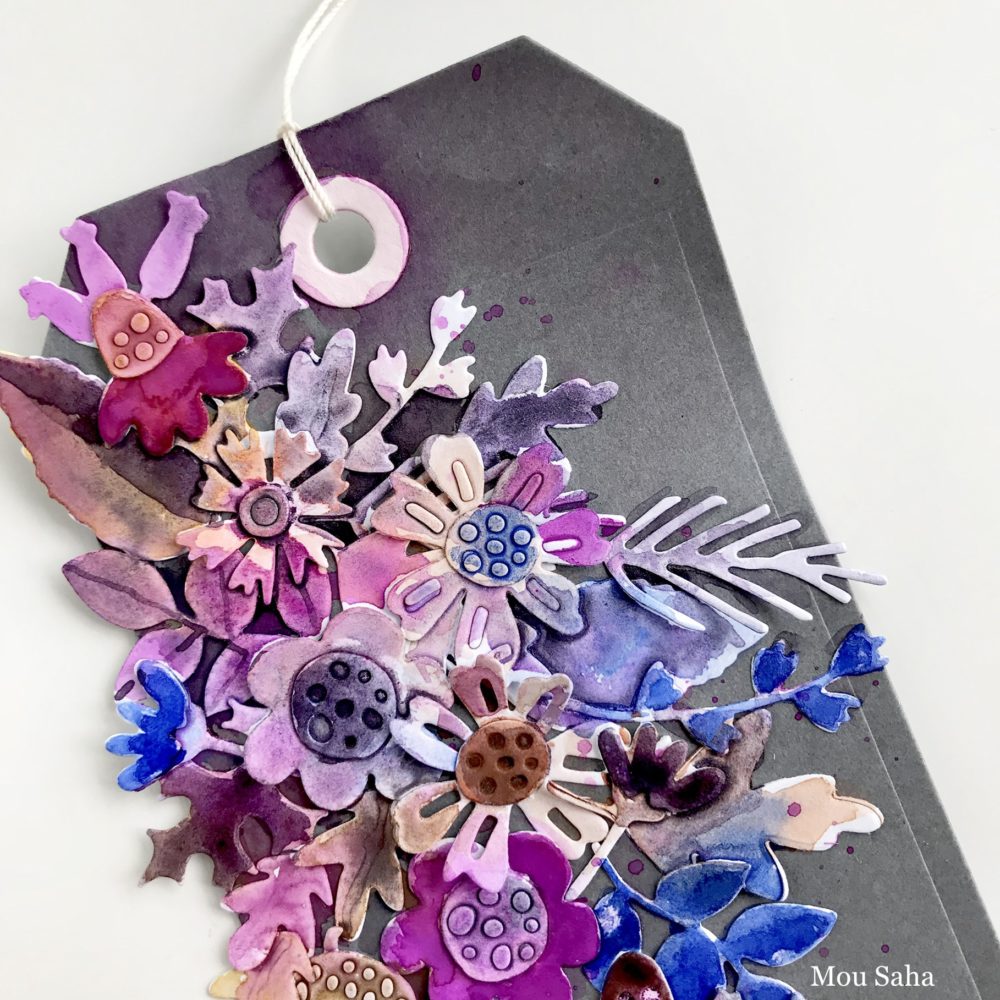
Welcome to day 3 of my Blog Series Inspired by Autumn. All of this week, I’ll post projects inspired by the season. Be sure to check back each day for a new project and a list of supplies that I used. And if you want to learn more about tag making, check out Life Book 2019 where my class will be all about tags.
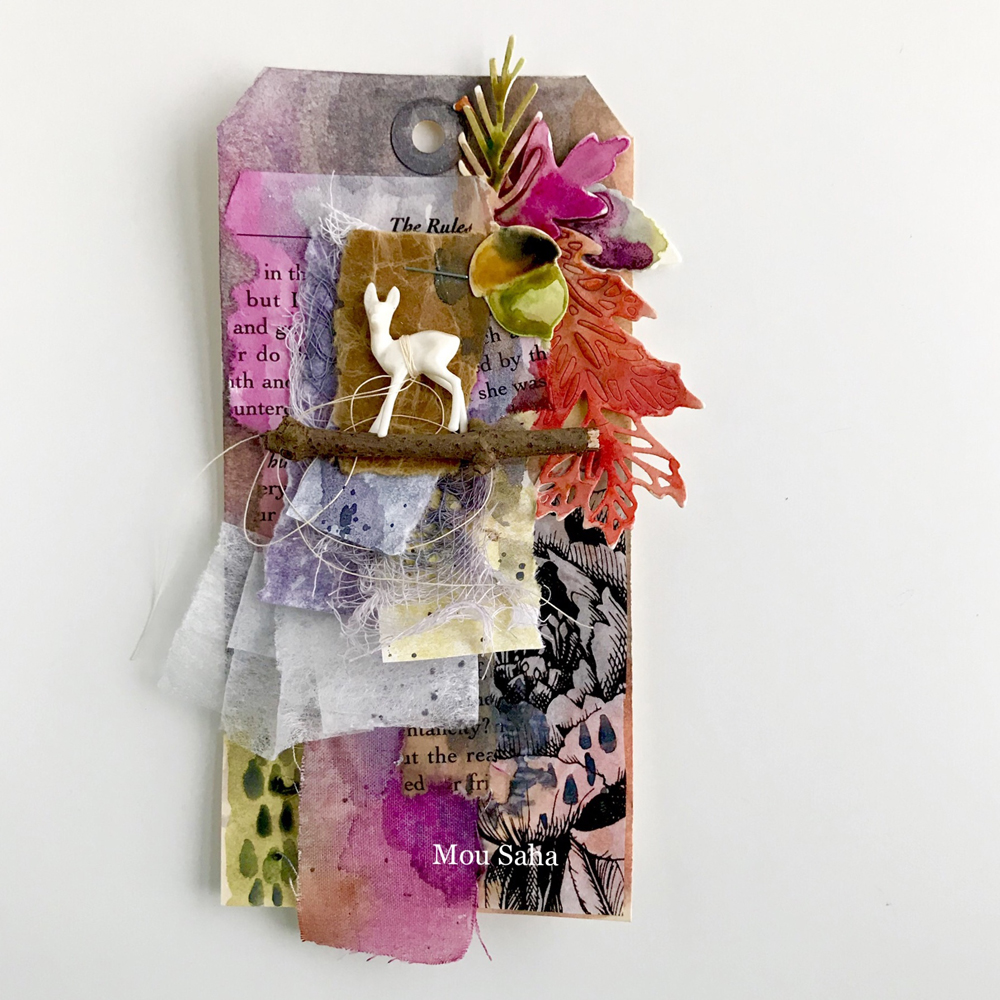
Welcome to day 2 of my Blog Series Inspired by Autumn. All of this week, I’ll post projects inspired by the season. Be sure to check back each day for a new project and a list of supplies that I used. And if you want to learn more about tag making, check out Life Book 2019 where my class will be all about tags.
The temperature here is already in the low 30s (Fahrenheit). The rain and temperature drop are starting to bring out the colors of Autumn at its best! Gorgeous golds and rich reds and deep violets are everywhere. And it’s just the time for another Blog Series inspired by Autumn. All of this week, I’ll post projects inspired by the season. Be sure to check back each day for a new project and a list of supplies that I used. And if you want to learn more about tag making, check out Life Book 2019 where my class will be all about tags.
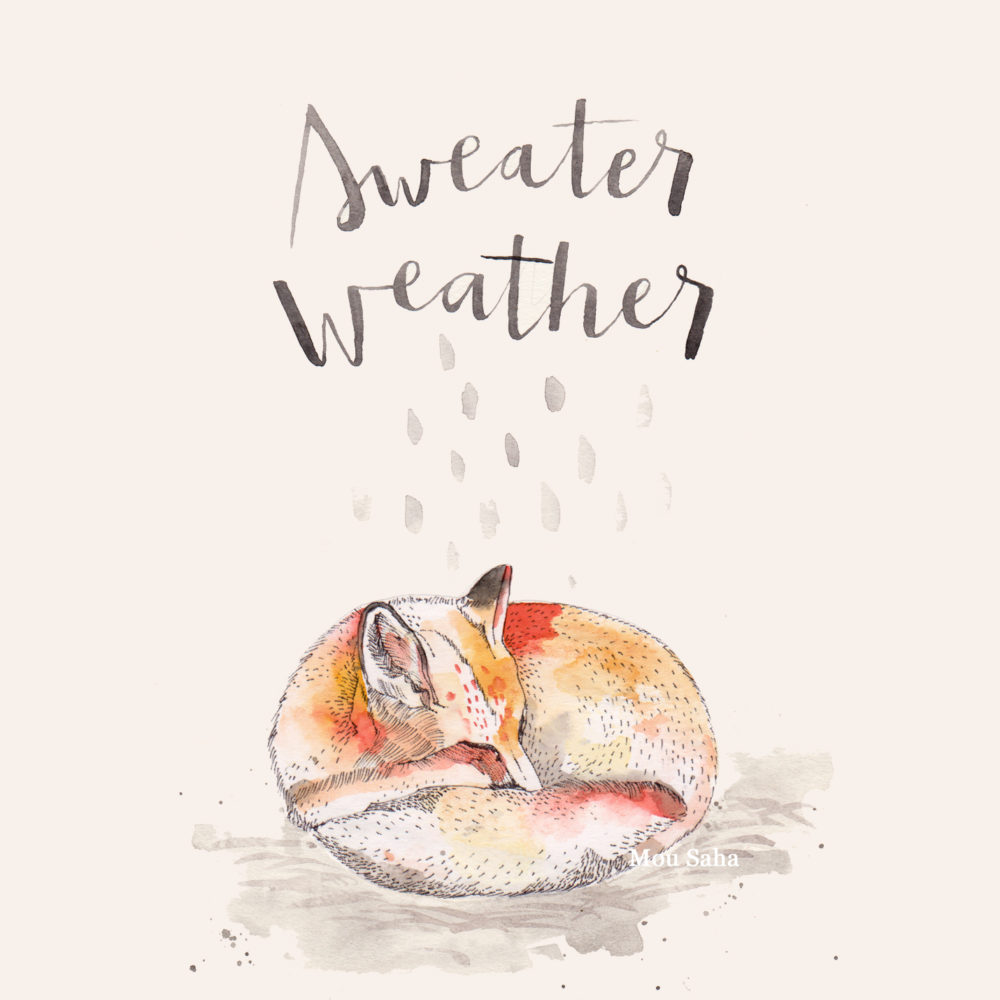
It’s mid-October and the temperatures have dropped to the 30 degrees Fahrenheit. Every day this week, we woke up to cloudy cold mornings, not feeling like getting out of our warm blankets. I feel like sleeping all day like this little fox from my Hello Fall coloring book. But of course, that’s not possible, so I am just making more time to make some art using the Hello Fall coloring book images. If wasn’t recovering from surgery, I’d step out more and walk on the crunchy leaves down our beautiful neighboorhood streets under the colorful trees. But for now, I’m doing what I can to enjoy my favorite season of the year!
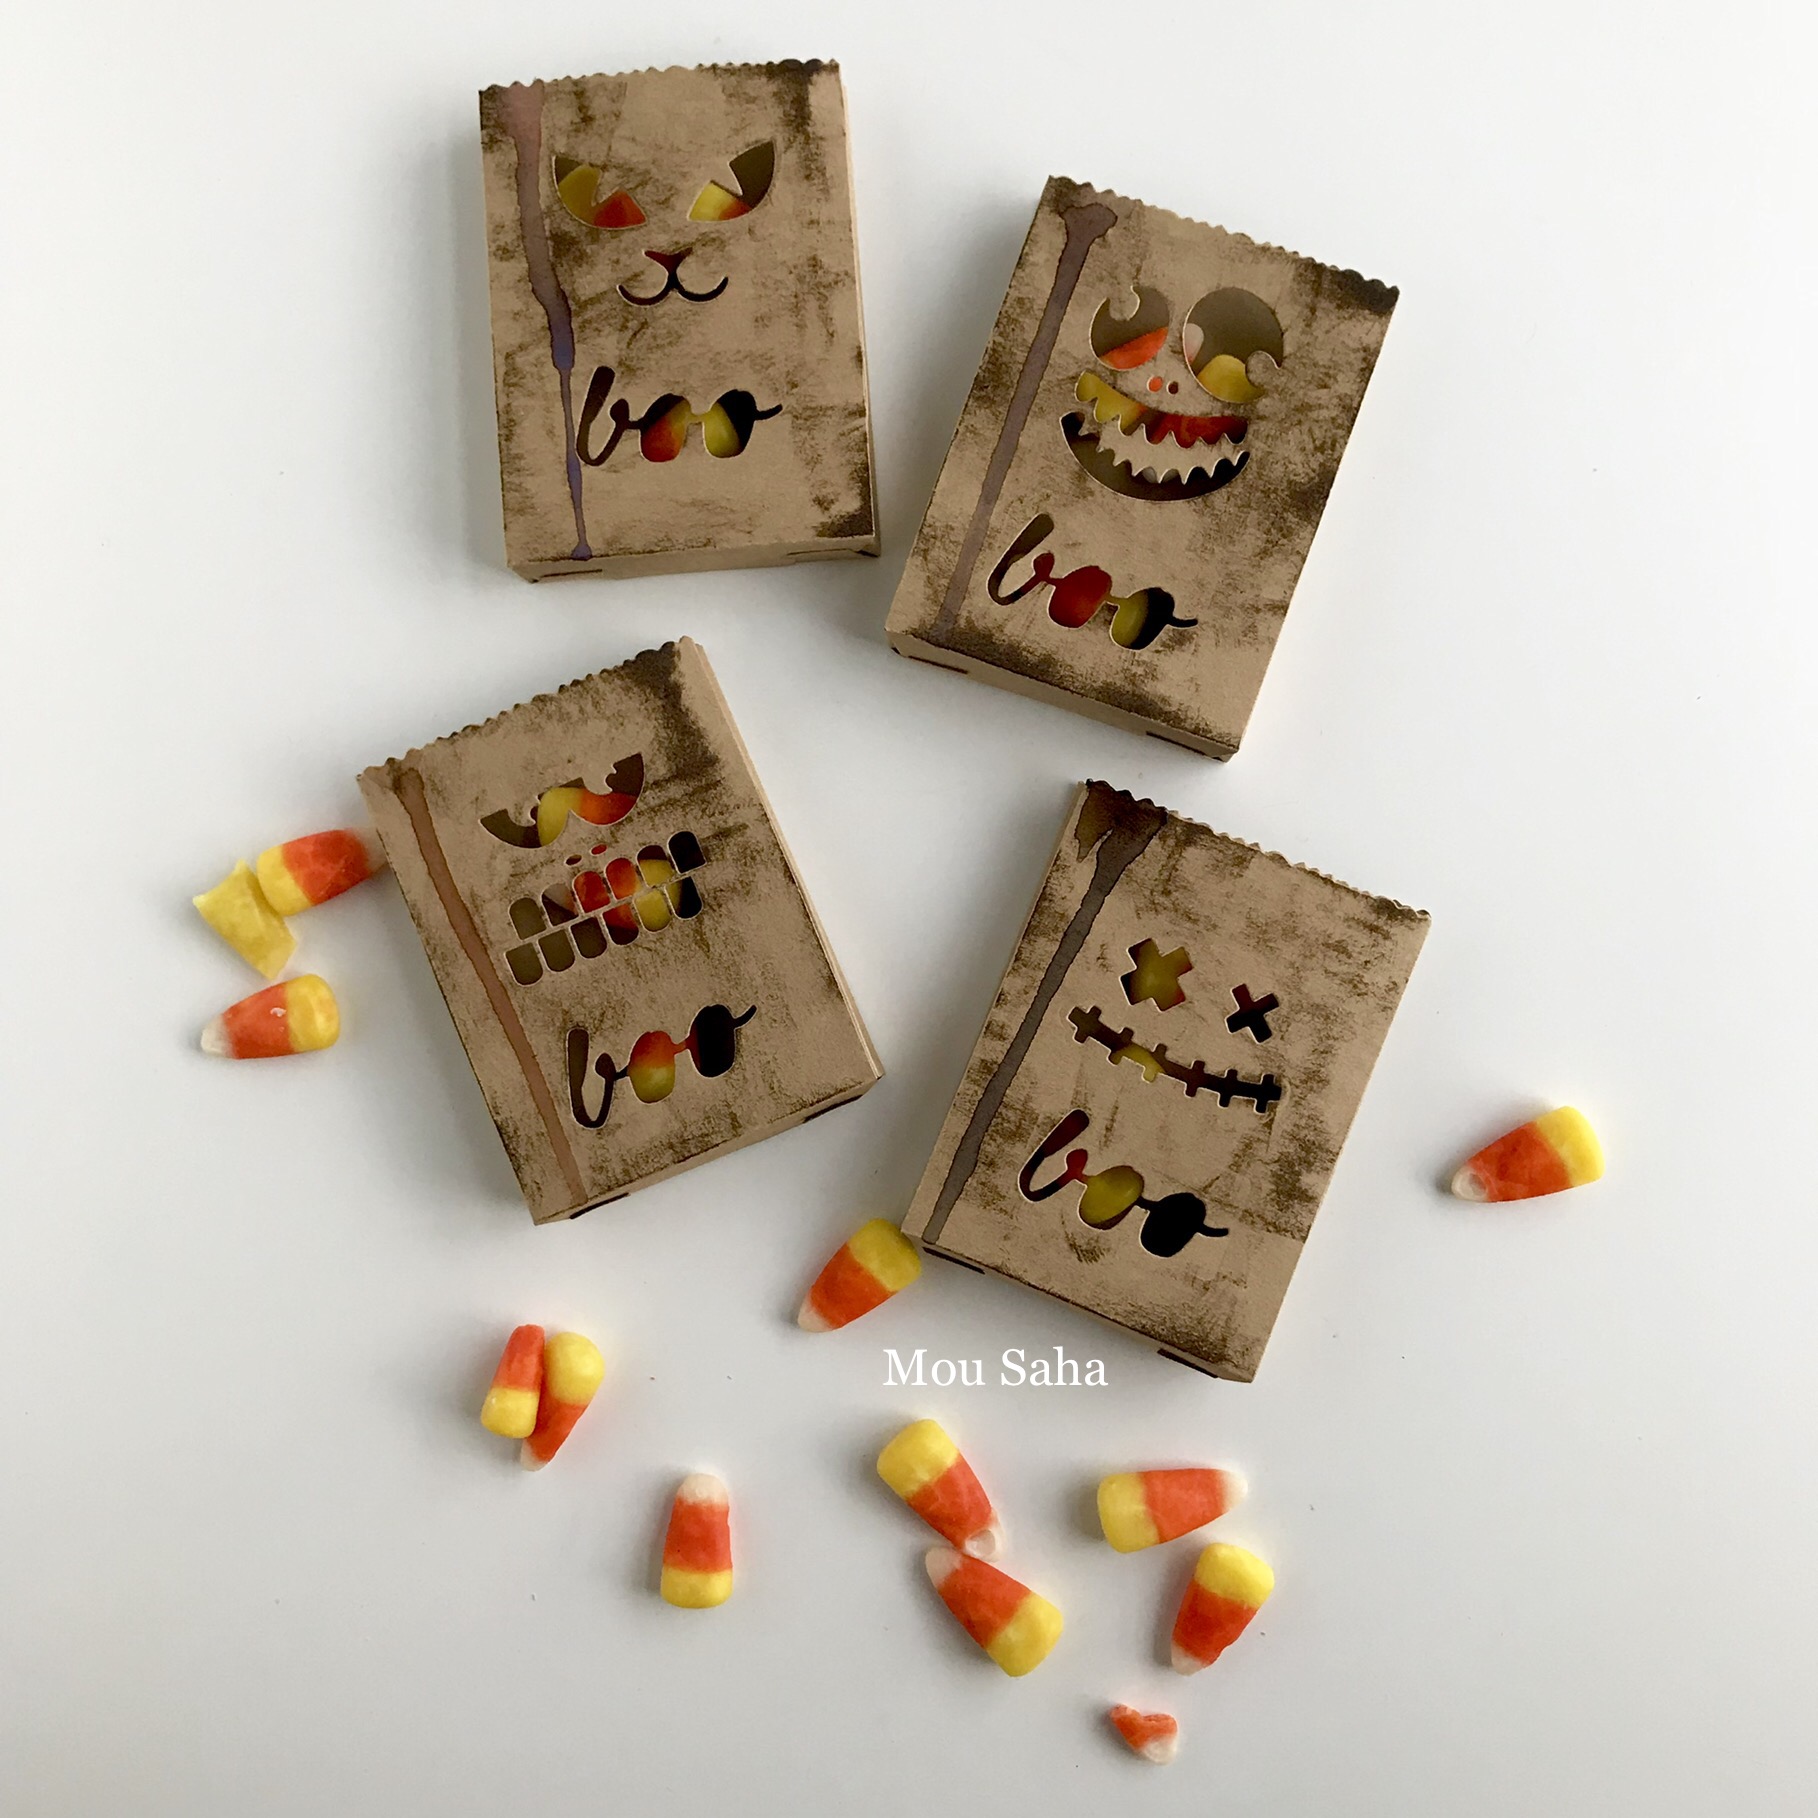
Welcome to the 5th and final day of my Fall Decor Blog Series! Today’s decor project doubles as party favors. I also created a tutorial to show you how to make them.
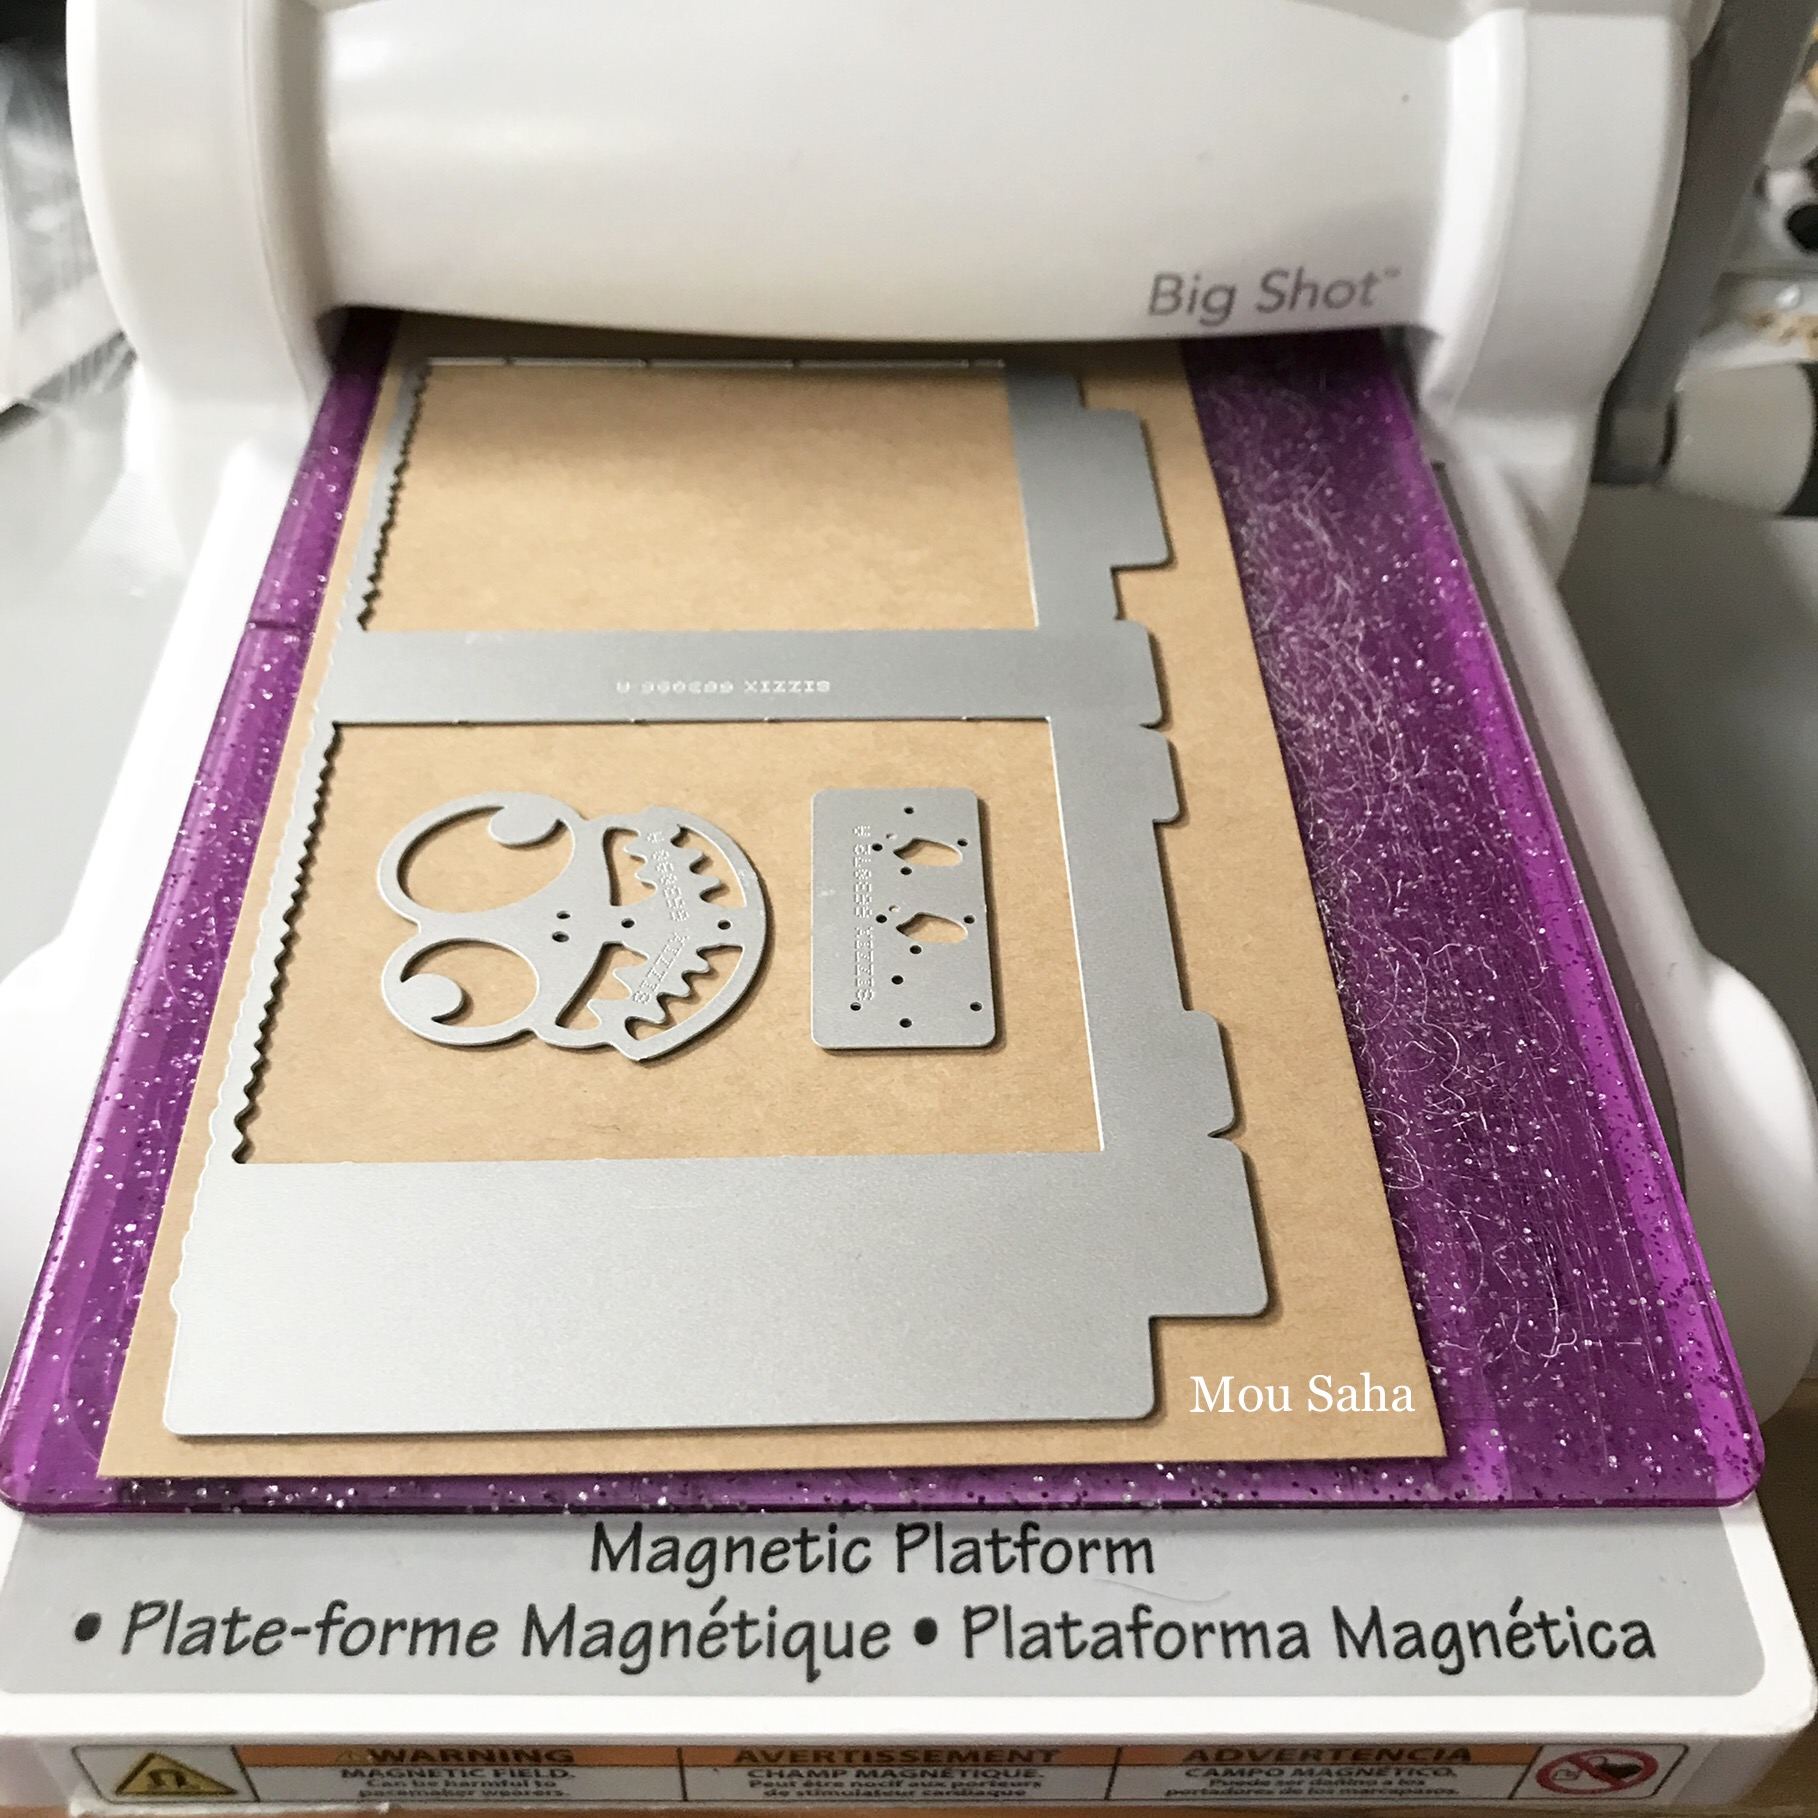
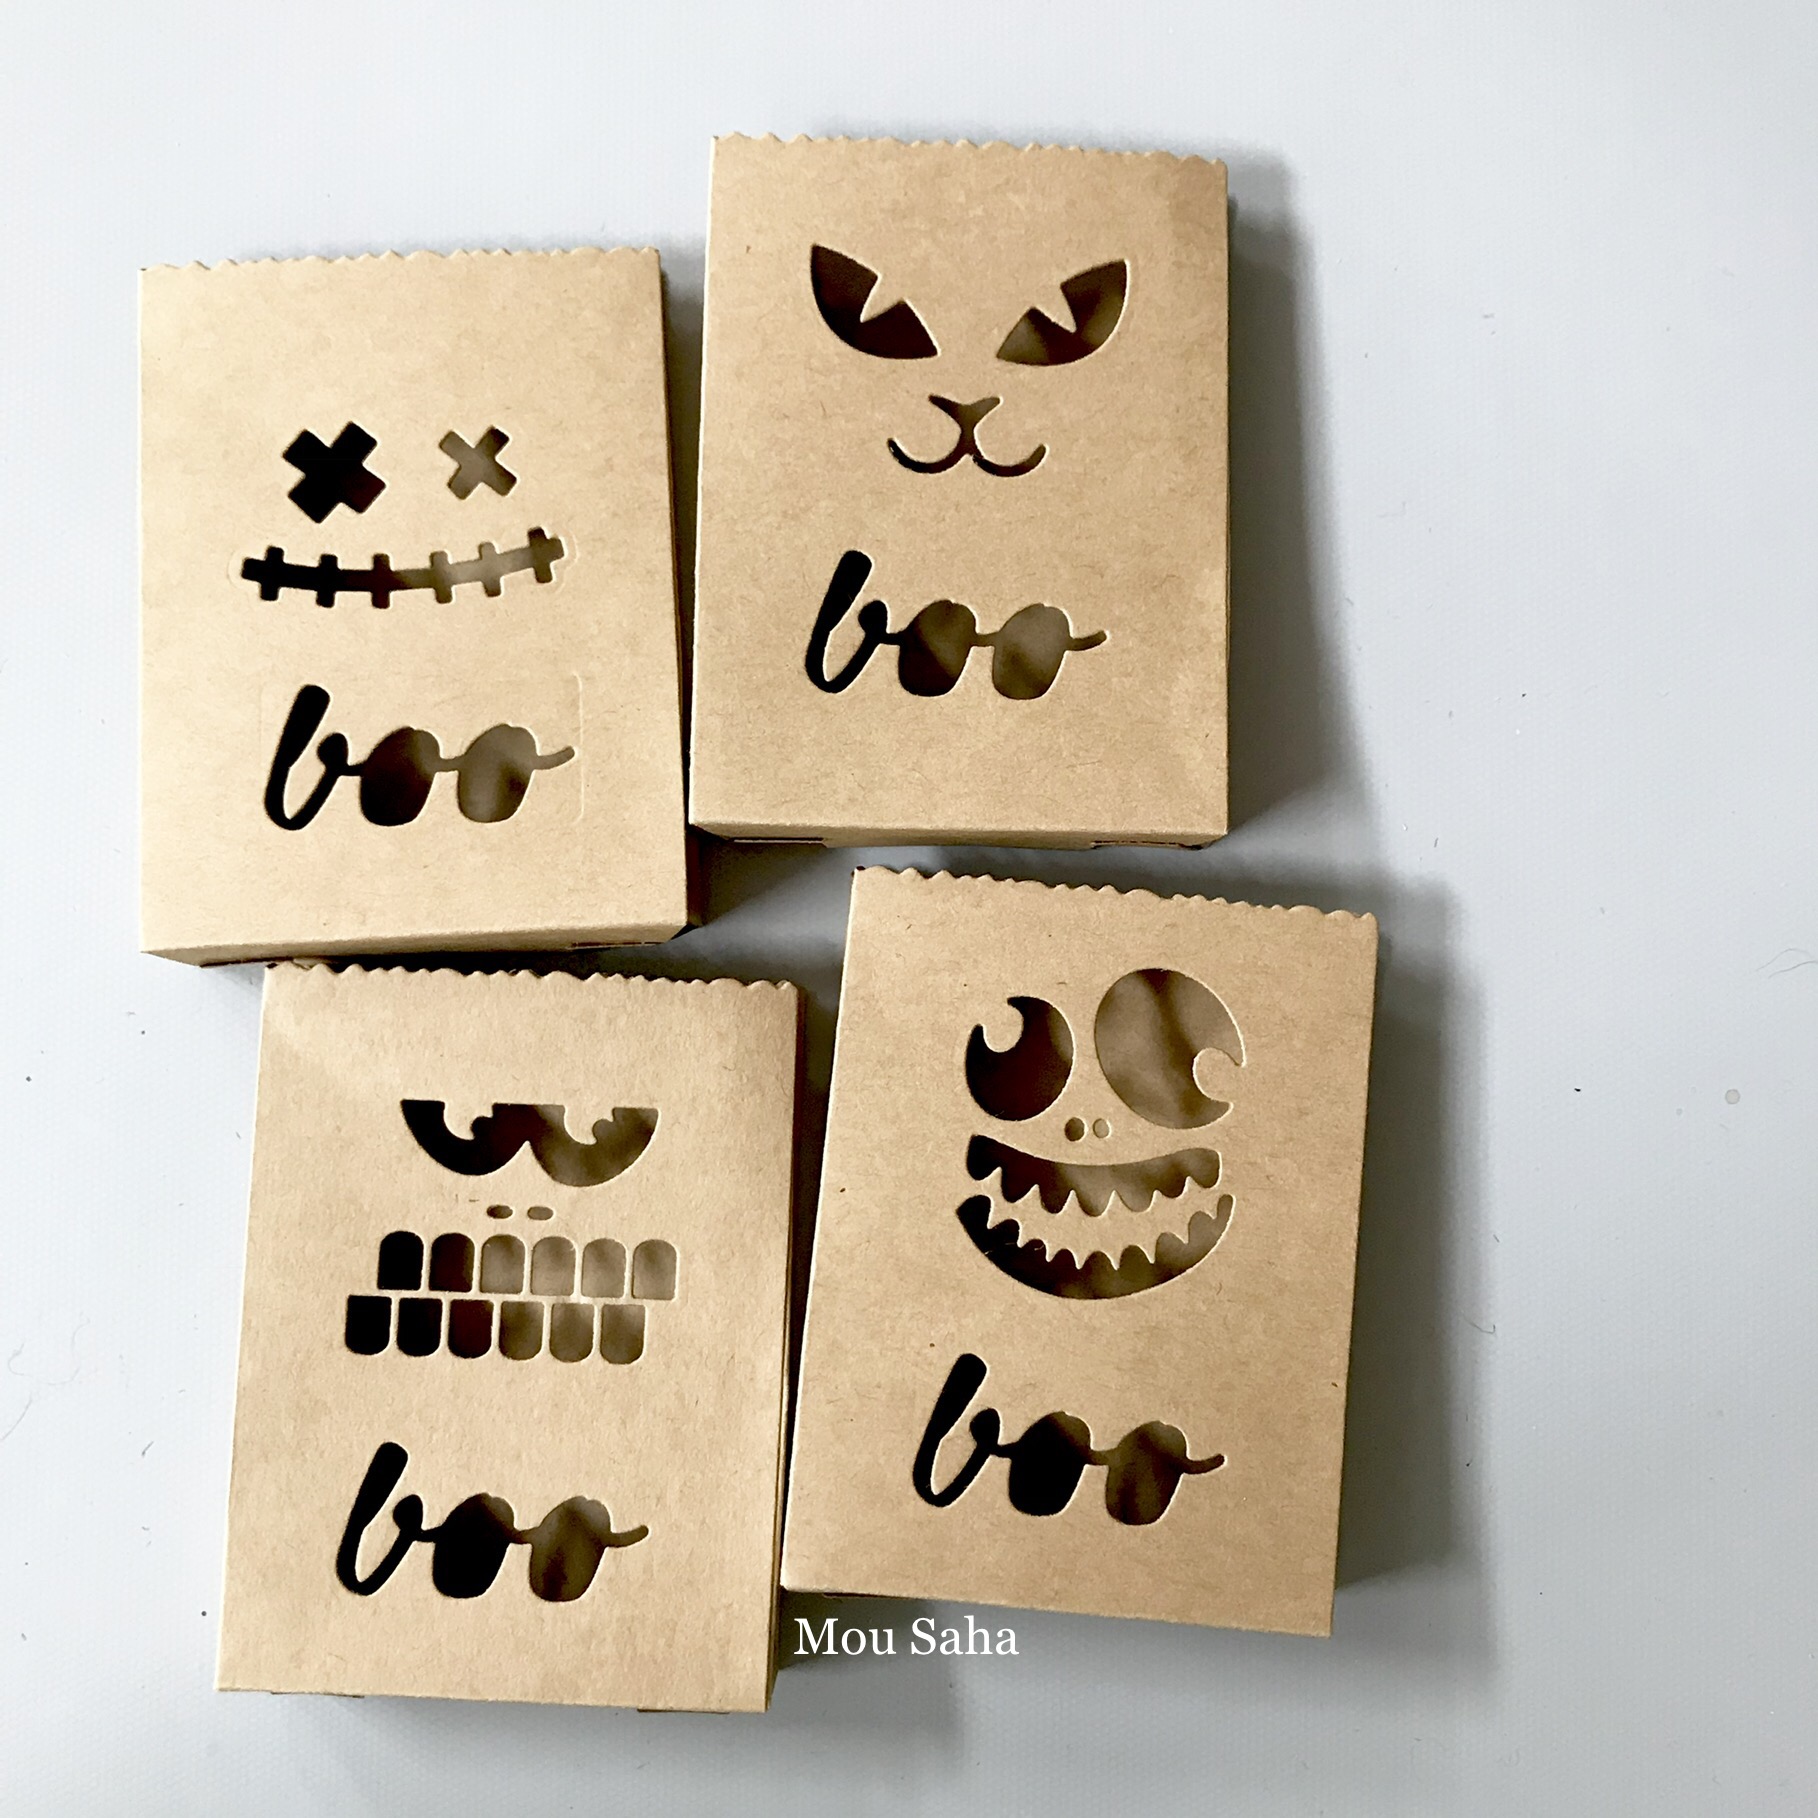
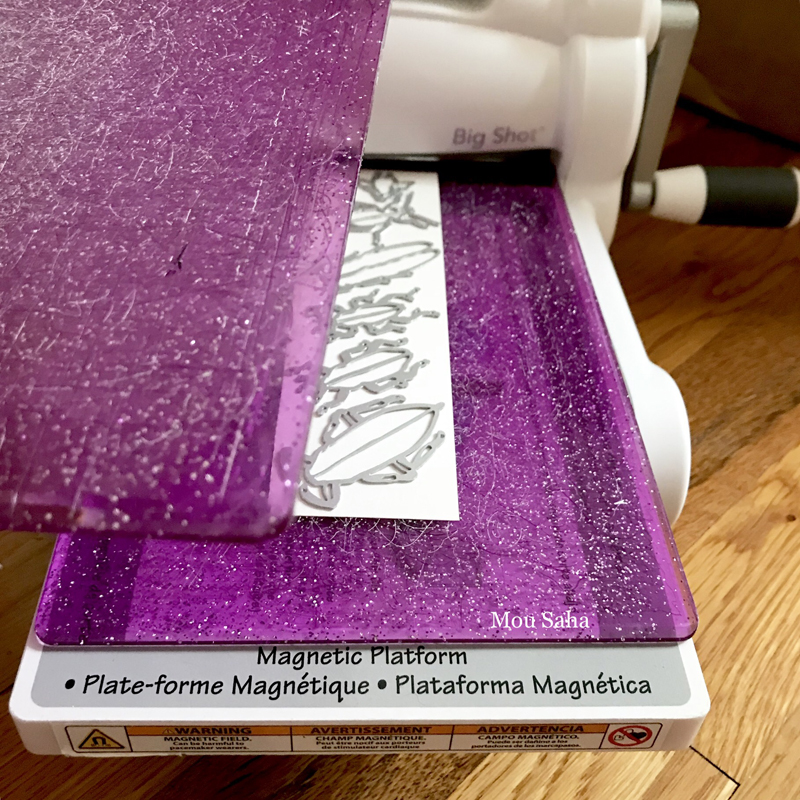
To die-cut the treat bags, create the following Sizzix Sandwich – on Sizzix Accessory Standard Magnetic Platform for Wafer-Thin Dies, lay a Standard Cutting Pad. Place kraft cardstock on the cutting pad and lay Treat Bag die blade side down on it. Arrange one of the Frightening Faces dies and the ‘boo’ sentiment from the Sizzix Sidekick Side-Order Set – Halloween inside the Treat Bag die, making sure that your design will be upright after the bag is cut out. Cover with the other Standard Cutting Pad and pass the whole Sizzix Sandwich through the Sizzix Big Shot Machine. Repeat with other face designs for an interesting variety.
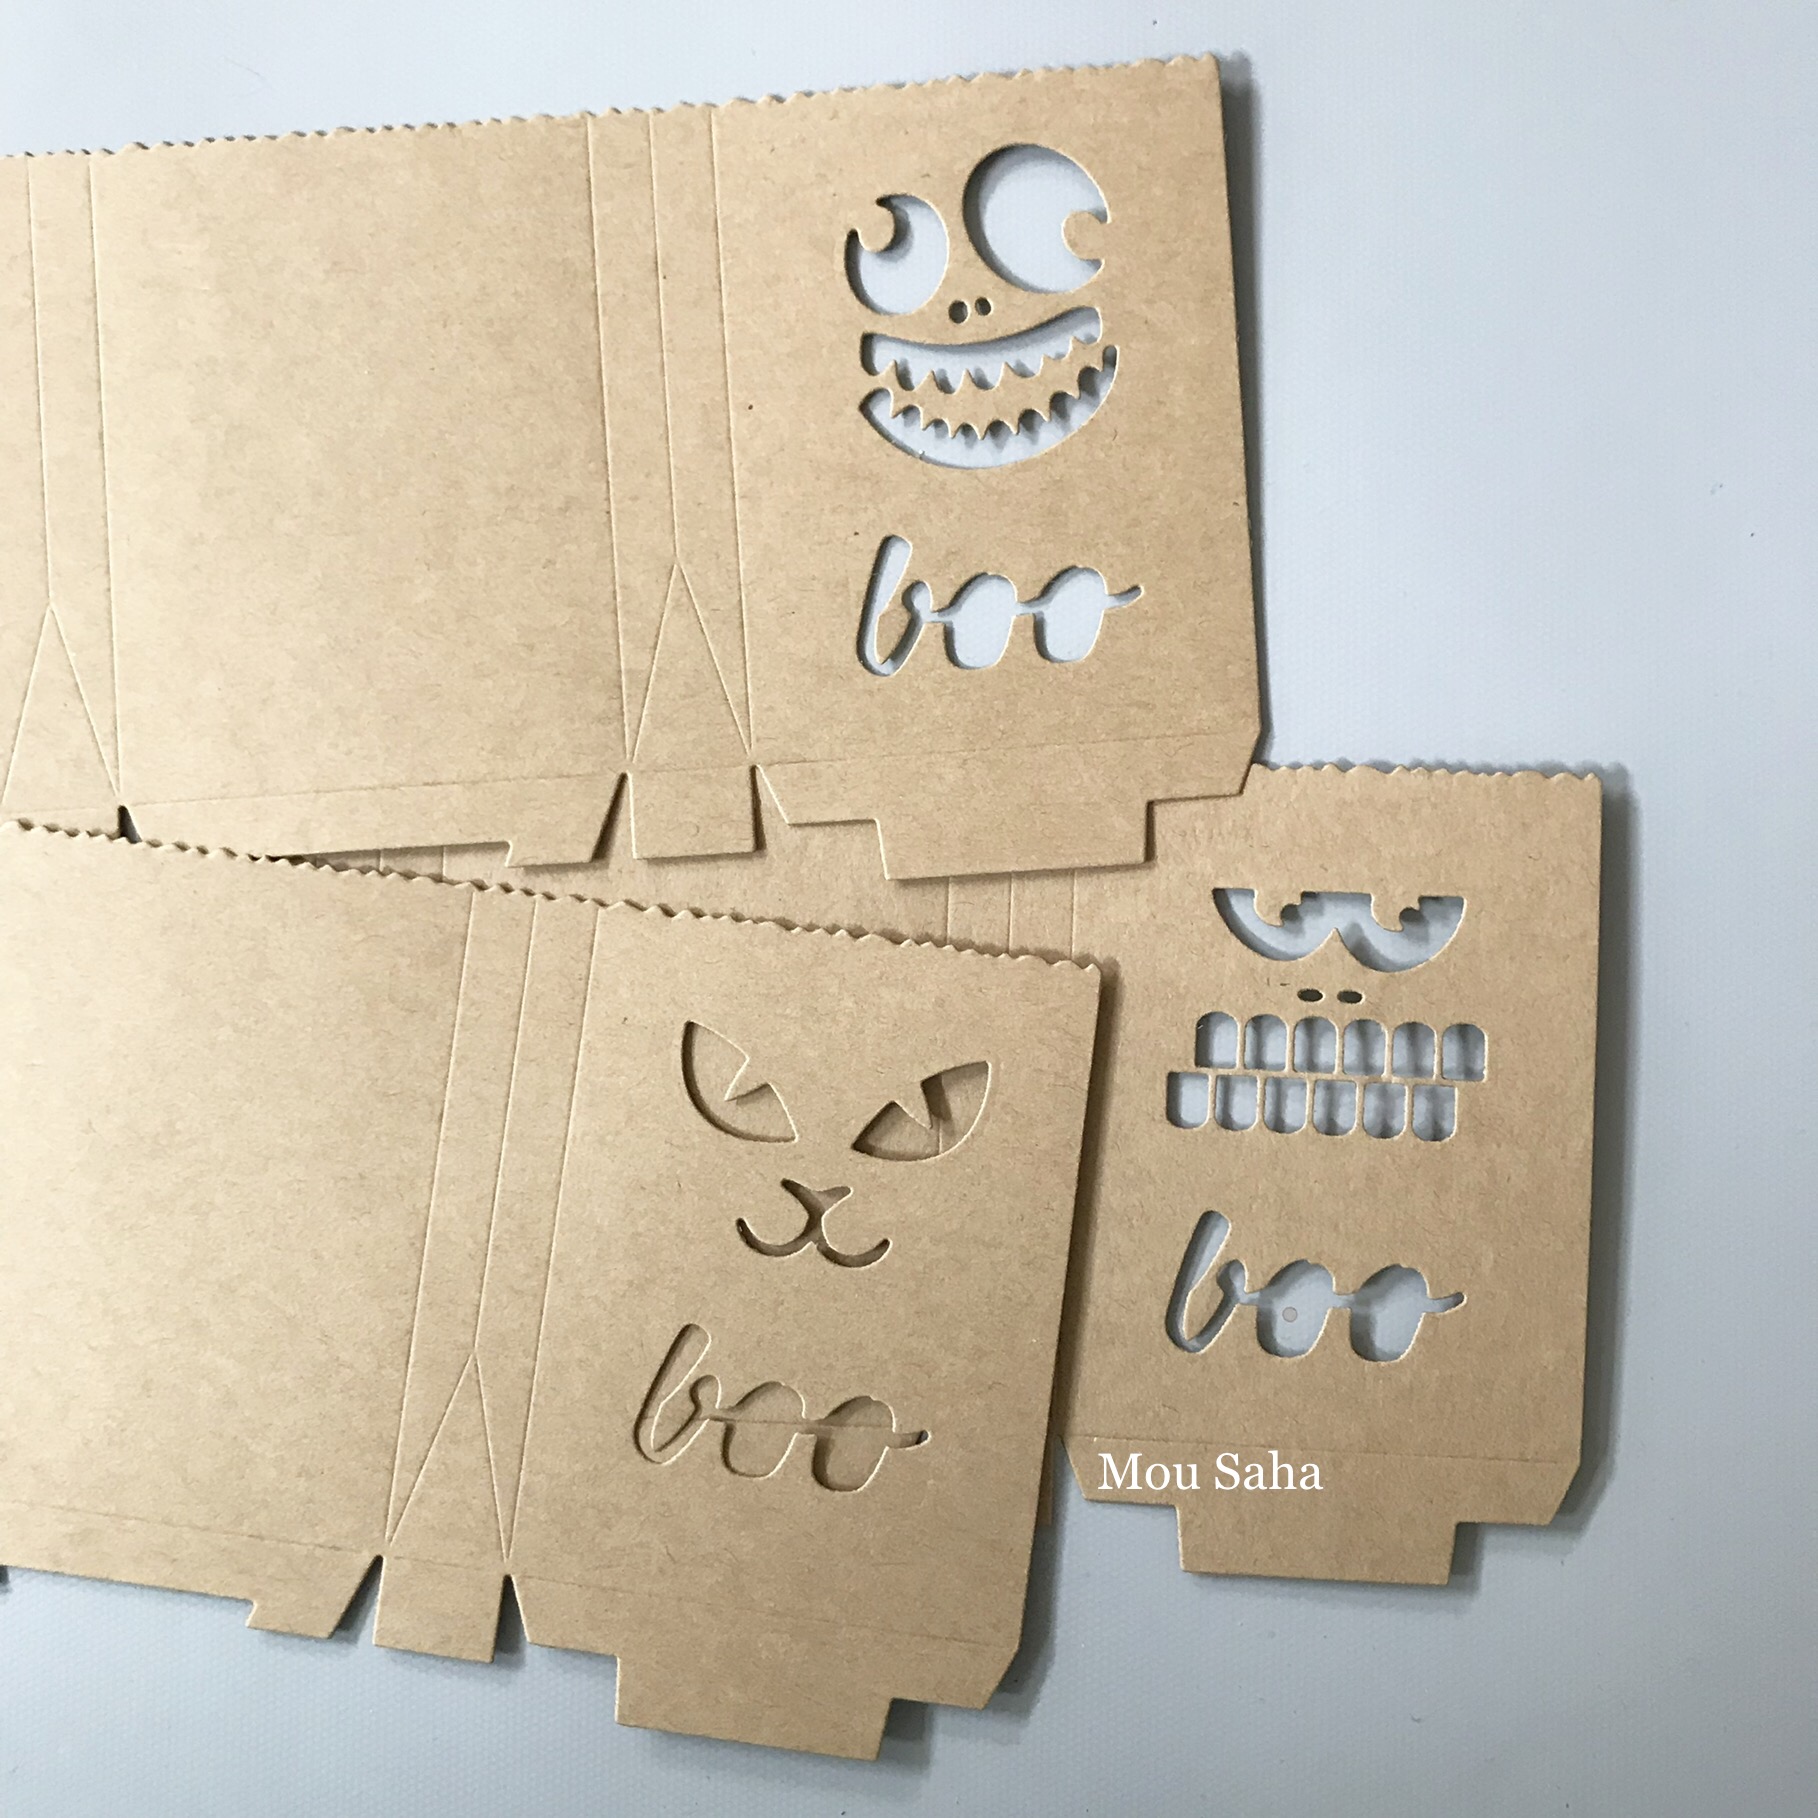
Here are some of my Treat Bag die-cuts.
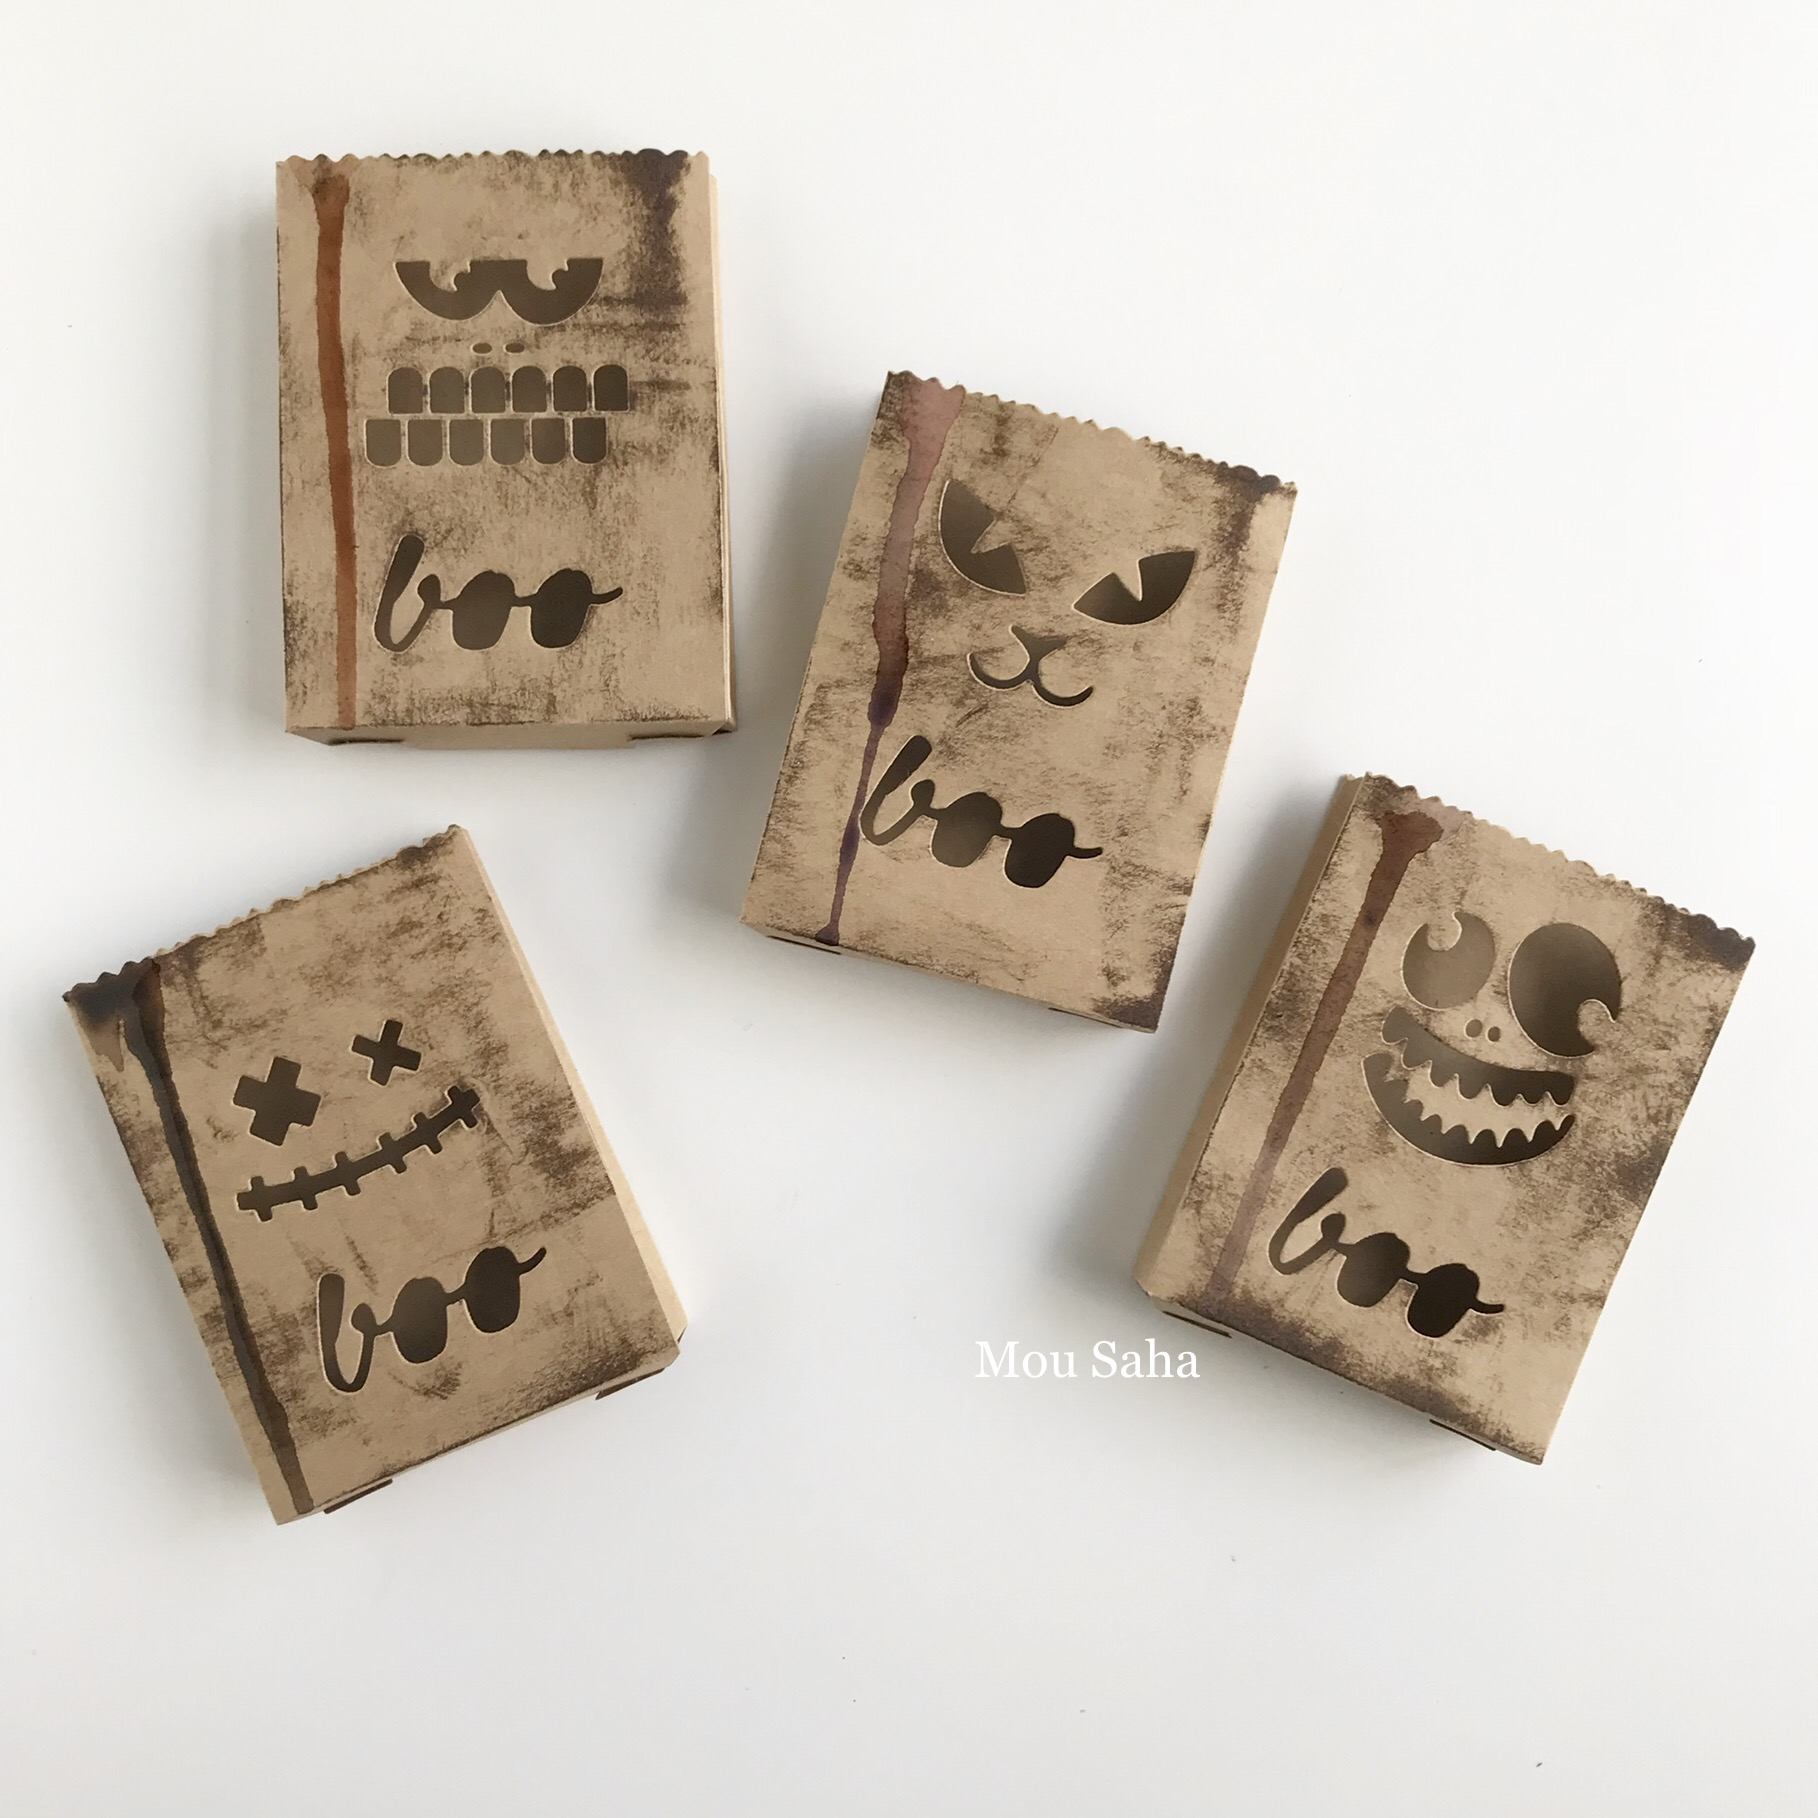
Fold along the score lines of the die-cut Treat Bags and apply adhesive to the flaps to assemble each bag. It hardly takes 2-3 minutes to make each bag from start to finish.
Rub some ink to the bags to add a touch of grunge. Dilute some Gelatos colors from the Steampunk set and drip them down the edge of each the bag. Let dry.
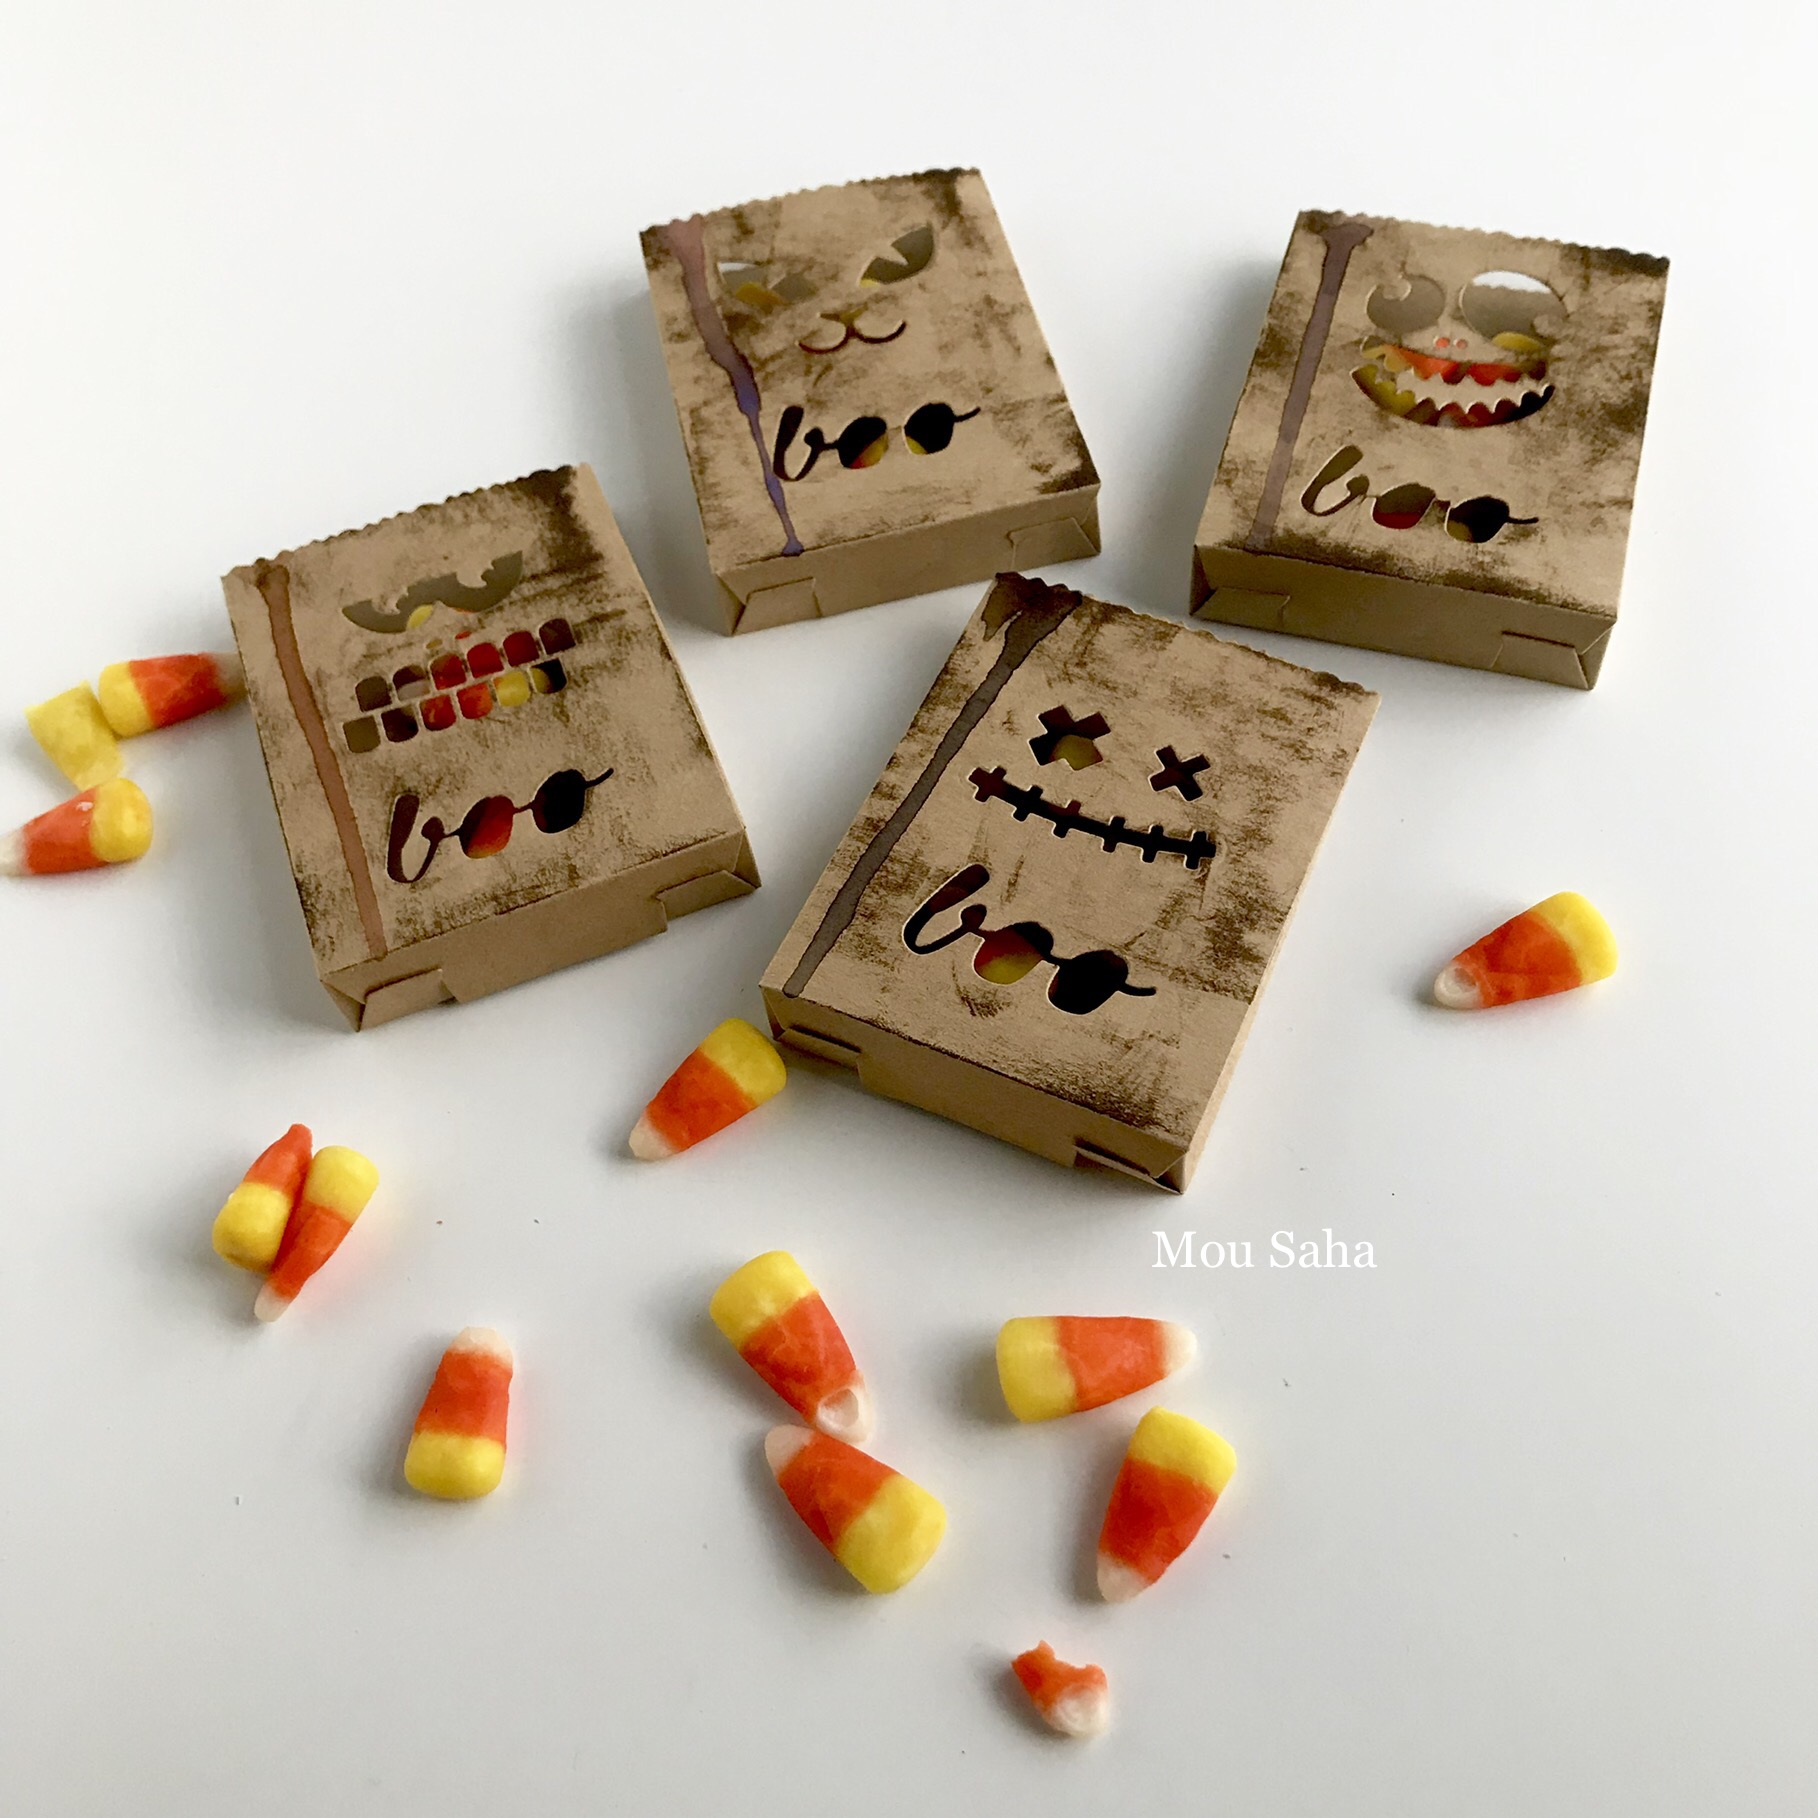
Stuff the bags with some candy and line them up on a trey. They look SO CUTE together!
Hope you enjoyed this Fall Decor blog series and have fun creating your own!
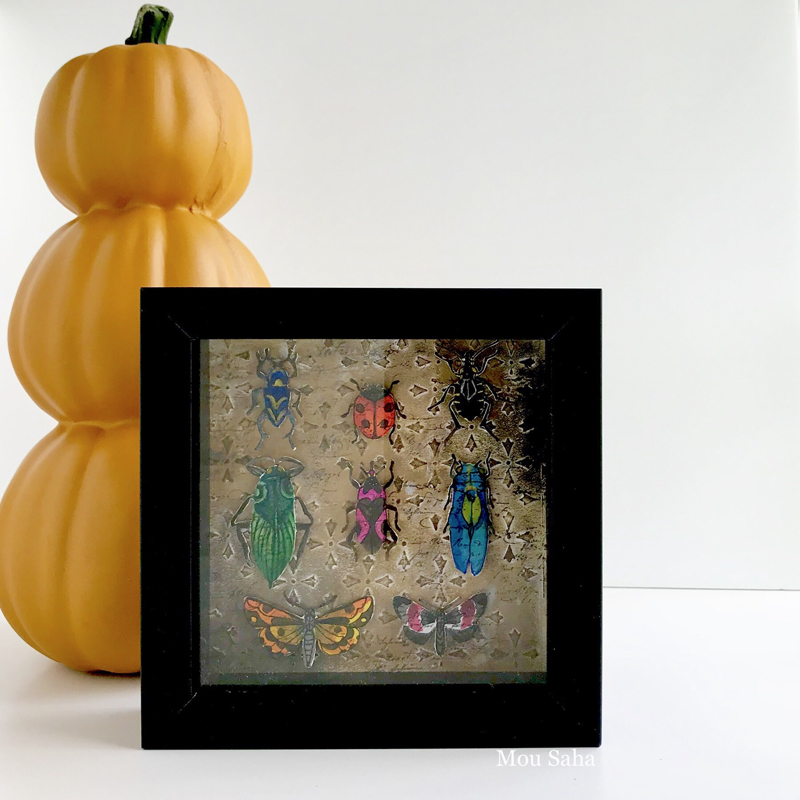
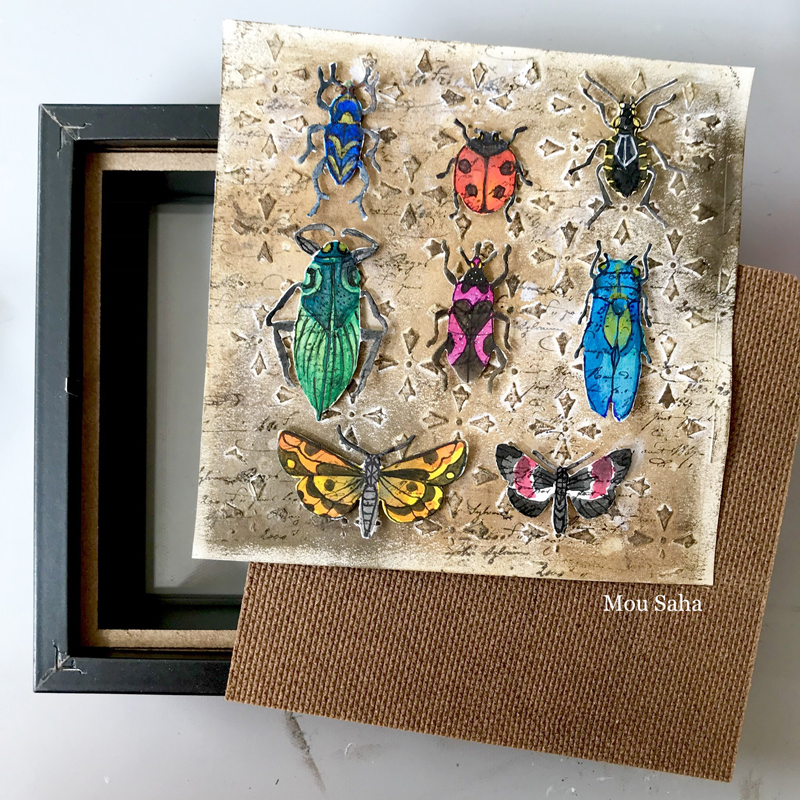
Welcome to Day 3 of my Fall Decor Blog Series! Today I have a tutorial for a DIY Entomology Specimen Display or to put simply, a bug box.
Now, if you are not fond of creepy crawly bugs, let me just tell you that neither am I. So, instead of painting realistic looking insects, I decided to give my bugs a flare of fantasy with bright colors and made-up patterns. Let me show you how. You can also use the stamp set that matches the Sizzix Framelits Die Set 14PK – Entomology.
Place the other Standard Cutting Pad on top and start turning the handle of your Sizzix Big Shot Machine Only (White & Gray). The rollers in the Big Shot machine will propel the entire sandwich through the machine and you’ll have your die-cut pieces ready.
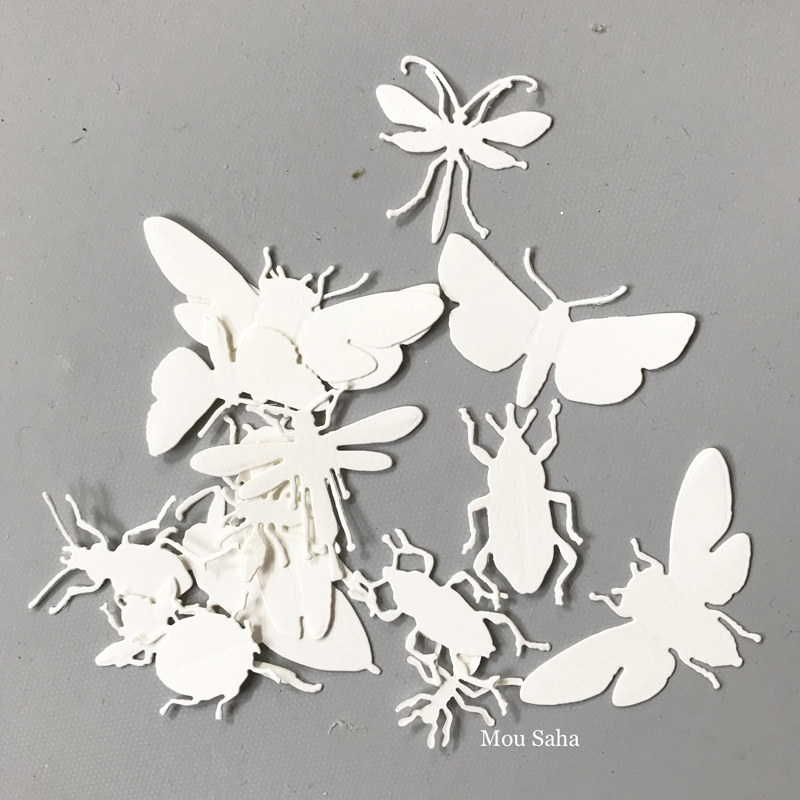
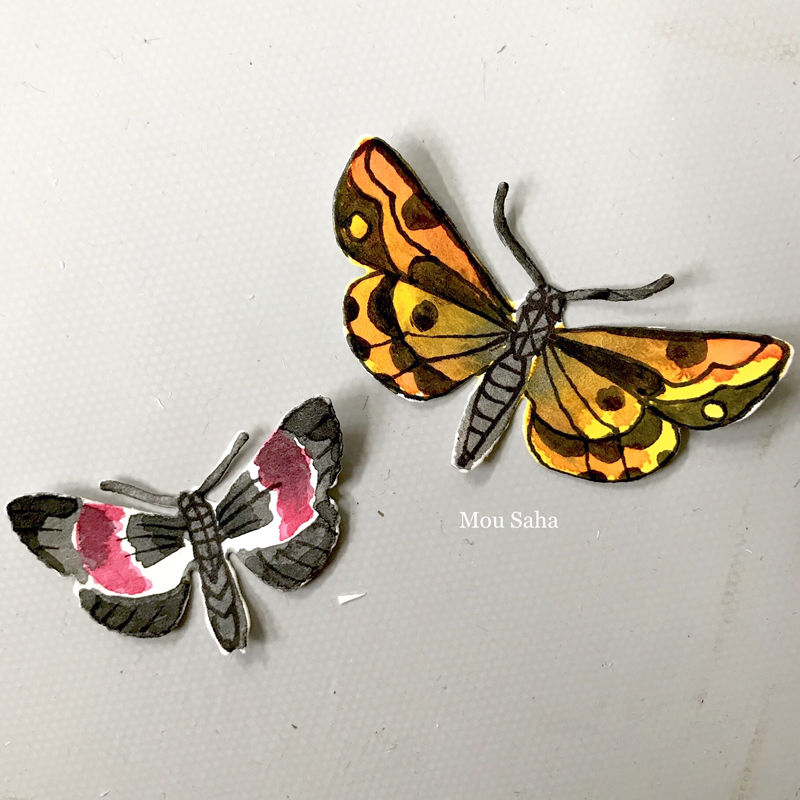
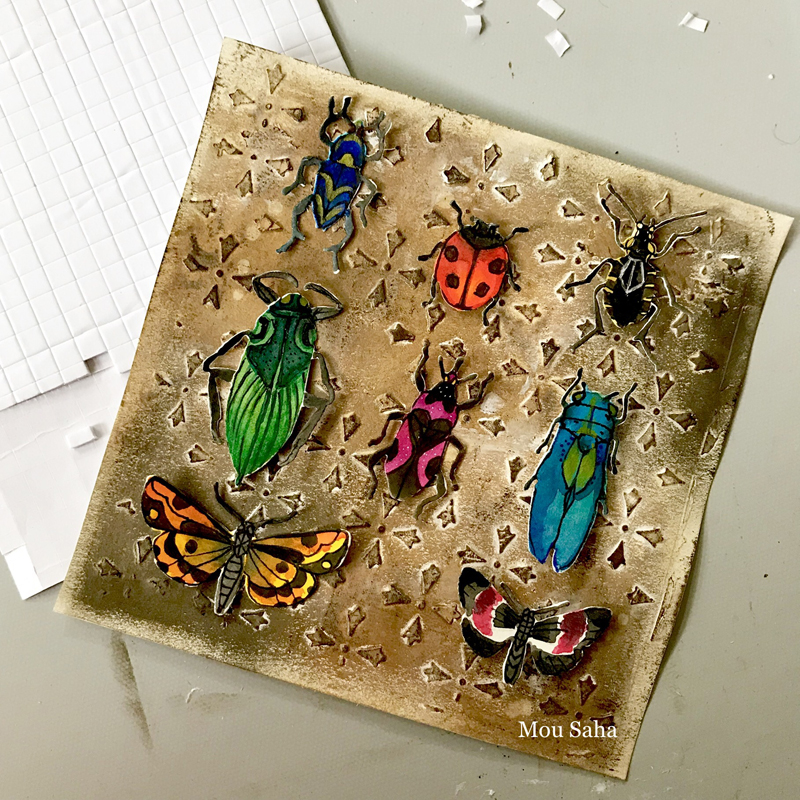
Here are all the die-cut insects. Depending on the size of your display case, you’ll need to select the ones that work best for you. I ended up using only eight of them.
TIP: If your display case is big, you might have to die-cut multiples of the same design and color them differently to look like unique specimens.
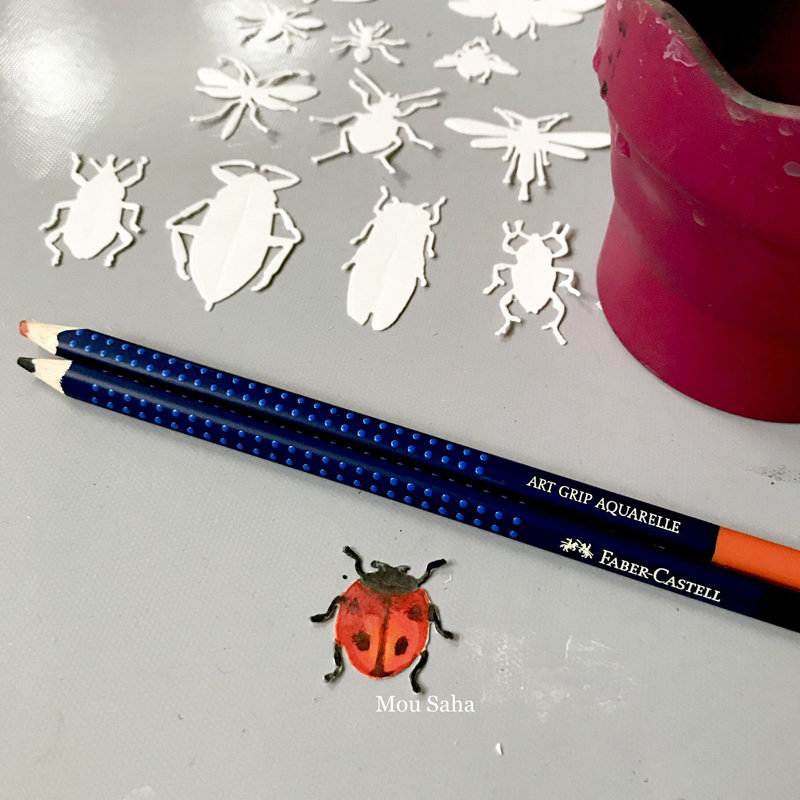
Start coloring the die-cut insects with watercolor pencils and Gelatos Iridescents. You can let reality or fantasy be your guide for this step. I leaned more towards fantasy.
Here are my finished insects. I added some pen details once the paints dried.
Next, create a backdrop for the insects to be mounted. For that, measure the back board of the display case and trim a piece of watercolor paper to that size. My case is 5.5 x 5.5 inches, so I trimmed my paper to that size and then drew about a quarter inch margin all around to make sure all the insects are properly visible once I put the display case back together with my decorated insert.
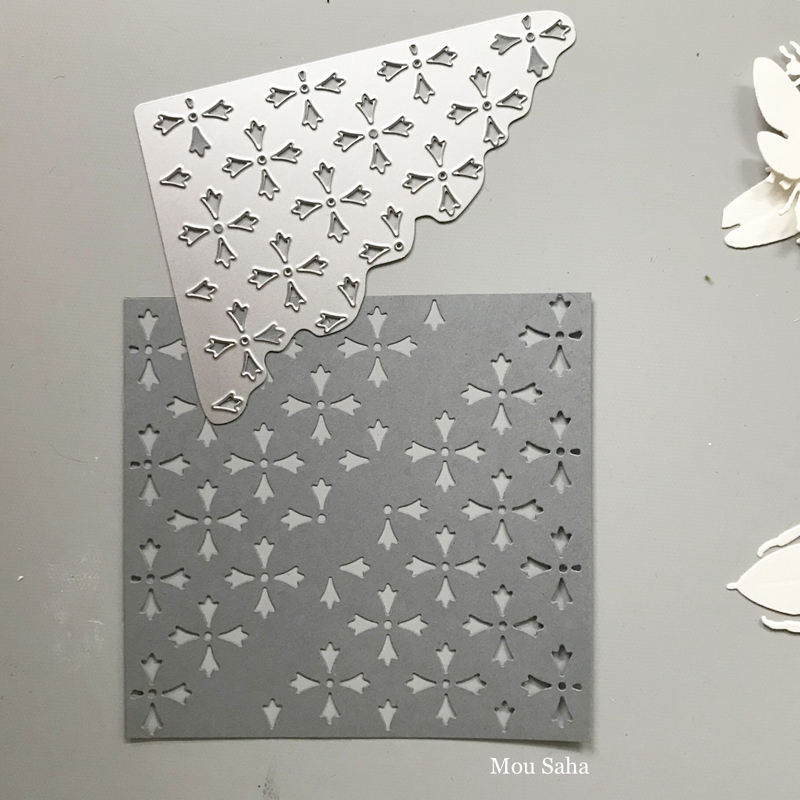
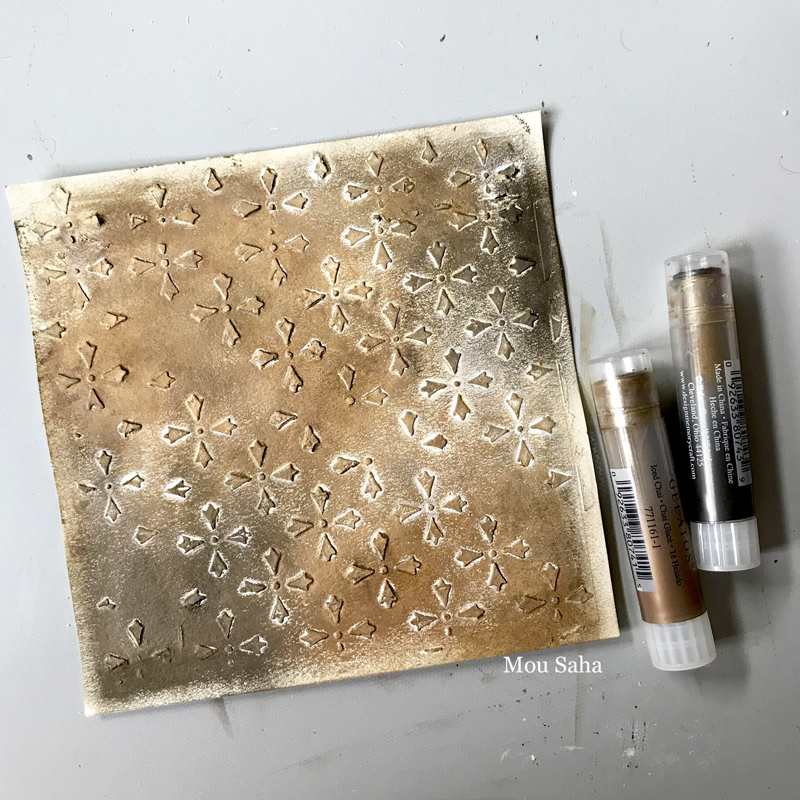
To create a patterned background, you could simply attach patterned paper or paint one. But I wanted one not only with patterns and colors but also with some texture. So, I decided to create a stencil with one of the dies from the Sizzix Thinlits Die Set 3PK – Mixed Media Halloween #2.
To create your own stencil, start by creating the exact same Sizzix Sandwich as above. Use a heavyweight cardstock for this. Once you make the first cut, rotate the piece of cardstock around and lay the same die blade-side down on the cardstock at a facing angle to complete a square-ish design.
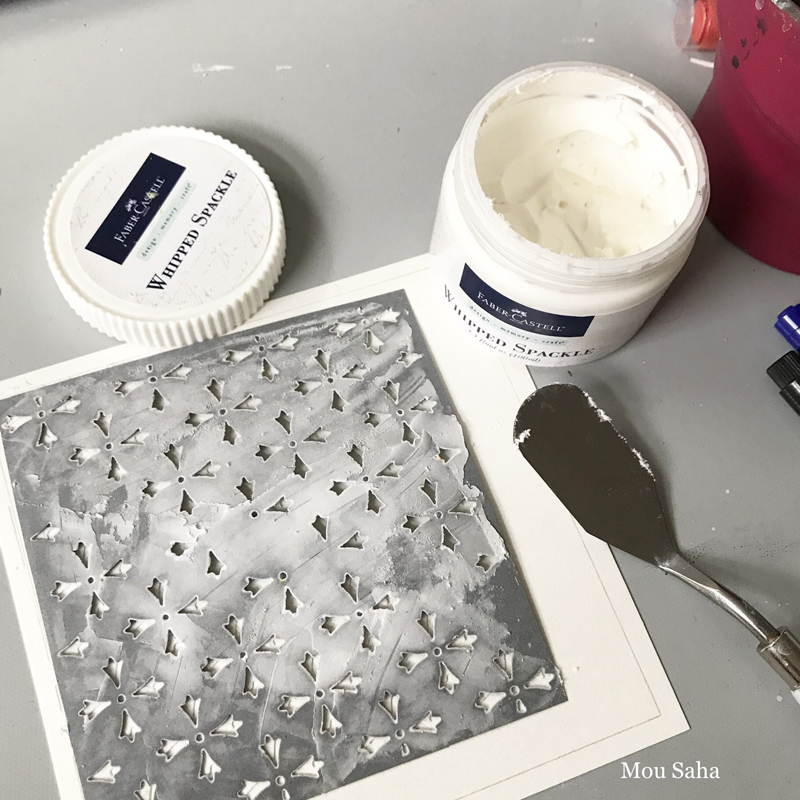
Lay your stencil down on the background piece and apply Whipped Spackle or another texture paste with palette knife.
It turns out that my background piece was slightly larger than my stencil. So, I simply repeated the stencil pattern allowing the paste to dry in between.
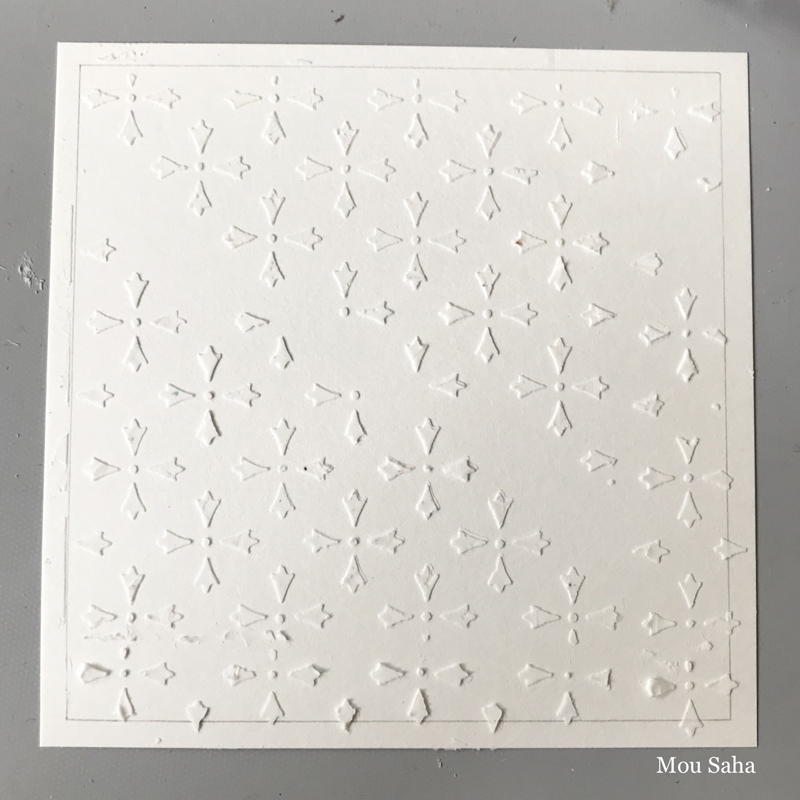
Once the texture paste dries color the piece with Gelatos colors or your favorite paints.
Mount the insects to the background with 3D foam squares making sure to stay inside the margins you drew earlier.
At this point, you can re-assemble your display case with the insert you just created. I wanted to add a finishing touch to my piece. I inked up a script background stamp with a neutral color ink (so it doesn’t clash with the colors and become a distraction) and stamped over the entire piece. As soon as the ink dried, I placed the piece in its display case.
Place the piece on your fireplace or shelf to add a festive touch to your home!
Be sure to be back tomorrow for some more fun inspiration!
*All contents, words and images are copyright of Mou Saha.*