As I was reading all the answers you have left to my question ‘why do you make art’, I was going like ‘yes, I know exactly what you mean’, ‘I can totally identify with that’ – the process of making art brings us joy, relieves stress and anxiety, helps us cope with grief, loss, and difficulties – art gives us strength and hope, the power to carry on. Thank you so much for sharing your thoughts with me!
A couple of weeks ago, I had a number of surgeries that have kept me bed-bound. I have been using this downtime to watch bits of the Life Book Summit. And the most beautiful thing about watching the videos was that they resonate with your answers. No matter where we are in our art making journey, we all have this in common – we heart art and that unites all of us. I am so thankful for Tam for hosting this summit!
I hope my connections with you wonderful ones do not end with the Summit! I’d love if we could stay in touch via Instagram or Facebook or YouTube or all three if you like. You can also sign up for my studio newsletter for updates on workshops, giveaways, inspiration and other crafty stuff.
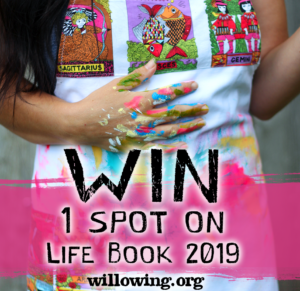
And now I have to choose one of you to win a free seat in Lifebook 2019. It’s an eyes closed RANDOM PICK from a hat. This is never easy for me, but at least I can make one person happy and I know the rest of you will cheer the winner on. I wish all of you joy and hope that you will win your spot on another Lifebook teacher’s giveaway!
THE WINNER IS:
Hi Mou, I first seen you when you started teaching on Creative Bug. So I was thrilled to see that Tam had chosen you as one of the Teachers for Life Book 2019. Enjoy it! I liked your interview with Tam for the summit as well and the quote you made! Love it!! Gonna use that often. Anyway the reason I make art is to retain my wellbeing. I discovered the benefits of art when I was off work for 2 years with severe anxiety, severe sleep disorder and deep depression. It literally saved my life. It became the lifeline I held on to everyday to keep my head above water. So now I can say I need to make art as much as I need to eat everyday or breathe. Thanks for asking! Take care.
CONGRATULATIONS Terri!!! I am sending your email (the one WordPress requires for allowing comments on the blog) to the Life Book Team! Enjoy your prize 🙂 I am so happy for you!
Terri, in the event that you have already won a spot elsewhere, please let me know in the comment to this post so I can choose another winner who could then take Life Book 2019 with you 🙂
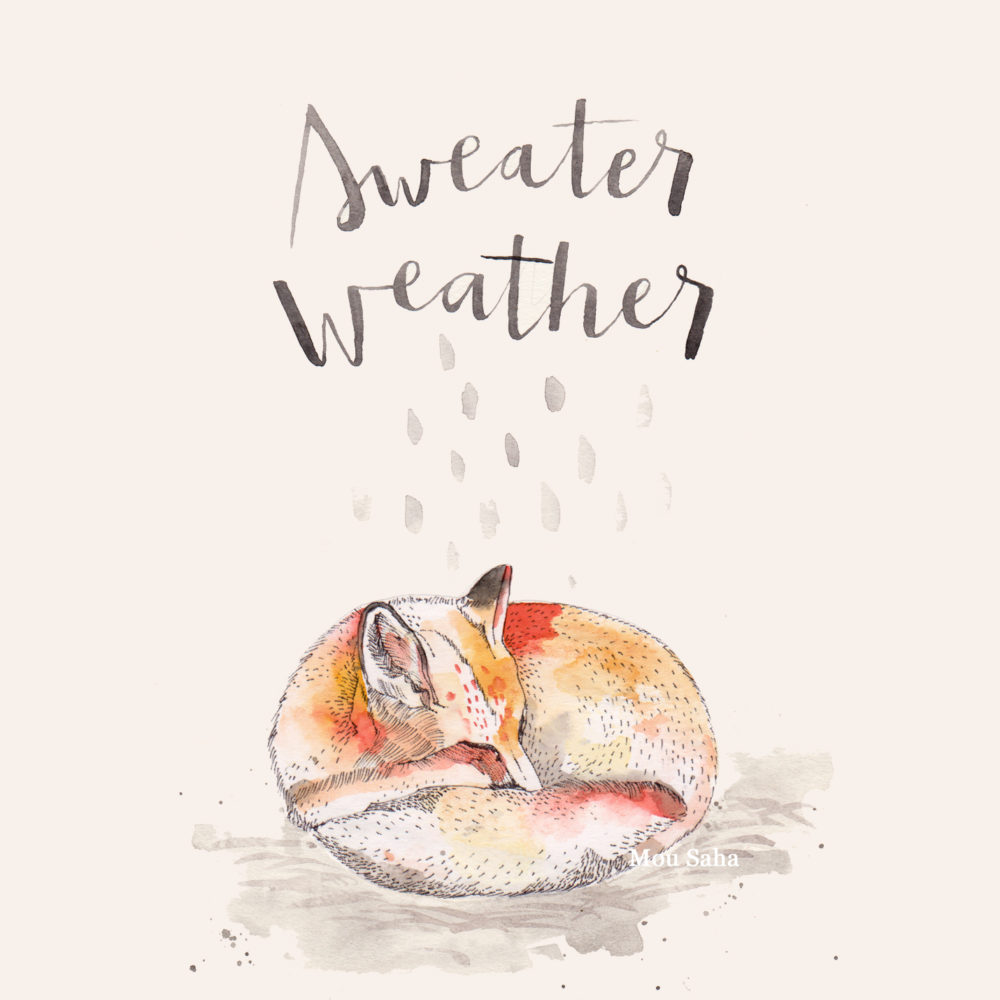
It’s mid-October and the temperatures have dropped to the 30 degrees Fahrenheit. Every day this week, we woke up to cloudy cold mornings, not feeling like getting out of our warm blankets. I feel like sleeping all day like this little fox from my Hello Fall coloring book. But of course, that’s not possible, so I am just making more time to make some art using the Hello Fall coloring book images. If wasn’t recovering from surgery, I’d step out more and walk on the crunchy leaves down our beautiful neighboorhood streets under the colorful trees. But for now, I’m doing what I can to enjoy my favorite season of the year!
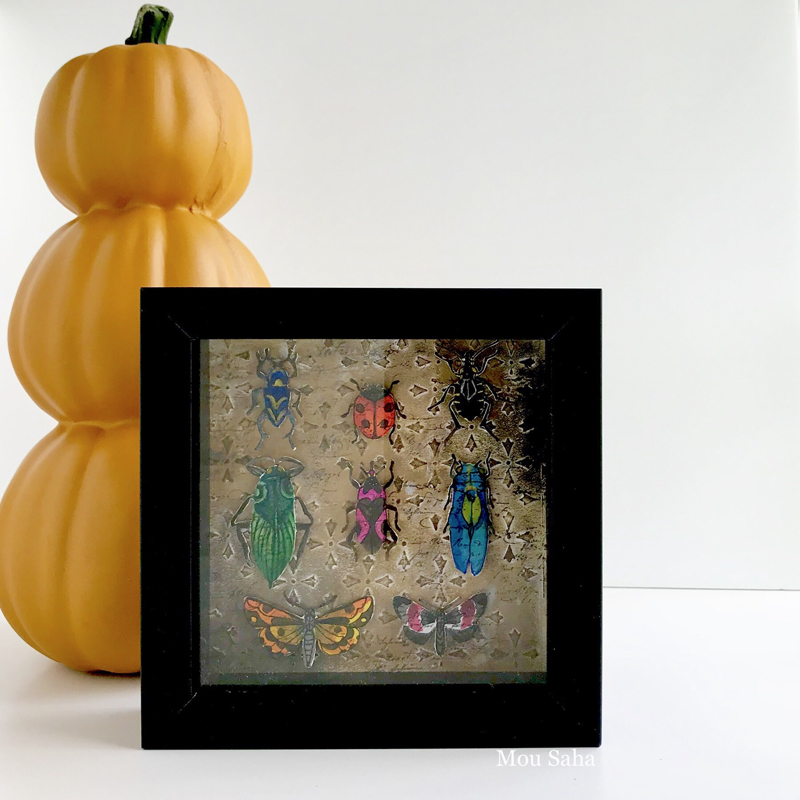
Welcome to Day 3 of my Fall Decor Blog Series! Today I have a tutorial for a DIY Entomology Specimen Display or to put simply, a bug box.
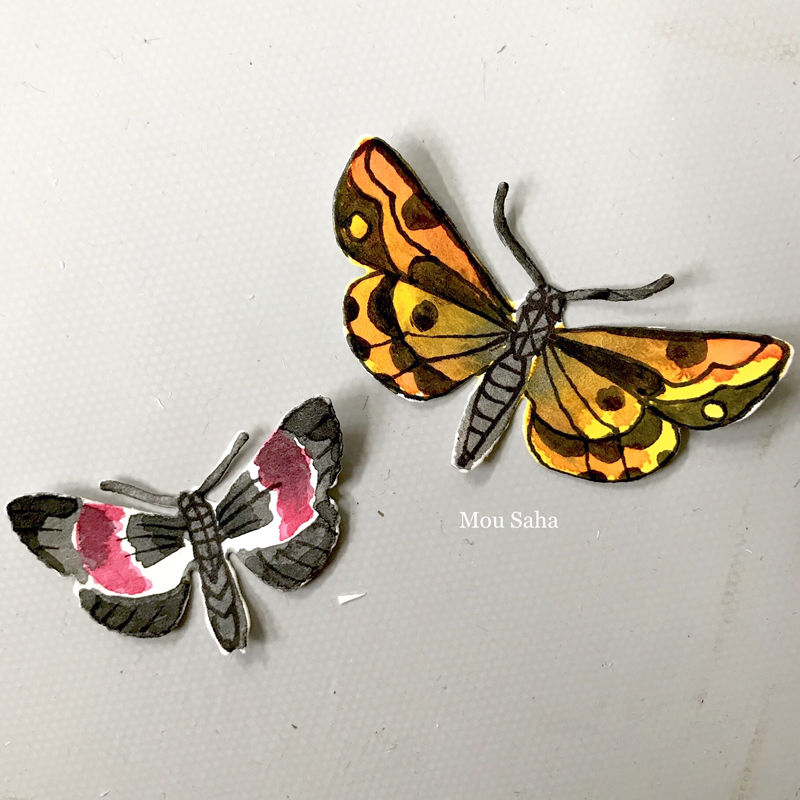
Now, if you are not fond of creepy crawly bugs, let me just tell you that neither am I. So, instead of painting realistic looking insects, I decided to give my bugs a flare of fantasy with bright colors and made-up patterns. Let me show you how. You can also use the stamp set that matches the Sizzix Framelits Die Set 14PK – Entomology.
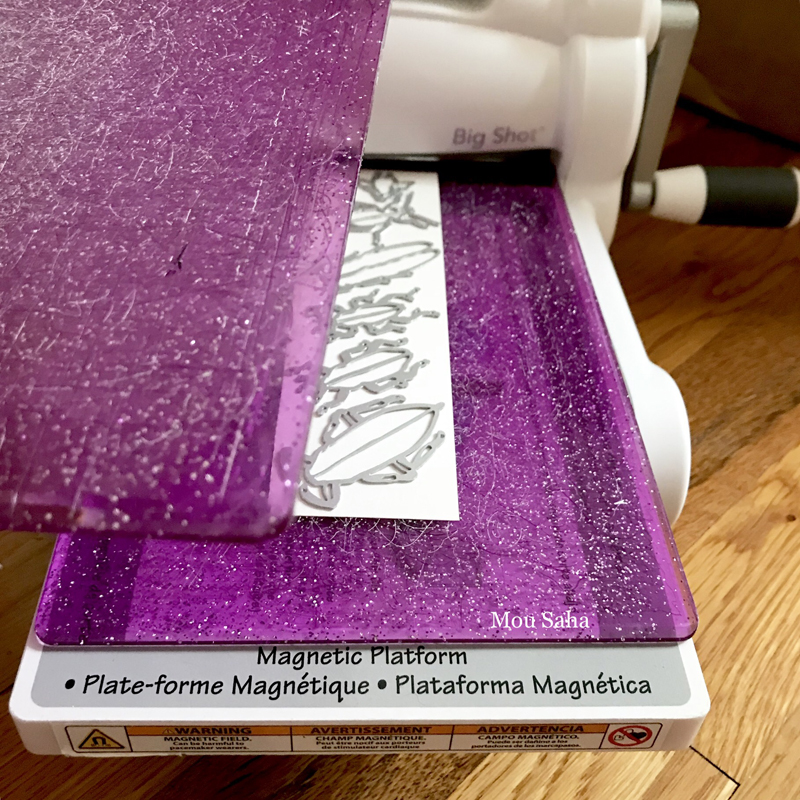
Place the other Standard Cutting Pad on top and start turning the handle of your Sizzix Big Shot Machine Only (White & Gray). The rollers in the Big Shot machine will propel the entire sandwich through the machine and you’ll have your die-cut pieces ready.
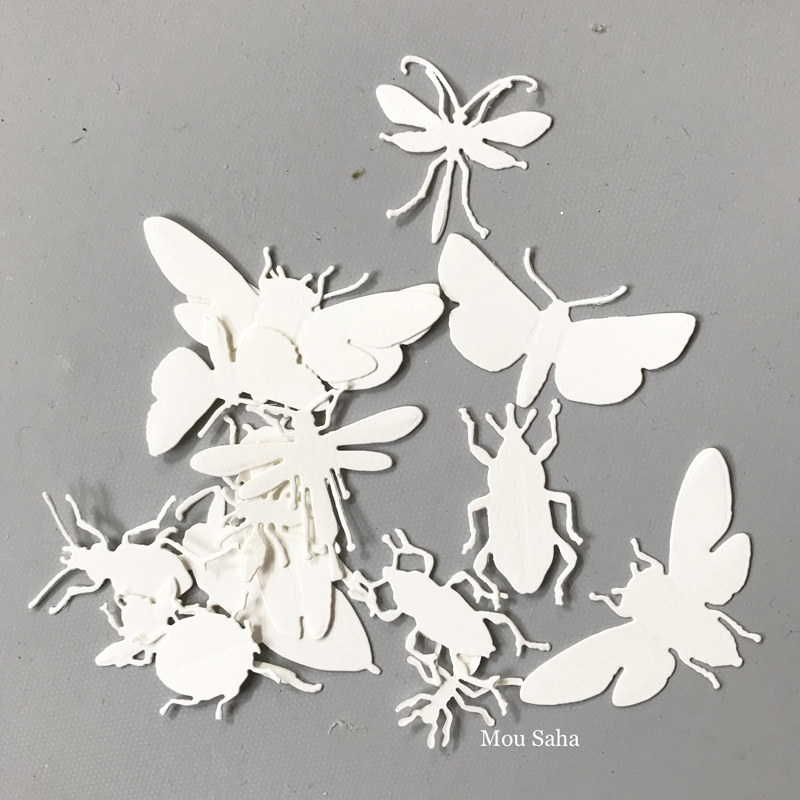
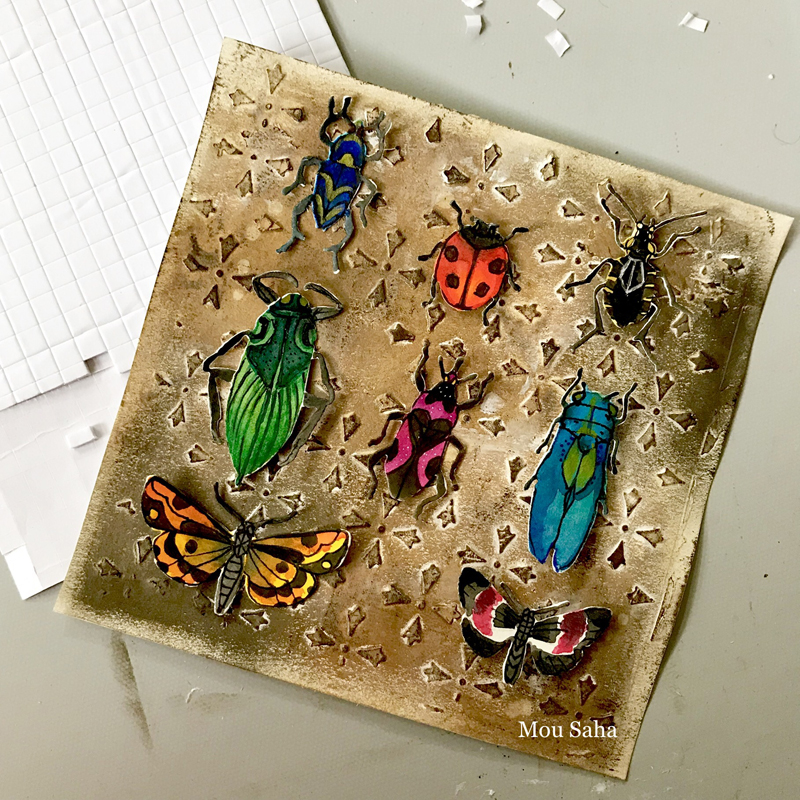
Here are all the die-cut insects. Depending on the size of your display case, you’ll need to select the ones that work best for you. I ended up using only eight of them.
TIP: If your display case is big, you might have to die-cut multiples of the same design and color them differently to look like unique specimens.
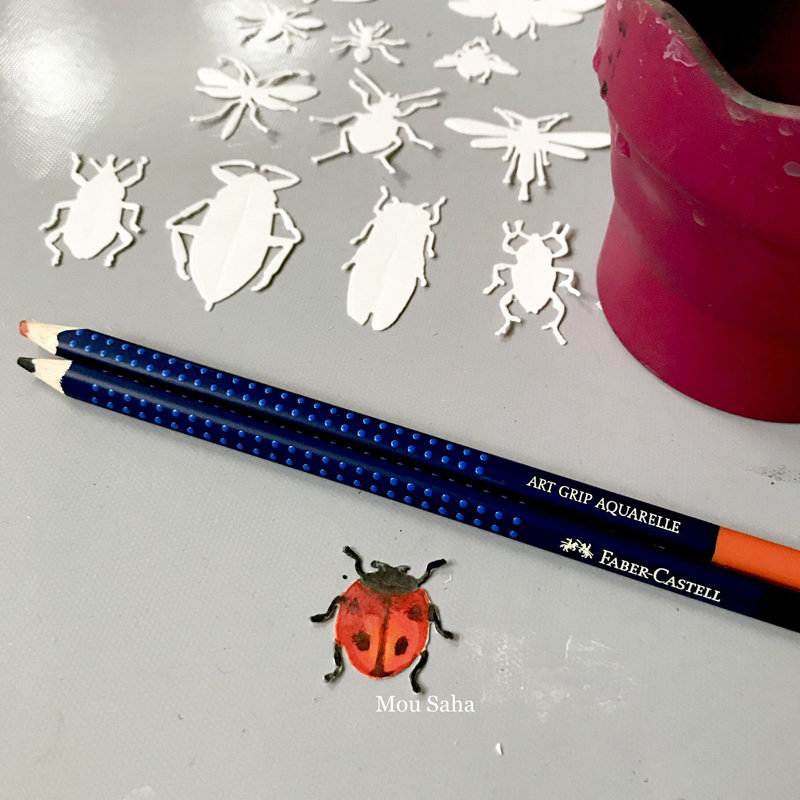
Start coloring the die-cut insects with watercolor pencils and Gelatos Iridescents. You can let reality or fantasy be your guide for this step. I leaned more towards fantasy.
Here are my finished insects. I added some pen details once the paints dried.
Next, create a backdrop for the insects to be mounted. For that, measure the back board of the display case and trim a piece of watercolor paper to that size. My case is 5.5 x 5.5 inches, so I trimmed my paper to that size and then drew about a quarter inch margin all around to make sure all the insects are properly visible once I put the display case back together with my decorated insert.
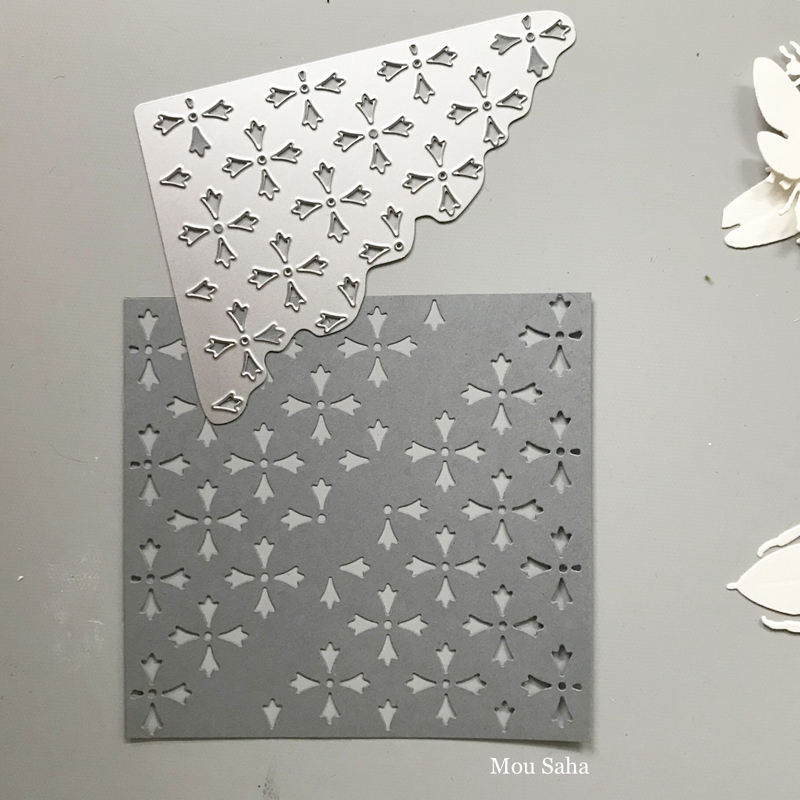
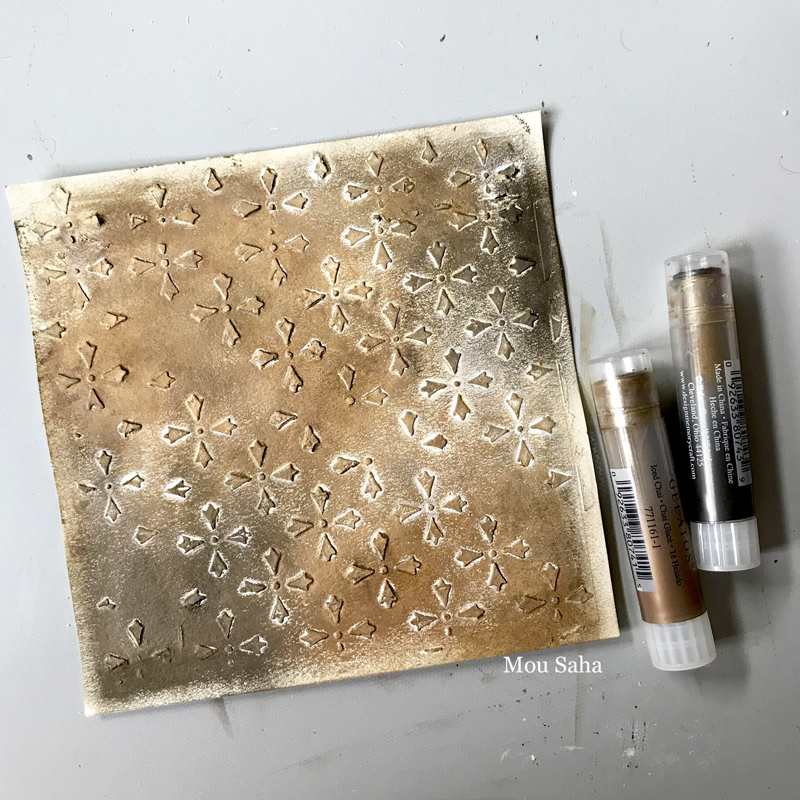
To create a patterned background, you could simply attach patterned paper or paint one. But I wanted one not only with patterns and colors but also with some texture. So, I decided to create a stencil with one of the dies from the Sizzix Thinlits Die Set 3PK – Mixed Media Halloween #2.
To create your own stencil, start by creating the exact same Sizzix Sandwich as above. Use a heavyweight cardstock for this. Once you make the first cut, rotate the piece of cardstock around and lay the same die blade-side down on the cardstock at a facing angle to complete a square-ish design.
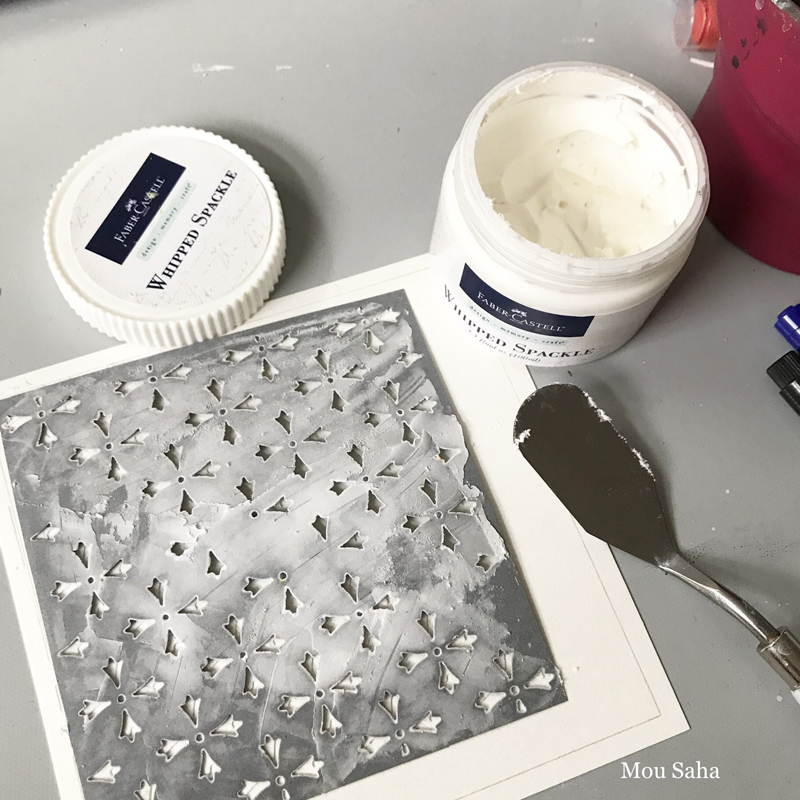
Lay your stencil down on the background piece and apply Whipped Spackle or another texture paste with palette knife.
It turns out that my background piece was slightly larger than my stencil. So, I simply repeated the stencil pattern allowing the paste to dry in between.
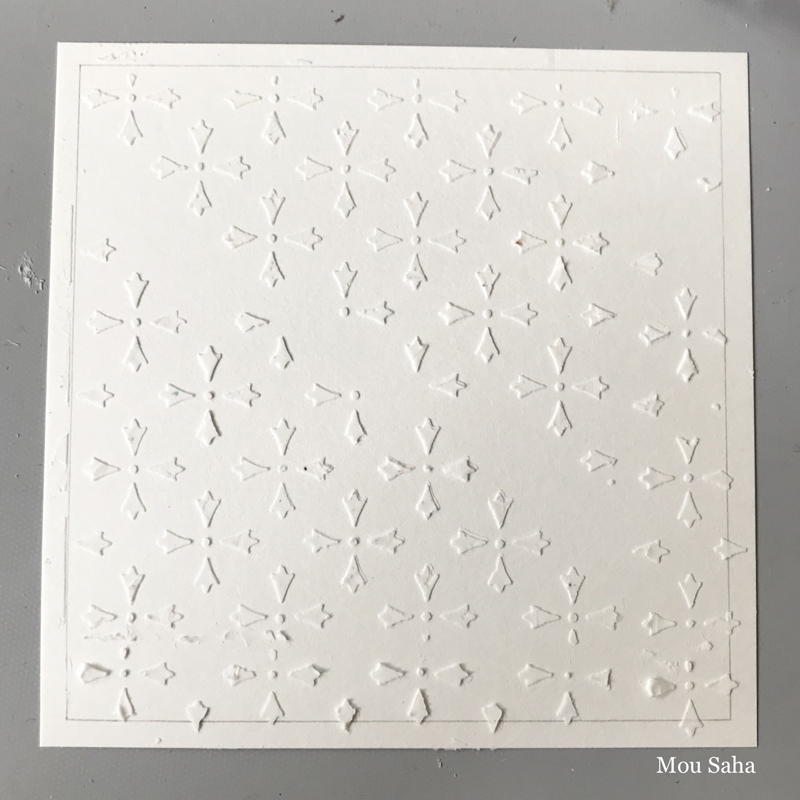
Once the texture paste dries color the piece with Gelatos colors or your favorite paints.
Mount the insects to the background with 3D foam squares making sure to stay inside the margins you drew earlier.
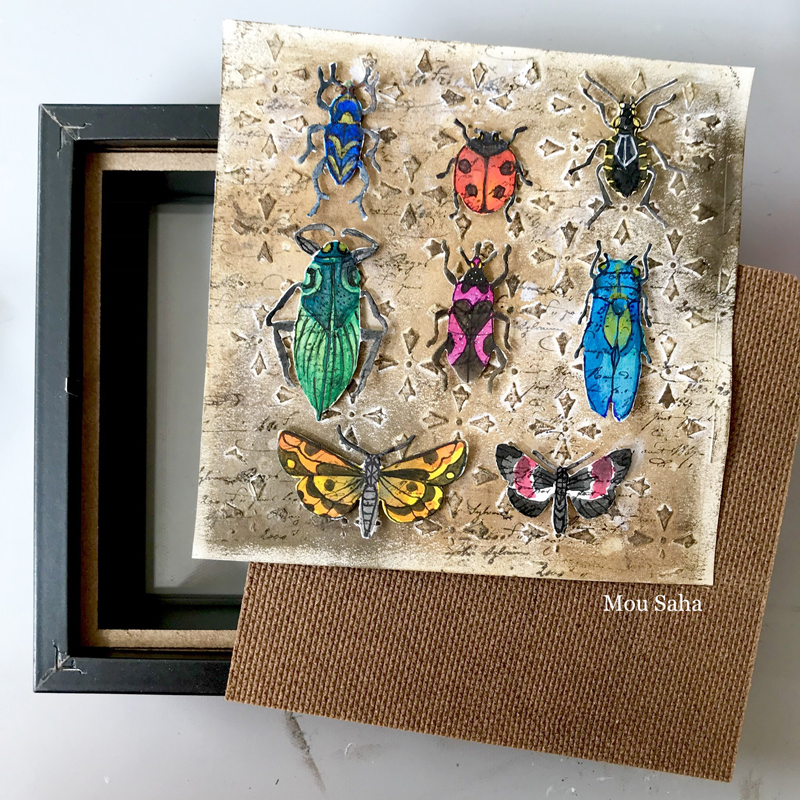
At this point, you can re-assemble your display case with the insert you just created. I wanted to add a finishing touch to my piece. I inked up a script background stamp with a neutral color ink (so it doesn’t clash with the colors and become a distraction) and stamped over the entire piece. As soon as the ink dried, I placed the piece in its display case.
Place the piece on your fireplace or shelf to add a festive touch to your home!
Be sure to be back tomorrow for some more fun inspiration!
*All contents, words and images are copyright of Mou Saha.*
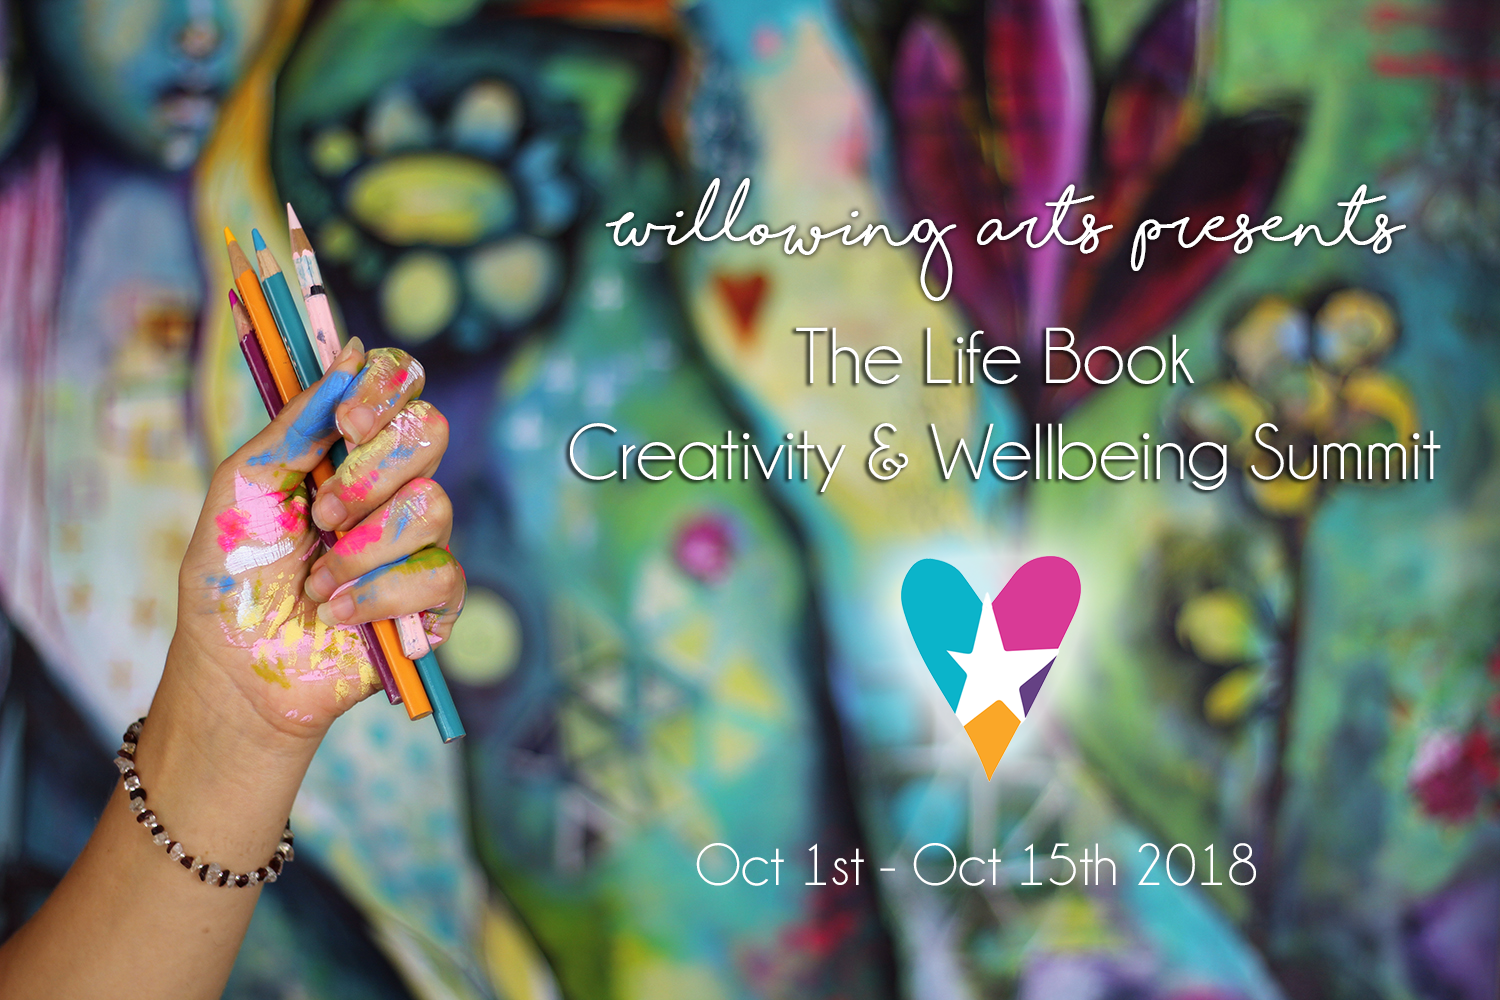
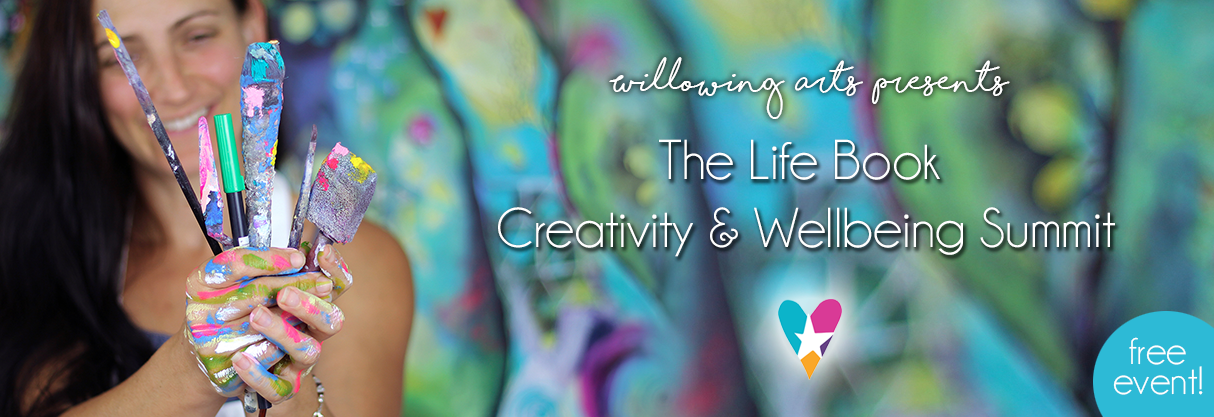
Something new and amazing has just been born! 🙂 My friend Tamara Laporte from Willowing Arts has just opened registration for The (free) Life Book Creativity & Wellbeing Summit! She has interviewed a wide range of Life Book 2019 Teachers for it and guess what?! I’m one of the speakers AND I’m also a teacher on Life Book 2019 next year!
Yay!!!
Not only is this Summit filled with inspiring interviews with amazing artists, but we each also provide a FREE creative and wellness activity for you that you can access for 2 weeks!
The Summit is filled with inspiring interviews, art sessions, meditations and wellbeing activities to help you get present and connected to the healing power of your creativity!
The Summit begins on October 1st and ends on October 15th!
Life Book 2019 (which I’ll be teaching on yippee!) will open registration on October 16th and guess what? If you join Life Book 2019 you’ll get life long access to the Summit content as well as a year of amazing art activities + a virtual gift bag filled with extras and goodies also! More on this later, but keep an eye out for Life Book 2019 sign up details!
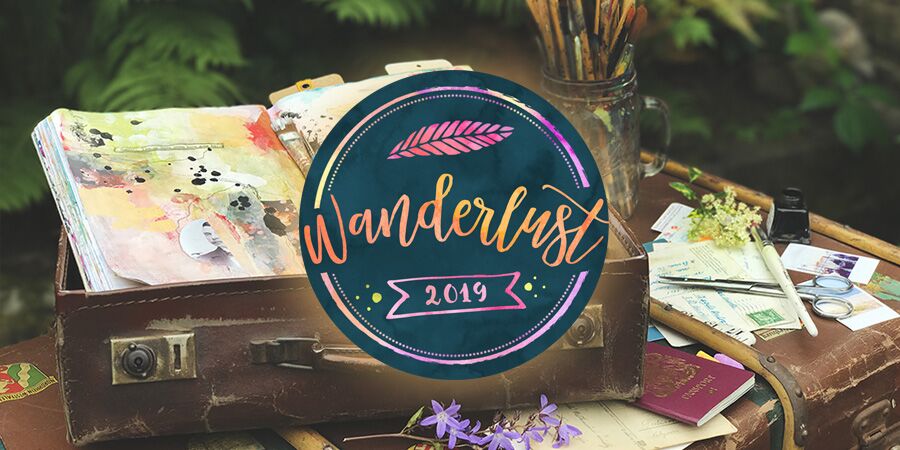
I’m SO PLEASED to announce that I am a teacher for Wanderlust 2019!
Wanderlust 2019 is a year-long self-paced mixed media online workshop taught by 26 amazing teachers with a wide variety of styles. You’ll get 49 high-quality full-length streamable (and downloadable) video lessons every Friday starting January 4th, 2019. You’ll also get lifetime access plus a ton of creative bonuses.
The regular price for Wanderlust 2019 is $150 USD, but if you sign up by December 31st, 2018, you’ll get a 30% Early Bird Discount. Just use the code EARLY30 and you’ll pay only $105 USD (approx. £81, €90) for a whole year of classes! Isn’t that wonderful?
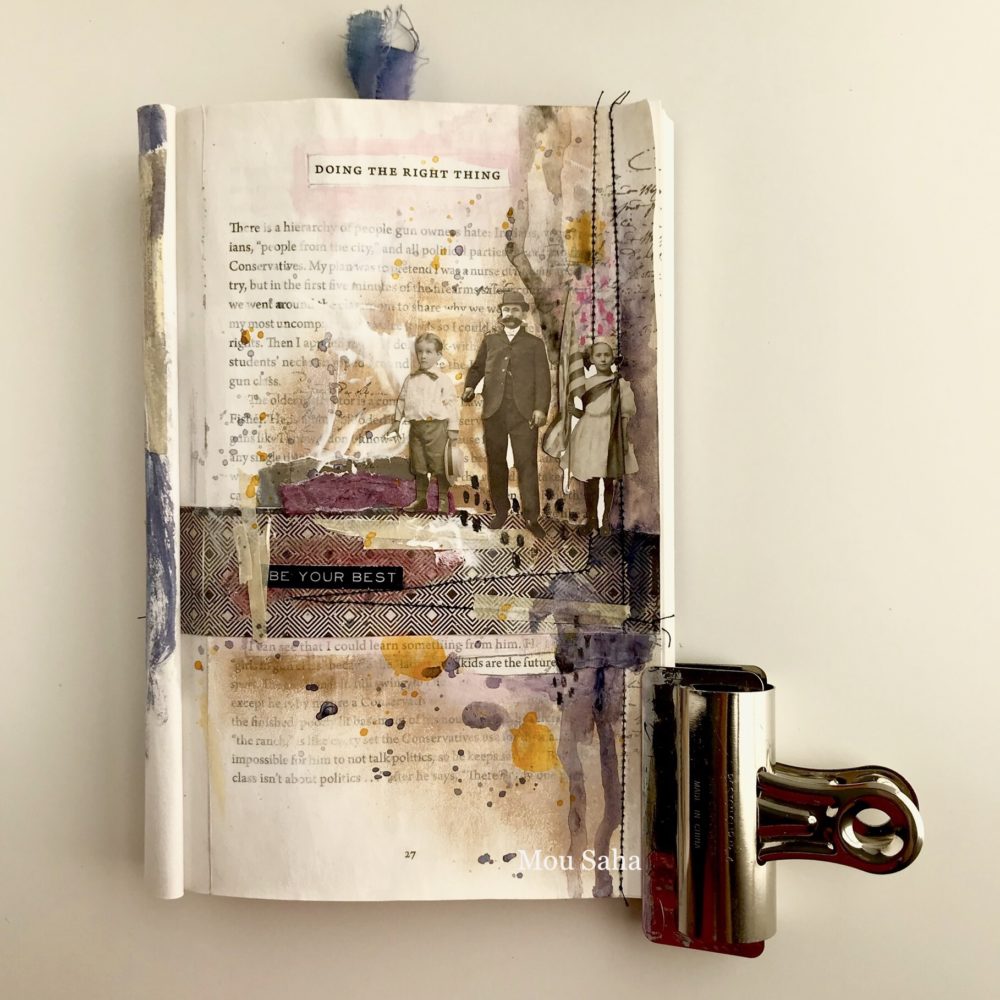
Welcome to my Blog Series – Art Journaling August Inspiration Day 5.
Over the next five days, I will share with you five art journal pages. These pages all have the following common threads –
photographic ephemera as the focal point
layers created with table scraps (stuff left on my desk after finishing bigger projects – giving them new life instead of discarding them)
the page is completed in 30 minutes or less
I’m listing the supplies I used. Feel free to choose from your stash. I want to give you some starting points and not directions, so you can explore freely.
If you do create some pages along with me, please use the hashtag #mousaha and tag me on Instagram @mou.saha.studio and on Facebook @MouSahaStudio.
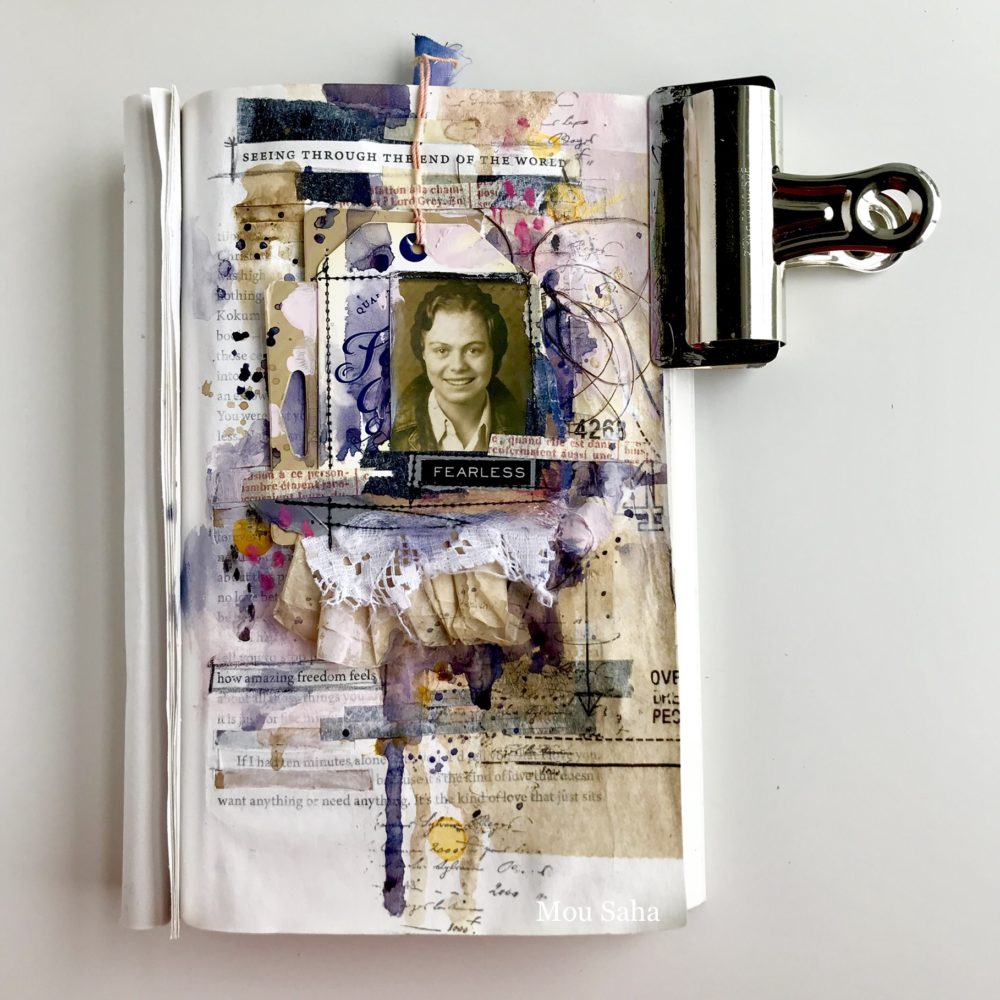
Welcome to my Blog Series – Art Journaling August Inspiration Day 4.
Over the next five days, I will share with you five art journal pages. These pages all have the following common threads –
photographic ephemera as the focal point
layers created with table scraps (stuff left on my desk after finishing bigger projects – giving them new life instead of discarding them)
the page is completed in 30 minutes or less
I’m listing the supplies I used. Feel free to choose from your stash. I want to give you some starting points and not directions, so you can explore freely.
If you do create some pages along with me, please use the hashtag #mousaha and tag me on Instagram @mou.saha.studio and on Facebook @MouSahaStudio.
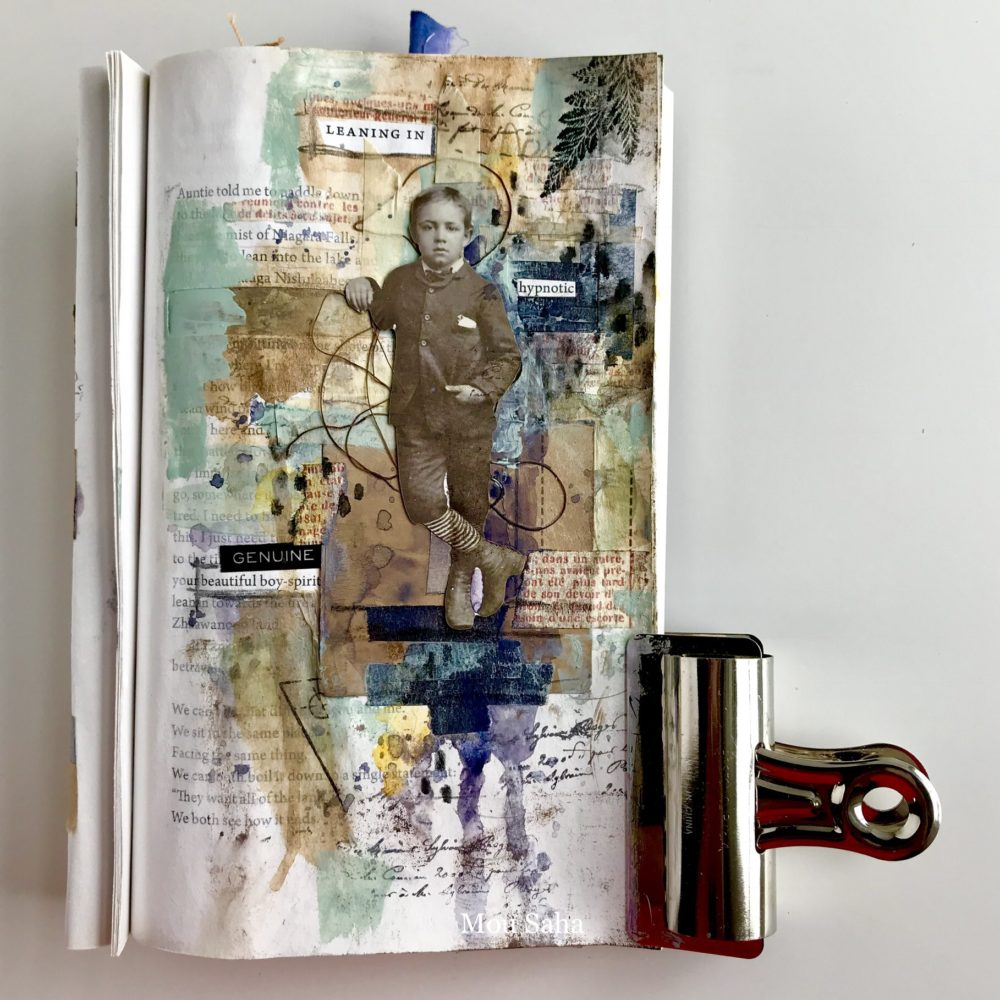
Welcome to my Blog Series – Art Journaling August Inspiration Day 3.
Over the next five days, I will share with you five art journal pages. These pages all have the following common threads –
photographic ephemera as the focal point
layers created with table scraps (stuff left on my desk after finishing bigger projects – giving them new life instead of discarding them)
the page is completed in 30 minutes or less
I’m listing the supplies I used. Feel free to choose from your stash. I want to give you some starting points and not directions, so you can explore freely.
If you do create some pages along with me, please use the hashtag #mousaha and tag me on Instagram @mou.saha.studio and on Facebook @MouSahaStudio.

 Hello my creative friends!

Hi Mou, I first seen you when you started teaching on Creative Bug. So I was thrilled to see that Tam had chosen you as one of the Teachers for Life Book 2019. Enjoy it! I liked your interview with Tam for the summit as well and the quote you made! Love it!! Gonna use that often. Anyway the reason I make art is to retain my wellbeing. I discovered the benefits of art when I was off work for 2 years with severe anxiety, severe sleep disorder and deep depression. It literally saved my life. It became the lifeline I held on to everyday to keep my head above water. So now I can say I need to make art as much as I need to eat everyday or breathe. Thanks for asking! Take care.